Angel 2 Devil
This tutorial was written on January 4,2013.
Any similarities to another tutorial is purely coincidental.
All my tutorial are register with My Free Copyright.
Please do not claim as your own.
This tutorial writer assumes you have a working
knowledge of using Paint Shop Pro.
This tutorial was done in Paint Shop Pro9,
but can be adapted to use in other
Paint Shop Pro versions.
SUPPLIES NEEDED
Animation Shop3 ....HERE
Animation of Choice: I am using Scrappy Bit of Fun Animation #71
you can download HERE .... Thank you Simone
Tube of choice: I'm using the awesome work of Michael Calandra.
Please do not use unless you have a license to do so.
Get Them HERE
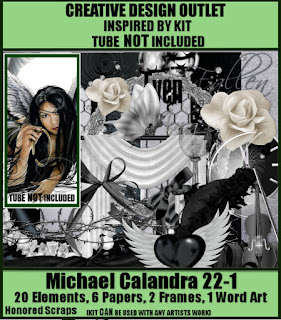
Scrapkit of Choice: I am using PTU Honored Scraps Michael Calandra IB-22-1
You can purchase it HERE ...Thanks Patty
Template of choice:I am using Aqua Rebel315 Dsnz Template #97
You can download it HERE...Thanks Aqua
Mask of Choice: I am using CM Tonya's Mask #
You can download it HERE.... Thank You
Filters used:Eye Candy 4000 gradient glow - HERE
Font for Name is Carbon Block
Copy write is always done in Pixelette HERE
AAA Frame - Foto Frame HERE
Dropshadow use through out H-2/V-2/O-60/B-6.85
Please leave a thank you when you downloading for supplies.
my tag is just a guide...please use your imagination
and make the tag your own you do not have to
use any of the supplies I used.
LET'S BEGIN
Open up Template and ShiftD and close original...delete
copyright layer/close all layers/copy/paste paper of choice and
resize to fit canvas/layers/load/save mask/find your mask and
set with these setting/click ok
activate background layer
effects/AAA Frame/foto frame with these settings/click ok
On the following raster layers follow these directions...
activate large circle layer/copy/paste paper of choice resize
paper/selections/invert on large circle layer/delete on paper
layer/merge down/add drop shadow
activate medium circle layer/copy/paste paper of choice resize
paper/selections/invert on medium circle layer/delete on paper
layer/merge down/add drop shadow
activate medium2 circle layer/copy/paste paper of choice resize
paper/selections/invert on medium2 circle layer/delete on paper
layer/merge down/add drop shadow
activate medium3 circle layer/copy/paste paper of choice resize
paper/selections/invert on medium3 circle layer/delete on paper
layer/merge down/add drop shadow/leavesrectangleslayer as
leave left glittered rectangle layer as is/activate left rectangle
layer/copy/paste paper of choice resize paper/selections/invert
on left rectangle layer/delete on paper layer/merge down/add drop
shadow
leave right glittered rectangle layer as is/activate right rectangle
layer/copy/paste paper of choice resize paper/selections/invert
on left rectangle layer/delete on paper layer/merge down/add drop
shadow
Copy/paste your tube of choice/resize if needed/place across template
add drop shadow to tube
add any other elements you wish to use/resize if needed/add drop
shadow to each element/place where they will look best
add your watermark and copyright credits/give it a slight gradient
glow.....
To animate
close name-copyright-butterfly-both word art-clock-heart-tube
verticul rectangle-verticual glittered rectangle-umbralla-faded
rectangle and flower
copy/merge/paste remainder tag into animation shop/edit/duplicate
6 times/click on tag/delete 2x/you should have 31 frames
open up your animation/edit/select all
copy into selected frame 2x at different places
go back to psp/close layer you have open/and open layers you have
closed/copy/merge/paste into animation shop/duplicate 6x/click on
tag/delete 2x/edit select all/copy into selected frame/place over
top of animation/make sure you paste in right place
check your tag if satisfied/save as gif
now give your tag to a friend.
You're done...thank you for trying my tutorial
please send me a copy so that I can show case it on my blog
send to.... riggsbee53@gmail.com


No comments:
Post a Comment