1/28/12

PTU Mythical Designs and Ismael Rac


This tutorial was written on January 28th 2012. 
Any similarities to another tutorial is purely coincidental.
All my tutorial are register with My Free Copyright. 
Please do not claim as your own.
This tutorial writer assumes you have a working 
knowledge of using Paint Shop Pro.
This tutorial was done in Paint Shop Pro9,
but can be adapted to use in other
Paint Shop Pro versions.


SUPPLIES NEEDED

Tube of choice: I'm using the awesome work of Ismael Rac.
I used one with a close up
Please do not use unless you have a license to do so.
You can get his tubes HERE

Scrapkit of Choice: I am using Mythical Designs
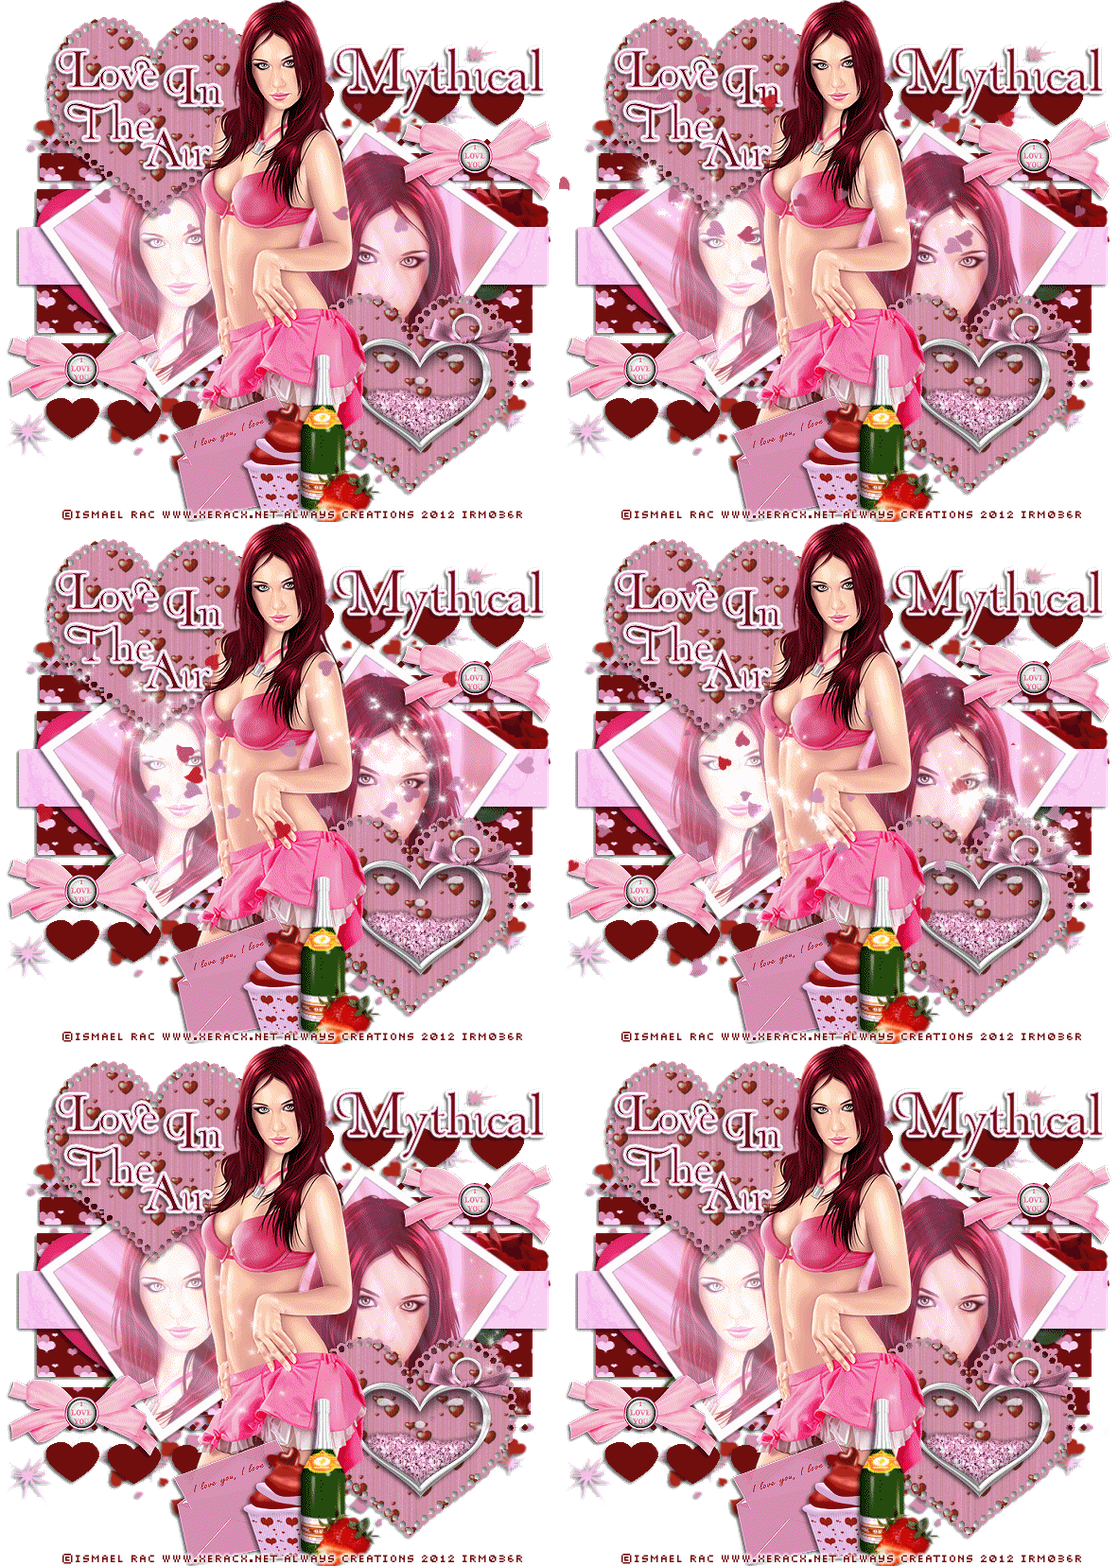
PTU Scrap kit called Love In The Air
You can purchase it HERE....Thank you Mythical

Mask of choice:I am using Yez mask #052 
You can download it HERE...
Thank you Yez

Template of Choice: I am using Kittz Kreationz-Template
You can download it HERE....Thank you Kittz

Animation Used: Scappy Bit Of Fun Sparkle Hearts- Ani 21 
You can download HERE...Thanks Simone

Filters used: Eye Candy 4000 gradient glow- Xero- Radiance..

Font for word art & name is Organic Elements 
and copy write is always done in Pixelette ...
Get them HERE

Drop shadow use through out H-2/V-2/O-65/B-6.00

Please leave a thank you when you downloading for supplies.


my tag is just a guide...please use your imagination and make the tag your own
you do not have to use any of the supplies I used.


     LET'S BEGIN

Open up Template and ShiftD and close original...delete copyright layer
resize template 691x652 for space to work/we will resize again at the end/
close all layers/choose paper of choice/copy/paste and put underneath
brush layer/go to mask of choice with these setting and click ok


Copy/paste element #23/resize and place on top of mask layer/add drop shadow

On the following raster layers follow these directions...

activate lg rectangle layer/copy/paste paper of choice/go to lg rectangle layer
invert/go to paper layer and delete/merge down/add drop shadow

copy/paste element#3 on top of lg rectangle layer/resize/add drop shadow/
duplicate 2x/space them beside one another/merge down to one layer

activate thin rectangle layer/copy/paste paper of choice/go to thin rectangle layer
invert/go to paper layer and delete/merge down/add drop shadow

activate rectangle 1 layer/copy/paste paper of choice/I used the same paper as the
lg rectangle/go to rectangle 1 layer/invert/go to paper layer and
delete/merge down/add drop shadow

activate rectangle 2 layer/copy/paste paper of choice/I used the same paper as the
lg rectangle/activate diamond line 1/select/float/defloat/choose color from kit/flood fill
diamond line/add drop shadow

activate diamond line 1/select/float/defloat/choose color from kit/flood fill
diamond line/add drop shadow

activate diamond line 2/select/float/defloat/choose color from kit/flood fill
diamond line/add drop shadow

activate square 1/with magic wand click inside square/copy/paste paper of choice
go to square 1 layer/invert/go to paper layer and delete/merge down/add drop shadow

copy/paste close up of your tube into the square 1/resize to fit/duplicate/close copy
layer/now go to blend/click screen/open copy layer and lower opacity to 42/put
screen layer on top of copy layer

activate square 2/with magic wand click inside square/copy/paste paper of choice
go to square 2 layer/invert/go to paper layer and delete/merge down/add drop shadow

copy/paste close up of your tube into the square 2/resize to fit/duplicate/close copy
layer/xero/radiance with these setting


now go to blend/click soft light/open copy
layer and lower opacity to 42/put soft light layer on top of copy layer

activate lg heart 1 layer/copy/paste paper of choice/go to lg heart 1 layer
invert/go to paper layer and delete/merge down/add drop shadow

activate lg heart 2 layer/copy/paste paper of choice/go to lg heart 2 layer
invert/go to paper layer and delete/merge down/add drop shadow

take magic wand and activate hearts1 layer/flood fill with color from kit/do
the same with hearts2 layer/deactivate and give drop shadow

now add the rest of your elements where you want them/make the tag your own
Have fun with it/make sure you add a drop shadow to each element.

choose your font and type Love In The Air and place on the top lg heart #2
see my tag for example/ add drop shadow

add your watermark and copyright credits/give it a slight gradient glow
...now give your tag to a friend.

Animation

Copy merge your tag and take to animation shop
open up Simone's animation
go to your tags and add the number of layers you need 
from the animation-you should have 53 layers
once that's done go to edit/select all/on your tag
now go to Simone's animation/edit /select all/copy
go to your tag and paste into selection
where you want the animation/Do this again
save as gif
You're done...thank you for trying my tutorial
please send me a copy so that I can show case it on my blog

1/26/12

PTU Mythical Designs and Fred Winkler- Show Off Tag

Here's a tag I did using Mythical Designs PTU Autumn Becomes Winter
Scrap kit. You can purchase this awesome scrap kit HERE


1/19/12

PTU Mythical Designs and Eugene Rzhevskii

This tutorial was written on January 17th 2012. 
Any similarities to another tutorial is purely coincidental.
All my tutorial are register with My Free Copyright.
Please do not claim as your own.
This tutorial writer assumes you have a working
knowledge of using Paint Shop Pro.
This tutorial was done in Paint Shop Pro9,
but can be adapted to use in other
Paint Shop Pro versions.


SUPPLIES NEEDED
Tube of Choice: I am using the amazing artwork of Eugene Rzhevskii
Please do not use unless you have a license to do so. You can
purchase his tubes HERE

Scrapkit of Choice: I am using Mythical Designs PTU Scrap kit called
Emotastic...You can purchase it HERE....Thank you Mythical

Mask of choice: I am using Chichi Designz2 #3 You can download it
HERE...Thank you Chichi

Filters used: No filters

Font  is Stereofidelic and copy write is always
done in Pixelette ... Get them HERE

Drop shadow use through out H-2/V-2/O-65/B-6.00

Please leave a thank you when you downloading for supplies.


my tag is just a guide...please use your imagination and make the tag your own
you do not have to use any of the supplies I used.


     LET'S BEGIN

open up the cluster frame/layer new raster layer/copy/paste paper of choice
go to layers/load/save mask/save mask from disc/with this setting/click ok
layers/merge group


go to frame layer and click inside of frame/selection modify/expand by 8
copy paste paper of choice/resize to fit/now go to frame layer/invent
now go to paper layer and delete/place paper underneath frame/add drop
shadow to frame

click inside frame/selections modify by 8/copy/paste close up tube on top
of frame/resize/now go to frame layer/selection/invert/go to tube layer
and delete/add drop shadow/duplicate tube/on original tube layer/left click
blend/screen/on duplicate layer lower opacity to 76

add any element you wish to use from the kit/resize if needed/add drop shadow

add your main tube/mirror/resize/adjust sharpen/add drop shadow

add your watermark and copyright credits...now give your tag to a friend.

You're done...thank you for trying my tutorial
please send me a copy so that I can show case it on my blog
riggsbee53@gmail.com

PTU Mythical Designs and Elias Chatzoudis

This tutorial was written on January 17th 2011.
Any similarities to another tutorial is purely coincidental.
All my tutorial are register with My Free Copyright.
Please do not claim as your own.
This tutorial writer assumes you have a working 
knowledge of using Paint Shop Pro.
This tutorial was done in Paint Shop Pro9,
but can be adapted to use in other
Paint Shop Pro versions.


SUPPLIES NEEDED
Tube of Choice: I am using the awesome work of Elias Chatzoudis
please do not use his work without a license to do so
you can purchase his tubes HERE

Scrapkit of Choice: I am using Mythical Designs PTU Scrap kit called
Winter Elegance...You can purchase it HERE....Thank you Mythical

Mask of choice:I am using moon beans and spiderwebs mask 16
You can download it HERE...Thank you Staci

Template of Choice: I am using Additive Pleasures xmas Template #8
You can download it HERE....Thank you Tammy

Filters used:..Xero -radiance, Eye Candy5/ nature - icicles and smoke
Eye Candy 4000/gradient glow on text and name

Blends-Screen-overlay and soft light

Font for is Santa's Sleigh-Full and copy write is
always done in Pixelette ... Get them HERE

Drop shadow use through out H-+2/V-2/O-65/B-6.00
Please leave a thank you when you downloading for supplies.


my tag is just a guide...please use your imagination and make the tag your own
you do not have to use any of the supplies I used.


     LET'S BEGIN

Open up Template and ShiftD and close original...delete copyright layer
resize template 700x700 for space to work/we will resize later
close all layers/choose paper of choice/copy/paste and put underneath
raster layer1/go to mask of choice with these setting and click ok


resize each layer 90%/On the each layers except dotted and
word art layers follow these directions...

selection/float/defloat/copy-paste paper of choice/go to raster layer
and invert/then go to paper layer and delete/merge down and add drop
shadow

now where there was a glitter layer /once you merge down go to adjust
add/remove noise/add noise with these setting below/then add your drop shadow


Now you can choose to create your tag the way you want or follow my lead
close all layer except your mask layer and glitter rectangle layer

on your glitter rectangle layer/copy/paste element 6/duplicated and move it
next to the one you just paste/duplicate again and image/mirror/duplicate
that and move over just a bit/you should have 4 trees/merge each layer down
until you have one layer with all four trees on it/adjust/sharpen/
add drop shadow

open your rectangle layer/copy paste your close up tube 3x/resize by 70%/
80% and 90%/on the 70% layer go to blend and choose screen/80% layer go to
blend and choose overlay/ and on the 90% go to blend and choose soft light/
add drop shadow.

Open your text layer and recolor the teal words to match your colors on your tag
leave your dotted rectangle layer as is
on your glitter circle layer/copy/paste element 31/resize by 65%/add drop
shadow

on the circle layer/copy/paste your close up again/resize by 90%/mirror/
take magic wand and click on circle/now go to selections/invert/go to tube
layer and delete/add drop shadow/now go to xero/radiance with this setting
click ok/leave dotted circle as is


open sm glitter circle and small circle/copy/paste element 8/resize by 30%
place on top of small circle/add drop shadow/go to Eye Candy5/icicles with
this setting/click ok


add your main tube and mirror/resize by 95%/add drop shadow/go to eye candy5
smoke with this setting/click ok/ 


merge down the three word art layers/place
them on top of tube leg/now go to eye candy 4000/gradient glow with this
setting/add drop shadow/also add to name,but click 2x


add your watermark and copyright credits...
now give your tag to a friend.

You're done...thank you for trying my tutorial
if you try it, please send me a copy so that 
I can show case it on my blog

1/12/12

PTU Honor Scraps and Martin Abel

Freeze

This tutorial was written on January 11th 2011. 
Any similarities to another tutorial is purely coincidental.
All my tutorial are register with My Free Copyright. 
Please do not claim as your own.
This tutorial writer assumes you have a working 
knowledge of using Paint Shop Pro.
This tutorial was done in Paint Shop Pro9,
 but can be adapted to use in other
Paint Shop Pro versions.


SUPPLIES NEEDED

Tube of Choice: I am using the art work of Martin Abel
You can purchase it HERE
Please do not use without a license to do so

Scrapkit of Choice: I am using Honored Scraps PTU Scrap
    kit called Gentle Freeze You can purchase it HERE....Thank you Honor

          Mask of choice:I am using moon beans and spiderwebs #20
You can download it HERE..Thank you Staci

         Template of Choice: I am using Chica winter Template #1
   You can download it HERE....Thank you Chica


     Filters used:..Xero -radiance,penta.com-jeans,
       eye candy5/nature-snow drift and icicles.

    Font for word art & name is  and copy write is always
       done in Pixelette ...Get them HERE

    Drop shadow use through out H-2/V-2/O-65/B-6.00

   Please leave a thank you when you downloading for supplies.


 my tag is just a guide...please use your imagination 
and make the tag your own you do not have
to use any of the supplies I used.

 LET'S BEGIN

            Open up Template and ShiftD and close original...delete copyright layer
         resize template 600x600 for space to work/we will resize later
             close all layers/choose paper of choice/copy/paste and put underneath
             raster layer1/go to mask of choice with these setting and click ok


On the each raster layers follow these directions
selection/float/defloat/copy-paste paper of choice/go to raster layer
 and invert/then go to paper layer and delete/merge down and add drop shadow

copy/paste snowflake 4/resize/duplicate 19 times/x out all layers but 
snowflakes/merge visable/add drop shadow and put underneath circle layer

 add the igloo/white tree/sign and snowman/resize and add drop shadow
add your main tube/resize and add drop shadow

on the three circle/selection/float/defloat/copy-paste paper of choice
 go to circle layer and invert/then go to paper layer and delete/effect
     3D effect/inner bevel/with these setting/click ok/do this on all 3 circles

       activate circle2/selections/float defloat/take you tube and place the part
         you want to show/go to circle layer and invert/then go to tube layer and
     delete/now go to xero/radiance with these setting/click ok


                                  activate circle4/selections/float defloat/take you tube and place the part
                                  you want to show/go to circle layer and invert/then go to tube layer and
                                         delete/now go to penta.com/jeans with these setting/click ok


                                on circle 3 place whatever element you wish to use/add drop shadow
                                       add any other elements you wish to use/add drop shadow

                               on the candle layer I added Eye Candy 5/snow drift with these setting/


                               on the snowman and candle I added Eye Candy5/icicles with these setting


                              add your watermark and copyright credits...now give your tag to a friend.

                                                    You're done...thank you for trying my tutorial
                               if you try it,please send me a copy so that I can show case it on my blog
                                                                  riggsbee53@gmail.com

1/9/12

PTU Hungry Hills and Outlaw by Designs

Ice Angel

This tutorial was written on January 9th 2012.
Any similarities to another tutorial is purely coincidental.
All my tutorial are register with My Free Copyright. 
Please do not claim as your own.
This tutorial writer assumes you have a working 
knowledge of using Paint Shop Pro.
This tutorial was done in Paint Shop Pro9,but can be 
adapted to use in other Paint Shop Pro versions.

SUPPLIES NEEDED

Scrapkit of Choice: I am using Hungry Hills PTU Scrap kit called Ice Angel
You can purchase it HERE....Thank you

Mask of choice:I am using Enchanted By Darkness 64  You can download it HERE...
Thank you

Filters used: Penta.com-color dot/ gradient glow..you can get it

Font for wordart & name is Aladdin and copy write is always done in Pixelette ...
Get them HERE

Drop shadow use through out H-2/V-2/O-65/B-6.00

Please leave a thank you when you downloading for supplies.


my tag is just a guide...please use your imagination and make the tag your own
you do not have to use any of the supplies I used.


     LET'S BEGIN

Open up new raster layer 600x600 (will resize later)
choose a paper of choice/copy/paste onto canvas
go to mask of choice with these setting and click ok
 

usng ellipse too/background white-foreground null/draw out a large ellipse
go to adjust/noise with these setting and click ok
pick a color from one of the papers/put in both foreground and background
now go to gradient and chose duotone light blue with these setting/click ok

recolor to match the color of the kit/go to effect/penta.com/color dot with
these setting/click ok
copy/paste open doorway to canvas/add drop shadow
copy/paste ice/resize and add to top doorway/add drop shadow
now add ice to each window top after resizing/add drop shadow
copy/paste wreath/resize and add to top of the window/add drop shadow

copy/paste doodle-1/resize and paste underneath door/duplicate and
mirror/merge down/add drop shadow

copy/paste glitter/resize and paste underneath doodle/duplicate and
mirror/merge down add light drop shadow/1/1/10/3

copy and paste tube of choice/I used the one within the kit/resize and place
where you want it/add drop shadow

now add the rest of your elements where you want them.make the tag your own.Have
fun with it/make sure you add a drop shadow to each element.

add your watermark and copyright credits...now give your tag to a friend.

You're done...thank you for trying my tutorial
if you use please send me a copy so that I can show case it on my blog
riggsbee53@gmail.com