Showing posts with label Always Creations. Show all posts

6/30/21

PTU Foxy's Designz and Barbara Jensen

Dream A Little Dream

This tutorial was written on June 30 2021. 
Any similarities to another tutorial is purely coincidental.
All my tutorial are register with My Free Copyright. 
Please do not claim as your own.
This tutorial writer assumes you have a working 
knowledge of using Paint Shop Pro.
This tutorial was done in Paint Shop Pro 9,
but can be adapted to use in other 
Paint Shop Pro versions.


SUPPLIES NEEDED

Tube of choice: I'm using the awesome work of Barbara Jensen.
Please do not use unless you have a license to do so.
 Purchase Barbara Jensen tubes HERE

Scrapkit of Choice: I am using PTU CDO Foxy Designz Dreamer
You can purchase it HERE 

Template of choice: I am using template Dream by Dees'Signz Depot
You can download it HERE...Thanks Dee

Masks of Choice: I am using MPM #110 - Thank you Millie
You can download it HERE.... Thank You 

Filters used: Eye Candy 4000 gradient glow - HERE

Font for Name is  - About Love - HERE
Copy write is always done in Pixelade  HERE

Drop shadow use through out / H-2/V-2/O-50/B-5.00
Smooth Setting through out /10

Please leave a thank you when you downloading for supplies.
My tag is just a guide...please use your imagination 
and make the tag your own. You do not have to 
use any of the supplies I used.


     LET'S BEGIN

Open up Template and ShiftD and close original...resize all
layers to 800 x 800/delete  copyright layer/close all layers

On the following raster layers follow these directions...

activate group raster layer/change color to #8fbdde/go to change 
color to target/recolor group layer with this color/sharpen

activate large purple rectangle layer/selections/modify/smooth with setting 
below/invert on rectangle layer/copy/paste paper of choice/resize paper 
to fit canvas/delete on paper layer/merge down/add drop shadow
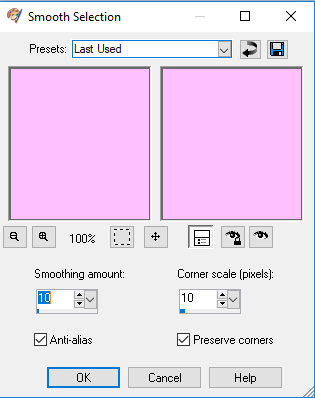


activate large blue square layer/selections/modify/smooth with setting 
above/invert on square layer/copy/paste paper of choice/resize paper 
to fit canvas/delete on paper layer/merge down/add drop shadow

activate purple oval background/recolor layer wit #8fbdde/add drop shadow

activate purple oval layer/selections/modify/smooth with setting 
above/invert on oval layer/copy/paste paper of choice/resize paper 
by 60%/delete on paper layer/merge down/add drop shadow

activate purple star layer/change color to #adc6c9/add drop shadow

activate purple star layer2/change color to #adc6c9/add drop shadow

activate dotted shape layer/adjust/hue and saturation hue saturation lightness 
with these settings/add drop shadow


activate purple shape layer/selections/modify/smooth with setting 
above/invert on purple layer/copy/paste paper of choice/resize paper 
by 60%/delete on paper layer/merge down/add drop shadow/leave word art as 
is/add light drop shadow

activate purple circle layer/change color to #adc6c9/add drop shadow

leave all other layers as is except black swirl layer/ change the color to 
#aacdce/add drop shadow

copy paste your tube choice /place on top of oval layer /resize by if needed/blend
overlay/add drop shadow 2/-2/7/6.76

copy paste your tube again and place on top of first tube/resize to make it smaller
to fit layer/mirror tube/place tube to the left side of the tag. See my tag for position/add drop shadow

add any elements you wish to use/resize if needed/add drop shadow
to each element/place where they will look best

I use the wordart on the template or use a wordart from the kit/position 
on tag where ever it looks best to you/add drop shadow

Copy/paste paper of choice at the bottom/resize to fit canvas/go to where
ever your mask are/follow picture above for settings/ you can use more 
than one mask


add your watermark and copyright credits/give it a slight gradient 
glow...now give your tag to a friend.

You're done...thank you for trying my tutorial
please send me a copy so that I can show case it on my blog


9/19/19

Jennifer Janesko - Feathers

This tutorial was written on September 19,2019. 
Any similarities to another tutorial is purely coincidental.
All my tutorial are register with My Free Copyright. 
Please do not claim as your own.
This tutorial writer assumes you have a working 
knowledge of using Paint Shop Pro.
This tutorial was done in Paint Shop Pro9
but can be adapted to use in other 
Paint Shop Pro versions.


Supplies

Tube: Jennifer Janesko-you will need a close up tube also
Purchase her tubes HERE
Filter: Mura Meister - Copies-Download HERE
Penta.com:VTR2/Dot and Cross-Download HERE
dsb:Blast:Download HERE
Font: Good Vibes - Download HERE

my tag is just a guide...please use your imagination 
and make the tag your own you do not have to 
use any of the supplies I used.

Let's Begin

Open new raster 700X250
Copy/paste tube of choice
Effects filter Mura Meister with these setting


Effects pemta.com/VTR2 with these setting


Effects dsb/Blast with these setting


repeat blast effect for all directions/duplicate and close

Copy and paste closeup tube/ place on the right hand side
move tube until it's close to the eye(see my tag for placement)
duplicate/mirror/place on left hand side/move this tube
until it's close to the eye (see my tag for placement)

On right tube change blend mode to overlay/drop shadow on tube


On left tube change blend mode to hard light/lower opacity to 82%/drop shadow on tube


Open blast effect copy and move to top of left tube/blend mode screen/lower opacity to 60%
Copy/paste main tube/blend mode-screen/resize by 85% twice
copy/paste main tube again/resize by70%/resize again by 85%/place on left side of tag
pemta.com/dot and cross with these settings


duplicate/mirror/add drop shadow to both
copy main tube again/resize by 85%/add drop shadow

Find you font of Choice and type out Feathers- I used Good Vibes
Place top right of tag
add copyright and give to a friend

Thank you for trying my tutorial


9/19/17

PTU Freeks Creations - Spooky Fun

Chills and Thrills

This tutorial was written on September 19,2017. 
Any similarities to another tutorial is purely coincidental.
All my tutorial are register with My Free Copyright. 
Please do not claim as your own.
This tutorial writer assumes you have a working 
knowledge of using Paint Shop Pro.
This tutorial was done in Paint Shop Pro9
but can be adapted to use in other 
Paint Shop Pro versions.


SUPPLIES NEEDED

Scrapkit of Choice: I am using PTU Freeks Creations-Spooky Fun
You can download it HERE ...Thank You Holly

Template of choice:I am using DeesSign Depot Template Chills and Thrills
This is an exclusive CDO template.PU Only.You can download it HERE...Thanks Dee

Mask of Choice: I am using DBV Mask 104
You can download it HERE.... Thank You Vabs

Filters used:Eye Candy 4000 gradient glow - HERE

Font for Name is Back to Fanatic Lite
Copy write is always done in Pixelade  HERE

Dropshadow use through out H-2/V-2/O-60/B-6.85

Please leave a thank you when you downloading for supplies.
my tag is just a guide...please use your imagination 
and make the tag your own you do not have to 
use any of the supplies I used.


     LET'S BEGIN

Open up Template and ShiftD and close original...delete 
copyright layer/close all layers/copy/paste paper of choice
resize to fit canvas/layers/load/save mask/find your mask
and set with these setting/click ok


On the following raster layers follow these directions...

activate orange strip layer/copy/paste paper of choice/resize
paper/selections/modify/smooth with these setting


invert on 
strip layer/delete on paper layer/merge down/add drop shadow

activate purple square layer/copy/paste paper of choice/resize
paper/selections/modify/smooth with these setting above/invert on 
square layer/delete on paper layer/merge down/add drop shadow

leave green strip layer as is/add drop shadow

activate blue circle layer/copy/paste paper of choice resize paper
selections/modify/smooth with setting above/invert on circle layer
delete on paper layer/merge down/add drop shadow

activate green rectangle layer/copy/paste paper of choice resize paper
selections/modify/smooth with setting above/invert on rectangle layer
delete on paper layer/merge down/add drop shadow

leave black glitter layer and orange oval layer as is/add drop shadow

activate purple circle layer/copy/paste paper of choice/resize paper
selections/modify/smooth with setting above/invert on circle layer
delete on paper layer/merge down/leave large dotted circle layer as is

leave large dotted circle layer and blue circle layer as is/add drop shadow
leave all other layers as is

Now is the time to make your tag any way you want using elements from the kit
add as many as you like/resize if needed/add drop shadow to each element/
place where they will look best./once you finish/resize tag

add your watermark and copyright credits/give it a slight gradient 
glow.....now give your tag to a friend.

You're done...thank you for trying my tutorial
please send me a copy so that I can show case it on my blog

11/25/15

PTU Foxy Designz and Alicia Mujica

Frosted Christmas

This tutorial was written on November 25,2015. 
Any similarities to another tutorial is purely coincidental.
All my tutorial are register with My Free Copyright. 
Please do not claim as your own.
This tutorial writer assumes you have a working 
knowledge of using Paint Shop Pro.
This tutorial was done in Paint Shop Pro9,
but can be adapted to use in other 
Paint Shop Pro versions.

 photo AM_Frosted Christmas-Foxy.gif


SUPPLIES NEEDED

Animation Shop: Get it HERE

Tube of choice: I'm using the awesome work of Alicia Mujica.
Please do not use unless you have a license to do so. 
Get Them HERE

Mask of Choice: I am using Insatible Dreams Mask 161
You can download it HERE.... Thank You Cat

Word Art of Choice: I used my own

Animation of Choice: I used Scrappy Bit of fun Animation #419
You can download it HERE ..... Thank you Simone

Filters used:Eye Candy 4000 gradient glow - HERE

Font for Name is Santa's Sleigh
Copy write is always done in Pixelette  HERE

Dropshadow use through out H-2/V-2/O-60/B-6.85

Please leave a thank you when you downloading for supplies.

my tag is just a guide...please use your imagination 
and make the tag your own you do not have to 
use any of the supplies I used.


     LET'S BEGIN

Open up new raster layer 800x800/copy/paste paper of choice
resize to fit canvas/layers/load/save mask/find your mask
and set with these setting/click ok

copy/paste frame #1 into canvas/place in middle of canvas/click
inside of frame/selection/modify by 5/invert on frame/copy
paste paper of choice/resize by 90%/delete on paper layer/add
drop shadow to frame

copy/paste tube of choice/place in center of frame/resize if 
needed/add drop shadow to both sides of tube

elements used
27
29
30
31
39

add any other elements you wish to use/resize if needed/add drop 
shadow to each element/place elements underneath frame

add wordart if you wish/add fat gradient glow/add drop shadow

add your watermark and copyright credits/give it a slight gradient 
glow.....now give your tag to a friend.

Open animation shop
Copy/merge and take to animation shop
look for the animation you will use
your animation has21 frames,so you will need 21 frames for your tag
on your tag edit/duplicate your tag 5 times/then click on top frame
and duplicate 3 more times/you should have 21 frames
edit/select all/go to animation/edit/select all/copy/paste into
your tag/do this twice on each side of the tube

you can either click on optimization wizard/then save or follow 
direction below

To save:
Go to File, Save as, enter the name of your file and select the folder to save to.
Now click on Customize:
Under COLORS TAB:
Number of colors: 255 Colors
Create palette by: OPTIMIZED OCTREE
Reduce colors by: Error Diffusion
Under OPTIMIZATIONS TAB:
set a check mark beside the second, third and forth choices. UN-check the 1st and last.
Under PARTIAL TRANSPARENCY:
check Convert pixels less than 92
Yes, blend with this color: change to white #FFFFFF
Click OK. Click Next, next, next, next.
Play your animation.

At times your animation may or will come out terrible. Optimization in Animation Shop 
is not the greatest.
You can play around will your settings, especially under the Tab: Optimization. 
I change this setting at times from anywhere between 70 and 100.
Some people add a white background.  To add background, go to Animation:
Animation Properties, select Opaque and change color to white.

You're done...thank you for trying my tutorial
please send me a copy so that I can show case it on my blog

Instruction to save in animation shop from Simone (Scrappy Bit of Fun ) HERE

4/16/14

PTU Honored Scraps and Sweet Pinup - Happy Easter

Happy Easter

This tutorial was written on April 16,2013. 
Any similarities to another tutorial is purely coincidental.
All my tutorial are register with My Free Copyright. 
Please do not claim as your own.
This tutorial writer assumes you have a working 
knowledge of using Paint Shop Pro.
This tutorial was done in Paint Shop Pro9,
but can be adapted to use in other 
Paint Shop Pro versions.


SUPPLIES NEEDED

Tube of choice: I'm using the awesome work of Sweet Pinup.
Please do not use unless you have a license to do so. 
Get Them HERE

Scrapkit of Choice: I am using PTU Honored Scraps Easter Blossom
You can purchase it HERE ...Thanks Patty

Template of choice:I am using Amy/Leah's gimptastictuts Template #66
You can download it HERE...Thanks Leah

Mask of Choice: I am using Insatiable Dreams Mask #155
You can download it HERE.... Thank You Cat

Filters used:Eye Candy 4000 gradient glow - HERE

Font for Name is Plantagenet Cherokee
Copy write is always done in Pixelette  HERE

Dropshadow use through out H-2/V-2/O-60/B-6.85

Please leave a thank you when you downloading for supplies.

my tag is just a guide...please use your imagination 
and make the tag your own you do not have to 
use any of the supplies I used.

     LET'S BEGIN

Open up Template and Shift D and close original...delete 
copyright layer/close all layers/copy/paste paper of choice
resize to fit canvas/layers/load/save mask/find your mask
and set with these setting/click ok


On the following raster layers follow these directions...

activate square #3 layer/copy/paste paper of choice/resize paper
selections/invert on square layer/delete on paper/layer merge down
add drop shadow

activate square #2 layer/copy/paste paper of choice/resize paper
selections/invert on square layer/delete on paper/layer merge down
add drop shadow

activate square #1 layer/copy/paste paper of choice/resize paper
selections/invert on square layer/delete on paper/layer merge down
add drop shadow

activate circle #2 layer/copy/paste paper of choice/resize paper
selections/invert on circle layer/delete on paper/layer merge down
keep activated/copy/paste tube of choice/resize to fit circle/delete
on tube layer/recolor circle frame to match tag/add drop shadow to
tube and circle frame

activate rectangle #2 layer/copy/paste paper of choice/resize paper
selections/invert on rectangle layer/delete on paper/layer merge down
add drop shadow

activate rectangle #1 layer/copy/paste paper of choice/resize paper
selections/invert on rectangle layer/delete on paper/layer merge down
add drop shadow

activate circle #1 layer/copy/paste paper of choice/resize paper
selections/invert on circle layer/delete on paper/layer merge down
add drop shadow

copy/paste your main tube/resize if needed/place tube where it will
look best/add a drop shadow

add any elements you wish to use/resize if needed/add drop shadow to 
each element/place where they will look best

copy/paste word art that is in the kit/resize by 60%/effects/eye 
candy 4000/gradient glow/with these settings/add drop shadow 

add your watermark and copyright credits/give it a slight gradient 
glow.....now give your tag to a friend.

You're done...thank you for trying my tutorial
please send me a copy so that I can show case it on my blog

9/14/13

FTU Always Creations and Ismael Rac

Irish

This tutorial was written on March 29,2012. 
But never posted,never to late to post
Any similarities to another tutorial is purely coincidental.
All my tutorial are register with My Free Copyright. 
Please do not claim as your own.
This tutorial writer assumes you have a working 
knowledge of using Paint Shop Pro.
This tutorial was done in Paint Shop Pro9,
but can be adapted to use in other 
Paint Shop Pro versions.


SUPPLIES NEEDED

Tube of choice: I'm using the awesome work of Ismael Rac .
Please do not use unless you have a license to do so. 
You can get his tubes HERE

Scrapkit of Choice: I am using My FTU Irish Gold Scrap kit 
You can download it HERE..Please leave a thank you if you download

Mask of choice:I am using Sophistical Simone mask #56.You can download
it HERE...Thank you Simone

Template of Choice: I am using Toxic Desires-Template #142
You can download it HERE....Thank you Kristin

Filters used:Eye Candy 4000 gradient glow - HERE

Font for Name is Scythe ...HERE
copy write is always done in Pixelette ...HERE 


Drop shadow use through out H-2/V-2/O-65/B-6.00

Please leave a thank you when you downloading for supplies.


my tag is just a guide...please use your imagination 
and make the tag your own you do not have to use any 
of the supplies I used.This will be a quick and easy.


     LET'S BEGIN

Open up Template and ShiftD and close original...delete 
copyright layer/close all layers/choose paper of choice
copy/paste and put underneath background layer/go to mask 
of choice with these setting and click ok/delete background 
layer/removed the word art layer


On the following raster layers follow these directions...

activate oval layer/copy/paste paper of choice/go to oval layer
invert/go to paper layer and delete/merge down/keep activated

copy/paste tube/resize/place the part of the tube that you want to 
show/on oval layer/invert/on tube layer/delete/deactivate/blend/screen
add drop shadow

leave oval shadow as is/add drop shadow

activate oval layer frame/copy/paste paper of choice/go to oval layer 
frame/invert/go to paper layer and delete/merge down

on layers1/copy/paste paper of choice/go to layer1 layer frame
invert/go to paper layer and delete/merge down

on layers2/copy/paste paper of choice/go to layer2 layer 
frame/invert/go to paper layer and delete/merge down

on layers3/copy/paste paper of choice/go to layer3
layer frame/invert/go to paper layer and delete/merge down

on thin rectangle/copy/paste paper of choice/go to thin rectangle
layer frame/invert/go to paper layer and delete/merge down

on thin rectangle1/copy/paste paper of choice/go to thin rectangle1
layer frame/invert/go to paper layer and delete/merge down

now add your main tube and place where you want it/add drop shadow 

now add any other element you wish to use to make your tag your own/add drop
shadow on each element/resize your tag if needed

add your watermark and copyright credits/give it a slight gradient glow
...now give your tag to a friend.

You're done...thank you for trying my tutorial
please send me a copy so that I can show case it on my blog

9/21/11

FTU Always Creations and Pinuptoons


This tutorial was written on September 17th 2011. 
Any similarities to another tutorial is purely coincidental.
All my tutorial are register with My Free Copyright. 
Please do not claim as your own.
This tutorial writer assumes you have a
working knowledge of using Paint Shop Pro.
This tutorial was done in Paint Shop Pro9,
 but can be adapted to use in other
Paint Shop Pro versions.


Things That Go Bump in the Night


SUPPLIES NEEDED

Scrapkit of Choice: Always Creations-Halloween for You. you can get it HERE
please follow my TOU

Tube of Choice: I am using the awesome artwork of Pinup toons..You can purchase
his tubes HERE...Please do not use without a license to do so


Mask of Choice: I'm using one of Vix Halloween 2010 #1...You can find it HERE
Put mask in mask folder..Thanks so much for the use of your Vix

Template of Choice:I'm using Denz Designz #160.
You can get it HERE
Thank you Denny


ghost of choice or you can used mine. 
HERE  please follow my TOU

Filter of Choice:Eye Candy 4000-Gradient Glow-HERE
Font for name is Ash and copy write is always done in Pixelette ...
Get them HERE
 
Drop shadow use through out H-2/V-2/O-50/B-5.00

Please leave a thank you when you downloading for supplies.
my tag is just a guide...please use your imagination and make the tag your own
you do not have to use any of the supplies I used.

     LET'S BEGIN

Open Template/ShiftD/delete original template/delete copyright layer
close all layers except background layer/copy/paste paper of choice/resize
go to layersload/save mask/find your mask/setup with these setting below

click ok/merge group.

activate shape2 layer/copy/paste paper of choice/go to effects/gradient glow with
these setting below(do this for each template layer)

activate shape1 layer/copy/paste paper of choice/go to effects/gradient glow with
these setting below/add the glow

activate rectangle layer/copy/paste paper of choice/go to effects/gradient glow with
these setting below/add the glow

activate circle1 layer/copy/paste paper of choice/go to effects/gradient glow with
these setting below/add the glow

activate circle2 layer/copy/paste paper of choice/go to effects/gradient glow with
these setting below/add the glow

place the web on top of circle2/resize web to fit/now copy/paste spider/resize
duplicate 4x moving the spider up a little each time until you get to the top
close copies until later

place the bats where you want them/add the ghost where you want it/add drop
shadow to them/ add the orange eyes/place the lids on top of the eyes/close the
lid layer until time to animate

activate all word art and change the colors to orange/add the glow
place your tube where you want it to be/resize/add drop shadow

resize tag if needed/Add your water mark and copyright/on the name add the same
gradient glow 2 times/duplicate and move over just a little/duplicate and move over
just a little again/merge down after each duplication so that the name is triple
(see my tag)

to animate
your first spider layer and the eyes should be open
all other spiders and lids closed
Copy merge/paste to animation shop as a new layer

back to paint shop pro/close first spider layer and eyes
open up the next spider layer and lids copy merge/paste after current tag

back to paint shop pro/close second spider layer and lids
open up the next spider layer and eyes copy merge/paste after current tag

back to paint shop pro/close third spider layer and eyes
open up the next spider layer and lids copy merge/paste after current tag

back to paint shop pro/close fourth spider layer and eyes
open up the next spider layer and eyes copy merge/paste after current tag

you should have 5 layers/three with eyes and two with lids
edit select all/animation/frame property 100
save as gif

now give to a friend

thank you for trying my tutorial..please send me a copy of what you did
so I can showcase it...riggsbee53@gmail.com


8/6/10

FTU Always Creations and David Boller - Paint My World

Paint My World

Here's another tutorial I wrote.This is great for a beginner.
Any similarities to another tutorial is purely coincidental.All my tutorial are register
with My Free Copyright. Please do not claim as your own.This tutorial writer assumes you
have a working knowledge of using Paint Shop Pro. This tutorial was done in Paint Shop Pro9,
but can be adapted to use in other Paint Shop Pro versions.


SUPPLIES NEEDED

Tube of Choice: I am using the awesome artwork of David Boller..

You can purchase his tubes HERE
Please do not use without a license to do so

Template of Choice: I'm using Missy template#105..You can find it HERE
Thanks Missy for the use of your work.

Mask of Choice: I am using Babes Designs Mask#15..you can get it HERE...Thanks Babe

Scrap kit is one of my FTU Kits Called Rapsody In Blue..

you can find it HERE.....please do not
share, direct them to my site....thanks

Wordart from Wench Designs..you can get it HERE...thanks Vella

Font for name is Saginaw and copyright is always done in Pixelette ... Get them HERE

Drop shadow use throughout H-2/V-2/O-50/B-6.72


     LET'S BEGIN

Open up Template and ShiftD and close original...delete copyright layer
close all layers except the background layer...the one we'll be working on

Go to layers/new raster layer/click ok.Flood fill this layer with color from
your tube. I chose 5261a3...

Go to layers/load/save mask/load mask from disk...find your mask and set it with
these setting....


layers/merge group

Activate square 1/click on magic wand...mode-add/match-RGB value/Tolerance 10
contigous checked/feather 0/anti-alias checked/inside

Choose a paper from the kit...I chose 9. copy/paste on top of square 1 with this
paper...click on square1/selection/invert..now go to paper layer and delete/layers
merge/merge down...add a drop shadow

Activate square 2 and repeat the same process as square 1 choosing another paper
from the kit...I chose 12

actvate square 3 and repeat the same process as square 2 choosing another color
from your tube...I chose 8.

Open your word art and copy/paste on top of square3...place it so that the tube
doesn't cover it/I cut and pasted the bottom part so it would be closer to the
top part...add drop shadow

For the thin rectangles I resized and mirror/ chose a color from the tube and
flood filled and put the credits on it.

Now comes the fun part...add whatever elements you wish to add...don't forget to
 add drop shadow as you go along.

add your copyright and watermark and your done

Thanks for trying my tutorial
If you use send me a copy so I can show case it...thanks

11/10/09

FTU Always Creations and Jessica Doughtery - Good Girls Gone Bad

Here's another tutorial I wrote because I made a scrap kit awhile back..so made a tag from it.
Any similarities to another tutorial is purely coincidental.All my tutorial are register
with My Free Copyright. Please read my tou before using....This tutorial writer assumes you
have a working knowledge of using Paint Shop Pro. This tutorial was done in Paint Shop Pro9,
but can be adapted to use in other Paint Shop Pro versions.


SUPPLIES NEEDED

Tubes of Choice: You will need three tubes...I am using the awesome artwork of Jessica Dougherty
You can purchase her tubes HERE at CILM. Please do not use without a license to do so.

Scrap Kit of Choice: My PTU Scrap Kit So Good To Be Bad...you can get it HERE


Template of Choice: I'm using a temple from Vix called Block..you can get it HERE
Thanks so much for the share Vix

Masks of Choice: I'm using 3 Masks...EBD Mask 17 and 24/Vix Mask 23
Enchanted By Darkness mask can be seen Here ...thanks Rachel
and Vix Mask Here..Thank you both ladies for the share

Work Art From Truly Toxic- Good Girls Gone Bad...You can get it Here...Thanks Lou

Font for name is PhattPhreddy and copy write is always done in Pixelette ... Get them HERE

Drop shadow use throughout H-2/V-2/O-50/B-5


     LET'S BEGIN

Open up Template and ShiftD and close original...paste a paper of choice
go to layer/load/save mask and find your mask EBD17 .....with the following setting:

create mask from source luminance/Orientation:fit to canvas/Options: hide all mask
hit load....merge group...

now copy/paste another paper and go to layer/load/save mask and find mask EBD 24...
hit load and merge group...do this one more time with mask Vix23, making sure it's in
the order I gave you.

using magic wand click in a corner of the template and copy/paste a paper of choice
go to template layer and invert..then go to paper layer and hit delete... do this three
more times with each corner of the template,making sure the template is on top of papers
add drop shadow to template...now add your tubes, resize and give a drop shadow...add some
elements to your tag depending on which tubes you use..I just used some flowers...copy/paste
you word art and resize/then add some color to it to match your tag...give it a drop shadow
resize entire tag before you place your copyright and watermark....You're done!!!

Give a friend a gift and add their name...


Thank you for trying my tutorial!!!

8/30/09

FTU Always Creations and Ismael Rac - Electric Rock

Along with making the scrap kit Electric Rock... 
I made a tutorial to go with it. Enjoy.


 This tutorial was written by me on July 27, 2009. 
Any similarities to another tutorial is purely coincidental.
Please do not claim as your own.
This tutorial is My Free Copyright . 
This tutorial writer assumes you have a working 
knowledge of using Paint Shop Pro.
This tutorial was done in Paint Shop Pro9, 
but can be adapted to use in other Paint Shop Pro versions.

SUPPLIES NEEDED

Tube of Choice: I am using the awesome artwork of Ismael Rac..
You can purchase his tubes....HERE
Please do not use without a license to do so.

Scrap kit of Choice: I'm using my own scrap kit 

Electric Rock. you can download it... HERE 
HERE...HERE....HERE-4part download
Please do not share- please direct to my site.

Mask of Choice: I'm using WSL MASK #336 from Weescotslass

 place in your mask folder in psp. 
You can get it from HERE
Thanks for the use of your mask Chelle
Template of Choice: I'm using my own Template #11. 
You can get it ..... Here
 Please do not share, please TOU
Font for text and name is Park Avenue 
copy write is always done in Pixelette ... HERE

Drop shadow use throughout H-2/V-2/O-50/B-2

LET'S BEGIN
Open up template and duplicate/close original 
(we will resize later). x out all layers except background. 
Go to scrap kit and choose paper #4/resize to fit canvas. 
Copy and paste above white background. 
go to layers/load/save mask./load mask from disk
with these setting

Click ok/Merge group down
add raster layer and choose electric glitter #5.... 
copy/paste glitter and duplicate 3x....
arrange to your liking.... activate the square layer
 click inside square with magic wand 
go to kit and choose paper of choice ( I chose paper #16) 
and paste as a new layer/Selection invert and delete. 
add drop shadow...Activate frame 
using magic wand click inside of frame/color black
drop shadow/activate electric rock background layer
 add tube of choice/drop shadow
activate first musical note 
add a white gradient glow effect with the following setting


make sure it's underneath tube.
 unclick first star layer-using magic wand click inside
/selection/modify by 1......copy/paste paper #8
invert/delete / merge down/add drop shadow 
using magic wand again click inside next star. 
Choose paper#12/paste as a new layer/repeat process. 
Activate third star/choose paper #20 
paste as a new layer/repeat process again. 
add music staff/drop shadow/place underneath tube. 
activate 2nd musical note/add gradient glow to this one also. 
add microphone/add drop shadow
/add text word Electric Rock and give it a drop shadow. 

resize if needed/add copyright and your watermark
be nice and put a friend's name on it /now you're done.
Thank you for trying my newest tutorial.


Here's another tag using a different tube