Showing posts with label Ismael Rac. Show all posts

12/11/15

PTU Creative Crazy Scraps and Ismael Rac

Music

This tutorial was written on December 11,2015. 
Any similarities to another tutorial is purely coincidental.
All my tutorial are register with My Free Copyright. 
Please do not claim as your own.
This tutorial writer assumes you have a working 
knowledge of using Paint Shop Pro.
This tutorial was done in Paint Shop Pro9,
but can be adapted to use in other 
Paint Shop Pro versions.


SUPPLIES NEEDED

Tube of choice: I'm using the awesome work of Ismael Rac.
Please do not use unless you have a license to do so. 
Get Them HERE

Scrapkit of Choice: I am using PTU Creative Crazy Scraps The Voice Within
You can purchase it HERE ...Thank You Stu

Template of choice:I am using Toxic Desirez Mask 251
You can download it HERE...Thanks Kristin

Mask of Choice: I am using music paper that's in the kit
Thank You Stu

Filters used:Eye Candy 4000 gradient glow - HERE
Eye Candy Soften
Mura's Seamless

Font for Name is Remachine Script Personal
Copy write is always done in Pixelette  HERE

Drop shadow use through out H-2/V-2/O-60/B-6.85

Please leave a thank you when you downloading for supplies.

my tag is just a guide...please use your imagination 
and make the tag your own you do not have to 
use any of the supplies I used.


     LET'S BEGIN

Open up Template and ShiftD and close original...close all layers
copy/paste music element that is in the kit/resize by 70%/rotate 
15 degrees right/add drop shadow

On the following raster layers follow these directions...

activate left rectangle layer 8/copy/paste paper of choice/resize 
paper/selections/invert on rectangle layer/delete on paper layer
merge down/add drop shadow

activate copy of rectangle layer 8/copy/paste paper of choice resize 
paper/selections/invert on rectangle layer/delete on paper layer/merge 
down/add drop shadow

activate rectangle layer 7/copy/paste paper of choice resize paper
selections/invert on rectangle layer/delete on paper layer/merge down 
add drop shadow

activate copy of rectangle layer 7/copy/paste paper of choice resize 
paper/selections/invert on rectangle layer/delete on paper layer/merge 
down/add drop shadow

activate left square layer 6/copy/paste paper of choice resize paper
selections/invert on square layer/delete on paper layer/merge down
add drop shadow

activate copy of left square layer 6/copy/paste paper of choice resize 
paper/selections/invert on square layer/delete on paper layer/merge down
add drop shadow

recolor circle layer 3 a darker color from one of the paper/add drop
shadow

activate left circle layer 4/copy/paste paper of choice resize paper
selections/invert on circle layer/delete on paper layer/copy/paste tube
of choice/resize if needed/place tube in center of circle/effects/penta.com
color dot with these settings/click ok/merge down/add drop shadow

activate left circle layer 4/copy/paste paper of choice resize paper
selections/invert on circle layer/delete on paper layer/copy/paste tube
of choice/resize if needed/place tube in center of circle/effects/penta.com
color dot with these settings/click ok/merge down/add drop shadow

activate middle circle layer 5/copy/paste paper of choice/resize paper
selections/invert on circle layer/delete on paper layer/merge down
keep activated/copy/paste tube of choice/place in center of circle/delete
on tube layer/duplicate tube/on original layer/blend/overlay/on duplicate
lower opacity to 60%/add drop shadow to both tubes

Copy/paste main tube of choice/resize if needed/place tube where it will
look best/ add drop shadow

add any other elements you wish to use/resize if needed/add drop shadow
to each element/place where they will look best

copy/paste word art from kit/add gradient glow/add slight drop shadow

add your watermark and copyright credits/give it a slight gradient glow
.....now give your tag to a friend.

You're done...thank you for trying my tutorial
please send me a copy so that I can show case it on my blog

11/24/13

PTU Hungry Hills Scraps and Ismael Rac

Holiday Cheer

This tutorial was written on November 23,2013. 
Any similarities to another tutorial is purely coincidental.
All my tutorial are register with My Free Copyright. 
Please do not claim as your own.
This tutorial writer assumes you have a working 
knowledge of using Paint Shop Pro.
This tutorial was done in Paint Shop Pro9,
but can be adapted to use in other 
Paint Shop Pro versions.


SUPPLIES NEEDED

Tube of choice: I'm using the awesome work of Ismael Rac.
Please do not use unless you have a license to do so. 
Get Them HERE

Scrapkit of Choice: I am using PTU Hungry Hills Crimbo
You can purchase it HERE ...Thanks Alison

Template of choice:I am using Millie PSP Madness Misfit 
Christmas # 05...You can download it HERE...Thanks Millie

Mask of Choice: I am using Weescotslass  Creations Mask #362
You can download it HERE.... Thank You Chell

Filters used:Eye Candy 4000 gradient glow - HERE

Font for Name is Baltar
Copy write is always done in Pixelette  HERE

Dropshadow use through out H-2/V-2/O-50/B-5.00

Please leave a thank you when you downloading for supplies.

my tag is just a guide...please use your imagination 
and make the tag your own you do not have to 
use any of the supplies I used.


     LET'S BEGIN

Open up Template and ShiftD and close original...delete 
copyright layer/close all layers/copy/paste paper of choice
resize to fit canvas/layers/load/save mask/find your mask
and set with these setting/click ok


On the following raster layers follow these directions...

activate large circle layer/copy/paste paper of choice/resize
paper/selections/invert on large circle layer/delete on paper 
layer/merge down/selection/none/add drop shadow 

activited large rounded rectangle layer/copy/paste paper of 
choice/resize paper/selections/invert on rect layer/delete on 
paper layer/merge down/selections/none/add drop shadow 

activate large square layer/copy/paste paper of choice/resize 
paper/selections/invert on large square layer/delete on paper 
layer/merge down/selections/none/add drop shadow

activate medium circle layer/copy/paste paper of choice/resize 
paper/selections/invert on medium circle layer/delete on paper 
layer/merge down/selections/none/add drop shadow

activited medium rounded rectangle layer/copy/paste paper of 
choice/resize paper/selections/invert on rect layer/delete on 
paper layer/merge down/selections/none/add drop shadow 

activate small square layer/copy/paste paper of choice/resize 
paper/selections/invert on small square layer/delete on paper 
layer/merge down/selections/none/add drop shadow

activate small square2 layer/copy/paste paper of choice/resize 
paper/selections/invert on small square2 layer/delete on paper 
layer/merge down/selections/none/add drop shadow

activate 1st and 3rd small framed square/copy/paste paper of
choice/resize paper/selections/invert on framed squares/delete
on paper layers/merge down/selections/none/add drop shadow on frame

leave the 2nd and 4th framed squares and word at as is/add drop
shadow to all three

copy/paste tubes ofchoice/resize if needed/position where they will
look best/add drop shadow to each

add any other elements you wish to use/resize/add drop shadow 
to each element/place where they will look best

add your watermark and copyright credits/give it a slight 
gradient glow.....now give your tag to a friend.

You're done...thank you for trying my tutorial
please send me a copy so that I can show case it on my blog

9/14/13

FTU Always Creations and Ismael Rac

Irish

This tutorial was written on March 29,2012. 
But never posted,never to late to post
Any similarities to another tutorial is purely coincidental.
All my tutorial are register with My Free Copyright. 
Please do not claim as your own.
This tutorial writer assumes you have a working 
knowledge of using Paint Shop Pro.
This tutorial was done in Paint Shop Pro9,
but can be adapted to use in other 
Paint Shop Pro versions.


SUPPLIES NEEDED

Tube of choice: I'm using the awesome work of Ismael Rac .
Please do not use unless you have a license to do so. 
You can get his tubes HERE

Scrapkit of Choice: I am using My FTU Irish Gold Scrap kit 
You can download it HERE..Please leave a thank you if you download

Mask of choice:I am using Sophistical Simone mask #56.You can download
it HERE...Thank you Simone

Template of Choice: I am using Toxic Desires-Template #142
You can download it HERE....Thank you Kristin

Filters used:Eye Candy 4000 gradient glow - HERE

Font for Name is Scythe ...HERE
copy write is always done in Pixelette ...HERE 


Drop shadow use through out H-2/V-2/O-65/B-6.00

Please leave a thank you when you downloading for supplies.


my tag is just a guide...please use your imagination 
and make the tag your own you do not have to use any 
of the supplies I used.This will be a quick and easy.


     LET'S BEGIN

Open up Template and ShiftD and close original...delete 
copyright layer/close all layers/choose paper of choice
copy/paste and put underneath background layer/go to mask 
of choice with these setting and click ok/delete background 
layer/removed the word art layer


On the following raster layers follow these directions...

activate oval layer/copy/paste paper of choice/go to oval layer
invert/go to paper layer and delete/merge down/keep activated

copy/paste tube/resize/place the part of the tube that you want to 
show/on oval layer/invert/on tube layer/delete/deactivate/blend/screen
add drop shadow

leave oval shadow as is/add drop shadow

activate oval layer frame/copy/paste paper of choice/go to oval layer 
frame/invert/go to paper layer and delete/merge down

on layers1/copy/paste paper of choice/go to layer1 layer frame
invert/go to paper layer and delete/merge down

on layers2/copy/paste paper of choice/go to layer2 layer 
frame/invert/go to paper layer and delete/merge down

on layers3/copy/paste paper of choice/go to layer3
layer frame/invert/go to paper layer and delete/merge down

on thin rectangle/copy/paste paper of choice/go to thin rectangle
layer frame/invert/go to paper layer and delete/merge down

on thin rectangle1/copy/paste paper of choice/go to thin rectangle1
layer frame/invert/go to paper layer and delete/merge down

now add your main tube and place where you want it/add drop shadow 

now add any other element you wish to use to make your tag your own/add drop
shadow on each element/resize your tag if needed

add your watermark and copyright credits/give it a slight gradient glow
...now give your tag to a friend.

You're done...thank you for trying my tutorial
please send me a copy so that I can show case it on my blog

7/8/13

PTU Tyger Tibits and Ismael Rac

A Kiss a Day

This tutorial was written on July 8, 2013. 
Any similarities to another tutorial is purely coincidental.
All my tutorial are register with My Free Copyright. 
Please do not claim as your own.
This tutorial writer assumes you have a working 
knowledge of using Paint Shop Pro.
This tutorial was done in Paint Shop Pro9,
but can be adapted to use in other 
Paint Shop Pro versions.


SUPPLIES NEEDED

Tube of choice: I'm using the awesome work of Ismael Rac.
Please do not use unless you have a license to do so. 
You can get his tubes HERE

Scrapkit of Choice: I am using PTU Tyger Tibits - Ouch
You can purchase it HERE ...Thanks Tyger

Template of choice:I am using Milliespspmadness Template #101
You can download it HERE...Thanks Millie

Mask of Choice: I am using Weescotlass Creations mask# 11
You can download it HERE...Thanks Chell

Filters used:Eye Candy 4000 gradient glow - HERE

Font for Name and word art is Microsoft Tai Le
Copy write is always done in Pixelette  HERE

Dropshadow use through out H-2/V-2/O-50/B-5.00

Please leave a thank you when you downloading for supplies.


my tag is just a guide...please use your imagination 
and make the tag your own you do not have to 
use any of the supplies I used.


     LET'S BEGIN

Open up Template and ShiftD and close original...delete 
copyright layer/close all layers/copy/paste paper of choice
resize to fit canvas/layers/load/save mask/find your mask
and set with these setting/click ok/open background/effects
AAA Frame/foto frame with these settings


On the following raster layers follow these directions...

activate top rectangle layer/copy/paste paper of choice
resize paper/selections/invert on rectangle layer/delete
on paper layer/merge down/add drop shadow

activate bottom rectangle layer/copy/paste paper of choice
resize paper/selections/invert on rectangle layer/delete
on paper layer/merge down/add drop shadow

activate circle1 layer/copy/paste paper of choice/resize paper
selections/invert on circle1 layer/delete on paper layer/merge 
down/add drop shadow/copy paste element of choice/resize if 
needed/add drop shadow

activate large rounded square layer/copy/paste paper of choice
resize paper/selections/invert on rectangle layer/delete
on paper layer/merge down/add drop shadow

activate medium rounded square layer/copy/paste paper of choice
resize paper/selections/invert on rectangle layer/delete
on paper layer/merge down/add drop shadow

activate circle2 layer/copy/paste paper of choice/resize paper
selections/invert on circle2 layer/delete on paper layer/merge 
down/add drop shadow

activate circle3 layer/copy/paste paper of choice/resize paper
selections/invert on circle3 layer/delete on paper layer/merge 
down/keep activated/copy paste close up tube of choice/resize 
if needed/delete on tube layer/duplicate/on original/blend
soft light/put duplicate underneath original/add drop shadow
to bottom tube

copy/paste your tube of choice/resize if needed/place on your 
tag where it will look best/add drop shadow

add any other elements you wish to use/resize/add drop shadow 
to each element/place where they will look best

add your watermark and copyright credits/give it a slight 
gradient glow.....now give your tag to a friend.

You're done...thank you for trying my tutorial
please send me a copy so that I can show case it on my blog

6/6/13

PTU Amy Marie and Ismael Rac

Limited Edition

This tutorial was written on June 1,2013. 
Any similarities to another tutorial is purely coincidental.
All my tutorial are register with My Free Copyright. 
Please do not claim as your own.
This tutorial writer assumes you have a working 
knowledge of using Paint Shop Pro.
This tutorial was done in Paint Shop Pro9,
but can be adapted to use in other 
Paint Shop Pro versions.


SUPPLIES NEEDED

Animation Shop 3 or another animated program....HERE

Tube of choice: I'm using the awesome work of Ismael Rac.
Please do not use unless you have a license to do so. 
You can get his tubes HERE

Scrapkit of Choice: I am using PTU Amy Marie Red Hot
You can purchase it HERE ...Thanks Amy

Template of choice:I am using Divine Intentionz Template #381
You can download it HERE...Thanks Missy

Mask of Choice: I am using Insatiable Dreams mask #488
You can download it ... HERE...Thanks Cat

Animation of Choice: I am using Scrappy Bit of Fun animation #116
You can download .....HERE    Thank you Simone

Filters used:Eye Candy 4000 gradient glow - HERE
AAA Frame - Foto Frame....HERE

Font for Name is Respective 2.1
Copy write is always done in Pixelette  HERE

Drop shadow use through out H-2/V-2/O-50/B-5.00

Please leave a thank you when you downloading for supplies.

my tag is just a guide...please use your imagination 
and make the tag your own you do not have to 
use any of the supplies I used.

     LET'S BEGIN

Open up Template and ShiftD and close original...delete 
copyright layer/close all layers/copy/paste paper of choice
resize to fit canvas/layers/load/save mask/find your mask
and set with these setting/click ok/


on background layer
effect/AAA Frame/Foto Frame with these setting/click ok


On the following raster layers follow these directions...

recolor dotted line1 and dotted line2 red/activate rectangle 
layer/copy/paste paper of choice/resize paper/selections/invert 
on rectangle layer/delete on paper layer/merge down/add drop 
shadow

activate oval layer/copy/paste paper of choice/resize paper
selections/invert on oval layer/delete on paper layer/merge
down/keep activated/copy/paste tube of choice/resize/duplicate 
2x/overlap each tube/merge down/invert on oval layer/delete on 
tube layer/blend/screen/add drop shadow to tubes

activate circle layer/copy/paste paper of choice/resize paper
selections/invert on circle layer/delete on paper layer/merge
down/keep activated/copy/paste tube of choice/resize/place in 
middle of circle/invert on circle/delete on tube/add drop shadow
leave chrome circle as  is                                                                       

activate frame back1 layer/copy/paste paper of choice/resize paper
selections/invert on frame back1 layer/delete on paper layer/merge
down/add drop shadow/copy/paste element of choice/resize/add drop 
shadow/leave frame as is

activate frame back2 layer/copy/paste paper of choice/resize paper
selections/invert on frame back2 layer/delete on paper layer/merge
down/add drop shadow/copy/paste element of choice/resize/add drop 
shadow/leave frame as is

recolor word art to match tag/merge down on background and shadow
word art/delete all three star layers

copy/paste your tube of choice/resize if needed/place your tag
where it will look best/add drop shadow

add any other elements you wish to use/resize/add drop shadow to
each element/place where they will look best

add your watermark and copyright credits/give it a slight gradient 
glow ...now give your tag to a friend.

You're done...thank you for trying my tutorial
please send me a copy so that I can show case it on my blog


7/16/12

PTU SWA and Ismael Rac

Insane B*tch

This tutorial was written on July 16,2012.
Any similarities to another tutorial is purely coincidental.
All my tutorial are register with My Free Copyright.
Please do not claim as your own.
This tutorial writer assumes you have a working
knowledge of using Paint Shop Pro.
This tutorial was done in Paint Shop Pro9,
but can be adapted to use in other
Paint Shop Pro versions.


SUPPLIES NEEDED

Tube of choice: I'm using the awesome work of Ismael Rac.
Please do not use unless you have a license to do so.
You can get his tubes HERE

Scrapkit of Choice: I am using SWA PTU Scrap kit
named Bitch...You can download it HERE...Thank you Missy

Template of choice:I am using Rosey Template #115 from Tagstemplateandmore
You can download it HERE...Thank you Rosey

Mask of Choice: I am using Insatiable Dreams Mask #161
You can download it HERE....Thank you Cat

Filters used:Eye Candy 4000 gradient glow - HERE

Font for Name is Adelon -Medium
Copy write is always done in Pixelette
HERE

Drop shadow use through out H-2/V-2/O-50/B-5.00

Please leave a thank you when you downloading for supplies.


my tag is just a guide...please use your imagination
and make the tag your own you do not have to
use any of the supplies I used.


     LET'S BEGIN

Open up Template and ShiftD and close original...delete
copyright layer/close all layers/choose paper of choice
copy/paste and put underneath background layer/go to mask
of choice with these setting and click ok/delete background
layer/add drop shadow


On the following raster layers follow these directions...

activate background mask layer/change the color to match your
tube or your tag/add drop shadow/leave black rectangle as is

activate double rectangle layer/copy/paste paper of choice
go to double rectangle layer/ invert/go to paper layer and
delete/move paper layer to right an inch/merge down so it
looks like double backing/add drop shadow

activate lg rectangle layer/copy/paste paper of choice/go to
lg rectangle layer/ invert/go to paper layer and delete/add
drop shadow/copy/paste element of choice/add drop shadow

leave the following layers as is/thin rectangle/dotted line1
hyphen lines/and fat rectangles

activate left fat rectangle/copy/paste close up tube/resize to
fit/duplicate/on original/blend/screen/place duplicate underneath
and lower opacity to 70%/add drop shadow

activate right fat rectangle/copy/paste close up tube/resize to
fit/duplicate/on original/blend/hard light/place duplicate underneath
and lower opacity to 48%/add drop shadow

leave the following layers as is/thin rectangle2/dotted line2
dotted screens/change the color of your word art layers/add
drop shadow

add your main tube/resize if needed/place where it will look best
add drop shadow

now add any other element you wish to use to make your tag your
own/add drop shadow on each element/resize your tag

add your watermark and copyright credits/give it a slight gradient
glow ...now give your tag to a friend.

You're done...thank you for trying my tutorial
please send me a copy so that I can show case it on my blog
send to....riggsbee53@gmail.com


1/28/12

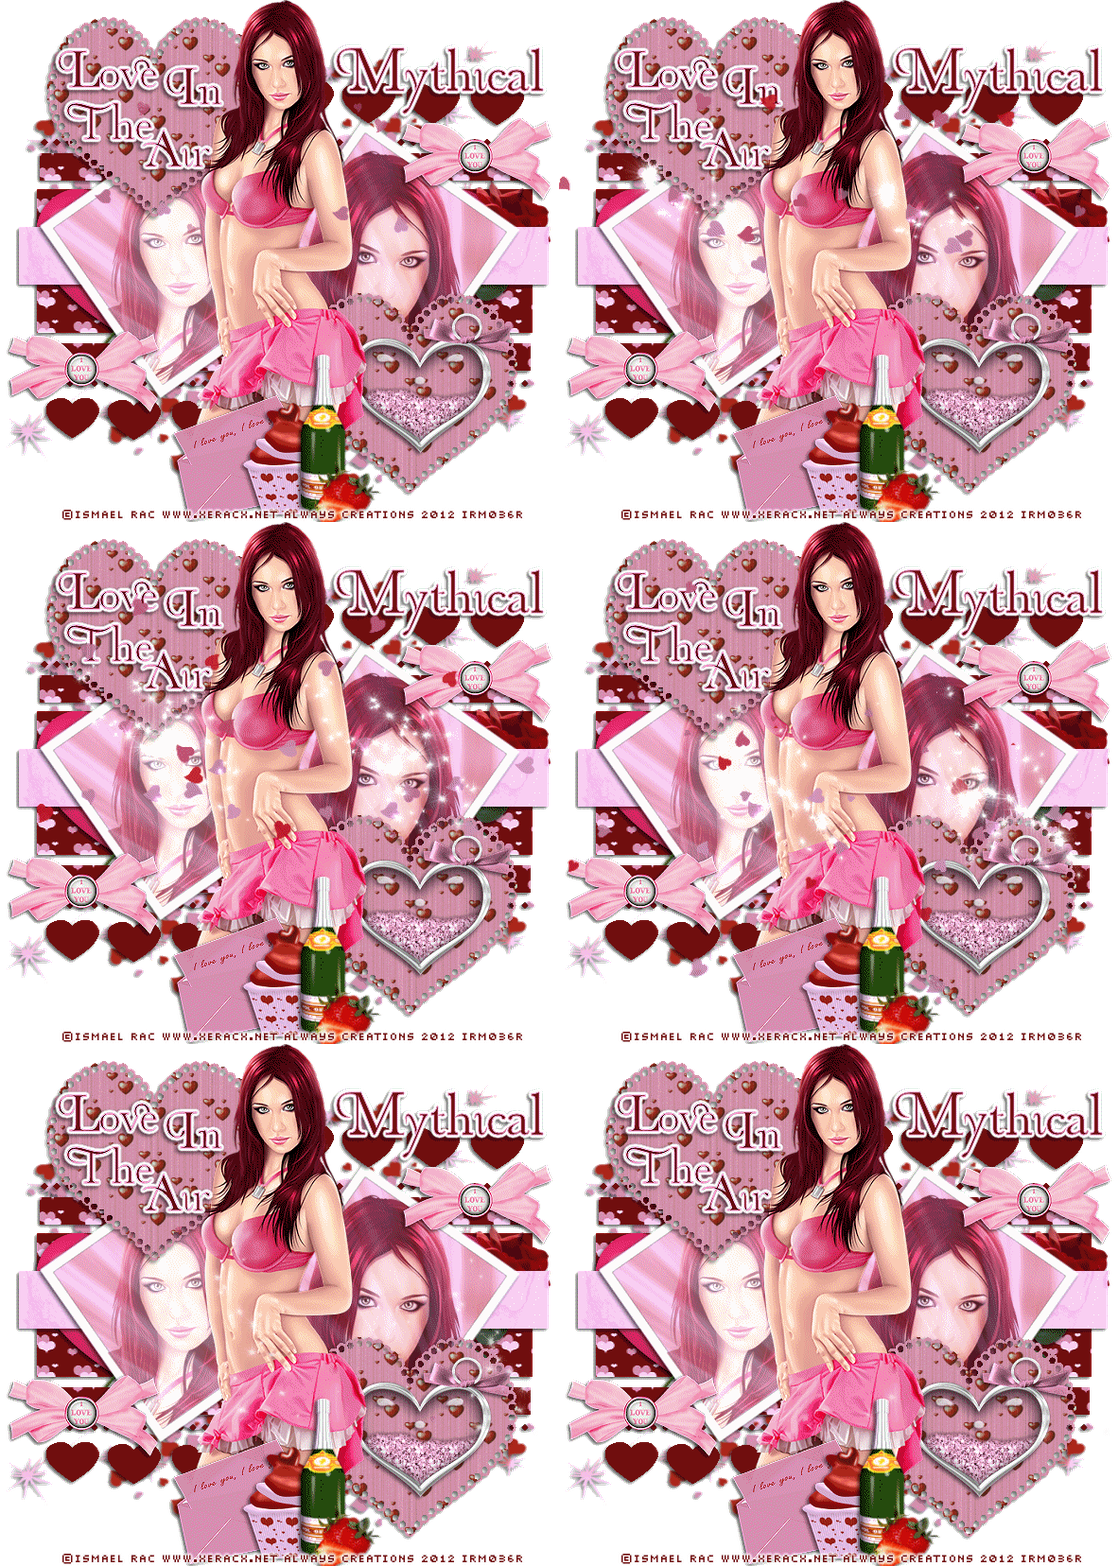
PTU Mythical Designs and Ismael Rac


This tutorial was written on January 28th 2012. 
Any similarities to another tutorial is purely coincidental.
All my tutorial are register with My Free Copyright. 
Please do not claim as your own.
This tutorial writer assumes you have a working 
knowledge of using Paint Shop Pro.
This tutorial was done in Paint Shop Pro9,
but can be adapted to use in other
Paint Shop Pro versions.


SUPPLIES NEEDED

Tube of choice: I'm using the awesome work of Ismael Rac.
I used one with a close up
Please do not use unless you have a license to do so.
You can get his tubes HERE

Scrapkit of Choice: I am using Mythical Designs
PTU Scrap kit called Love In The Air
You can purchase it HERE....Thank you Mythical

Mask of choice:I am using Yez mask #052 
You can download it HERE...
Thank you Yez

Template of Choice: I am using Kittz Kreationz-Template
You can download it HERE....Thank you Kittz

Animation Used: Scappy Bit Of Fun Sparkle Hearts- Ani 21 
You can download HERE...Thanks Simone

Filters used: Eye Candy 4000 gradient glow- Xero- Radiance..

Font for word art & name is Organic Elements 
and copy write is always done in Pixelette ...
Get them HERE

Drop shadow use through out H-2/V-2/O-65/B-6.00

Please leave a thank you when you downloading for supplies.


my tag is just a guide...please use your imagination and make the tag your own
you do not have to use any of the supplies I used.


     LET'S BEGIN

Open up Template and ShiftD and close original...delete copyright layer
resize template 691x652 for space to work/we will resize again at the end/
close all layers/choose paper of choice/copy/paste and put underneath
brush layer/go to mask of choice with these setting and click ok


Copy/paste element #23/resize and place on top of mask layer/add drop shadow

On the following raster layers follow these directions...

activate lg rectangle layer/copy/paste paper of choice/go to lg rectangle layer
invert/go to paper layer and delete/merge down/add drop shadow

copy/paste element#3 on top of lg rectangle layer/resize/add drop shadow/
duplicate 2x/space them beside one another/merge down to one layer

activate thin rectangle layer/copy/paste paper of choice/go to thin rectangle layer
invert/go to paper layer and delete/merge down/add drop shadow

activate rectangle 1 layer/copy/paste paper of choice/I used the same paper as the
lg rectangle/go to rectangle 1 layer/invert/go to paper layer and
delete/merge down/add drop shadow

activate rectangle 2 layer/copy/paste paper of choice/I used the same paper as the
lg rectangle/activate diamond line 1/select/float/defloat/choose color from kit/flood fill
diamond line/add drop shadow

activate diamond line 1/select/float/defloat/choose color from kit/flood fill
diamond line/add drop shadow

activate diamond line 2/select/float/defloat/choose color from kit/flood fill
diamond line/add drop shadow

activate square 1/with magic wand click inside square/copy/paste paper of choice
go to square 1 layer/invert/go to paper layer and delete/merge down/add drop shadow

copy/paste close up of your tube into the square 1/resize to fit/duplicate/close copy
layer/now go to blend/click screen/open copy layer and lower opacity to 42/put
screen layer on top of copy layer

activate square 2/with magic wand click inside square/copy/paste paper of choice
go to square 2 layer/invert/go to paper layer and delete/merge down/add drop shadow

copy/paste close up of your tube into the square 2/resize to fit/duplicate/close copy
layer/xero/radiance with these setting


now go to blend/click soft light/open copy
layer and lower opacity to 42/put soft light layer on top of copy layer

activate lg heart 1 layer/copy/paste paper of choice/go to lg heart 1 layer
invert/go to paper layer and delete/merge down/add drop shadow

activate lg heart 2 layer/copy/paste paper of choice/go to lg heart 2 layer
invert/go to paper layer and delete/merge down/add drop shadow

take magic wand and activate hearts1 layer/flood fill with color from kit/do
the same with hearts2 layer/deactivate and give drop shadow

now add the rest of your elements where you want them/make the tag your own
Have fun with it/make sure you add a drop shadow to each element.

choose your font and type Love In The Air and place on the top lg heart #2
see my tag for example/ add drop shadow

add your watermark and copyright credits/give it a slight gradient glow
...now give your tag to a friend.

Animation

Copy merge your tag and take to animation shop
open up Simone's animation
go to your tags and add the number of layers you need 
from the animation-you should have 53 layers
once that's done go to edit/select all/on your tag
now go to Simone's animation/edit /select all/copy
go to your tag and paste into selection
where you want the animation/Do this again
save as gif
You're done...thank you for trying my tutorial
please send me a copy so that I can show case it on my blog

10/12/11

PTU Broken Sky Designs and Ismael Rac

I'll Be Your Treat

This tutorial was written on October 11th 2011. 
Any similarities to another tutorial is purely coincidental.
All my tutorial are register with My Free Copyright.
Please do not claim as your own.
This tutorial writer assumes you have a 
working knowledge of using Paint Shop Pro.
This tutorial was done in Paint Shop Pro9,
but can be adapted to use in other
Paint Shop Pro versions.


SUPPLIES NEEDED

Tube of Choice: I am using the awesome artwork of Ismael Rac..You can purchase
 his tubes HERE...Please do not use without a license to do so

Template of Choice: I am using Scrappity Scrap and More Halloween Template #9
You can download it HERE....Thank you Mirella

Scrapkit of Choice: I am using Broken Sky Designz PTU Scrap kit called Trick or Treat
You can purchase it HERE....Thank you Tonya

Filters used:Penta.com - Jeans - Xero- Fritillary and Porcelaid-
Eye Candy 4000- Gradient Glow
Get them HERE

Font for word art and name is Parseltongue and copy write is always done in Pixelette ...
Get them HERE


Drop shadow use through out H-2/V-2/O-50/B-5.00

Please leave a thank you when you downloading for supplies.


my tag is just a guide...please use your imagination and make the tag your own
you do not have to use any of the supplies I used.


     LET'S BEGIN

Open up Template and Shift D and close original...delete copyright layer
close all layers except the background layer...the one we'll be working on
Choose paper of choice/paste underneath all layers.

On the following raster layers follow these directions...

activate large rectangle layer/copy/paste paper of choice/go to large rectangle layer
invert/go to paper layer and delete/merge down/add drop shadow

activate square layer/copy/paste paper of choice/go to square layer invert/
go to paper layer and delete/merge down/add drop shadow

activate half circle layer/copy/paste paper of choice/go to half circle layer invert/
go to paper layer and delete/merge down/add drop shadow

activate circle layer/copy/paste paper of choice/go to circle layer invert/
go to paper layer and delete/merge down/add drop shadow

activate small rectangle layer/copy/paste paper of choice/go to small rectangle layer
invert/go to paper layer and delete/merge down/add drop shadow

leave the following layers as is

Copy of vector1,2 and 3 and raster 9 and 10 and delete raster layer4

On square layer/copy/paste your close up tube on top/once placed take your freehand
selection tool and trace any part you do not want to show/on your tube layer go to
penta.com-jeans with these setting/click ok/add drop shadow
 

On circle layer/selection/float/defloat/invert layer/copy paste your smaller tube
position it where you want the part to show and then delete/remove any excess tube
go to xero- fritillary with these setting/click ok/now go to xero/porcelaid with
these setting/click ok/add drop shadow


copy/paste your main tube /position it where you want it/go to gradient glow with
these setting/click ok/ add drop shadow

now add the rest of your elements where you want them.make the tag your own.Have fun
with it/make sure you add a drop shadow to each element.

add your watermark and copyright credits...now give your tag to a friend.

You're done...thank you for trying my tutorial
please send me a copy so that I can show case it on my blog
riggsbee53@gmail.com

7/15/11

FTU Bel Vidotti Scraps and Ismael Rac

Who Dat Girl


This tutorial was written on July 13th 2011.
 Any similarities to another tutorial
is purely coincidental.
All my tutorial are register with My Free Copyright.
Please do not claim as your own.
This tutorial writer assumes you have a working knowledge of using
Paint Shop Pro.
This tutorial was done in Paint Shop Pro9, but can be adapted to use in other
Paint Shop Pro versions.


SUPPLIES NEEDED

Tube of Choice: I am using the awesome artwork of Ismael Rac..You can purchase
his tubes HERE...Please do not use without a license to do so

Scrapkit of Choice: I am using a FTU kit from Bel Vidotti Scraps called Alone
Her site is no longer available, please use another kit....Thank you Bel

Template of Choice: I am using AquaRebel315 Who Dat Girl.
You can download it HERE...Thank you again Aqua

Mask of Choice: I'm using one of AquaRebel315 #013...You can find it HERE
Put mask in mask folder..Thanks so much for the use of your mask Aqua

Filters used: Xero Fritillary,Screen work - Lace Screen
Font for name is Twilight New Moon and copy write is always done in Pixelette ...
Get them HERE

Dropshadow use througout H-2/V-2/O-50/B-5.00
Please leave a thank you when you downloading for supplies.


my tag is just a guide...please use your imagination and make the tag your own
you do not have to use any of the supplies I used.


LET'S BEGIN

Open Up template and duplicate. Close original and go to copy. Remove credit layer.
Close of all layers but the background layer...
Choose a paper of choice/copy/paste and resize to fit layer...now go to layers/load/
save mask/load mask from disk/ and find your mask of choice
...with these setting see photo below


....go to layers/merge group

activate 1st circle layer/copy/paste/resize paper of choice.go to circle layer
and invert, then go to paper layer and delete/keep activated
go to adjust/add-remove noise/add noise with these setting...Do this twice/deactivate


Do this twice/deactivate....add drop shadow

leave layer 2 as is...on layer 3/activate/ Choose a paper of choice/copy/paste and
resize to fit layer/ go to circle layer and invert, then go to paper layer and
delete/keep activated/go to effect screenworks/and click on lace screen/merge down

Keep activated/choose your close up tube and paste on top of layer 3/resize if need
or the way you want it and hit delete/go to Xero fritillery and apply these setting


deactivate.add drop shadow to tube.

leave layer4 and copy of layer4 as is.on layer5 and copy of layer5, repeat the same
process as you did with the circle layer...also repeat process of placing your closeup
tube where you want it.On the left tube I added screen blend mode and the right tube
I added blend mode lighten/add drop shadow to layer4 and copy layer4

On layer6 copy/paste paper of choice/go to rectangle layer and invert,then go to paper
layer and delete/merge down/add drop shadow.leave layers 7,8 and 9 as is..
I just moved them to suit my tag.

Now add whatever elements you want and add drop shadow to each one.
Add you main tube and give a drop shadow.

Add your water mark and copyright and give to a friend
thank you for trying my tutorial..please send me a copy of what you did
so I can showcase it...riggsbee53@gmail.com