6/29/13

PTU Amy Marie and Alex Prihodko

Blue Eyed Beauty

This tutorial was written on June 29,2013. 
Any similarities to another tutorial is purely coincidental.
All my tutorial are register with My Free Copyright. 
Please do not claim as your own.
This tutorial writer assumes you have a working 
knowledge of using Paint Shop Pro.
This tutorial was done in Paint Shop Pro9,
but can be adapted to use in other 
Paint Shop Pro versions.


SUPPLIES NEEDED

Tube of choice: I'm using the awesome work of Alex Prihodko.
Please do not use unless you have a license to do so. 
You can get is tubes HERE

Scrapkit of Choice: I am using PTU Amy Marie - Blue Eyed Beauty
You can purchase it HERE ...Thanks Amy

Template of choice:I am using ALGT Template #148
You can download it HERE...Thanks Leah

Mask of Choice: I am using Vix mask# 16
You can download it HERE...Thanks Vix

Filters used:Eye Candy 4000 gradient glow - HERE

Font for Name and word art is Blondi
Copy write is always done in Pixelette  HERE


Dropshadow use through out H-2/V-2/O-50/B-5.00

Please leave a thank you when you downloading for supplies.


my tag is just a guide...please use your imagination 
and make the tag your own you do not have to 
use any of the supplies I used.


     LET'S BEGIN

Open up Template and ShiftD and close original...delete 
copyright layer/close all layers/copy/paste paper of choice
resize to fit canvas/layers/load/save mask/find your mask
and set with these setting/click ok


On the following raster layers follow these directions..

activate left rectangle layer/copy/paste paper of choice
resize paper/selections/invert on left rectangle layer/delete
on paper layer/merge down/add drop shadow

activate right rectangle layer/copy/paste paper of choice
resize paper/selections/invert on right rectangle layer/delete
on paper layer/merge down/add drop shadow

activate circle layer/copy/paste paper of choice/resize paper
selections/invert on circle layer/delete on paper layer/merge 
down/add drop shadow

activate small circle 1 layer/copy/paste paper of choice/resize 
paper/selections/invert on small circle 1 layer/delete on paper 
layer/merge down/add drop shadow

activate small circle 2 layer/copy/paste paper of choice/resize 
paper/selections/invert on small circle 2 layer/delete on paper 
layer/merge down/add drop shadow

activate large rectangle layer/copy/paste paper of choice
resize paper/selections/invert on large rectangle layer/delete
on paper layer/merge down/add drop shadow

activate medium circle layer/copy/paste paper of choice/resize 
paper/selections/invert on medium circle layer/delete on paper 
layer/merge down/keep activated/copy/paste tube of choice
selections/invert on paper layer/delete on tube layer/delete excess
tube/add drop shadow

copy/paste your tube of choice/resize if needed/place on your 
tag where it will look best/add drop shadow

add any other elements you wish to use/resize/add drop shadow 
to each element/place where they will look best

make a word art for your tag using font of choice/add some elements
of choice/add drop shadow

add your watermark and copyright credits/give it a slight 
gradient glow.....now give your tag to a friend.

You're done...thank you for trying my tutorial
please send me a copy so that I can show case it on my blog

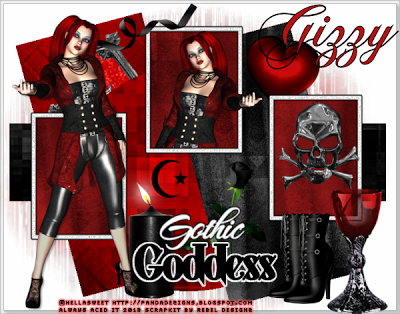
PTU Rebel Dezigns and Hellasweet

Goth Goddess

This tutorial was written on June 28,2013. 
Any similarities to another tutorial is purely coincidental.
All my tutorial are register with My Free Copyright. 
Please do not claim as your own.
This tutorial writer assumes you have a working 
knowledge of using Paint Shop Pro.
This tutorial was done in Paint Shop Pro9,
but can be adapted to use in other 
Paint Shop Pro versions.


SUPPLIES NEEDED

Tube of choice: I'm using the awesome work of Hellasweet.
Please do not use unless you have a license to do so. 
You can get is tubes HERE

Scrapkit of Choice: I am using PTU Rebel Dezigns - Goth Inspired
You can purchase it HERE ...Thanks Gizzy

Template of choice:I am using Kandi Kissez for Tagger Den Template #3
You can download it HERE...Thanks Kandi

Mask of Choice: I am using Weescotslass Creations mask #12
You can download it HERE...Thanks Chell

Filters used:Eye Candy 4000 gradient glow - HERE

Font for Name and word art is Chopin Script
Copy write is always done in Pixelette  HERE

Dropshadow use through out H-2/V-2/O-50/B-5.00

Please leave a thank you when you downloading for supplies.


my tag is just a guide...please use your imagination 
and make the tag your own you do not have to 
use any of the supplies I used.


     LET'S BEGIN

Open up Template and ShiftD and close original...delete 
copyright layer/close all layers/copy/paste paper of choice
resize to fit canvas/layers/load/save mask/find your mask
and set with these setting/click ok


On the following raster layers follow these directions...

activate red rectangle layer/copy/paste paper of choice/resize 
paper/selections/invert on red rectangle layer/delete on paper 
layer/merge down/add drop shadow

activate black dotted rectangle bottom layer/copy/paste paper of 
choice/resize paper/selections/invert on black dotted 
layer/delete on paper layer/merge down/add drop shadow

activate black circle layer/copy/paste paper of choice/resize paper
selections/invert on black circle layer/delete on paper layer/merge
down/add drop shadow

activate red ectangle1 layer/copy/paste paper of choice/resize paper
selections/invert on red rectangle1 layer/delete on paper layer/merge
down/add drop shadow

activate triple frame back layer/copy/paste paper of choice/resize 
paper/selections/invert on triple frame back layer/delete on paper 
layer/merge down/leave frames as is/add drop shadow

on middle frame back activate/copy/paste tube of choice/resize if 
nedded/selections/invert onframe back/delete on tube layer/add
drop shadow

leave word art back,word art and moon and star as is/ add drop shadow

copy/paste your tube of choice/resize if needed/place on your 
tag where it will look best/add drop shadow

add any other elements you wish to use/resize/add drop shadow 
to each element/place where they will look best

add your watermark and copyright credits/give it a slight 
gradient glow.....now give your tag to a friend.

You're done...thank you for trying my tutorial
please send me a copy so that I can show case it on my blog

PTU Rebel Designz and KT Byran

Sunkissed

This tutorial was written on June 28,2013. 
Any similarities to another tutorial is purely coincidental.
All my tutorial are register with My Free Copyright. 
Please do not claim as your own.
This tutorial writer assumes you have a working 
knowledge of using Paint Shop Pro.
This tutorial was done in Paint Shop Pro9,
but can be adapted to use in other 
Paint Shop Pro versions.


SUPPLIES NEEDED

Tube of choice: I'm using the awesome work of KT Bryan.
Please do not use unless you have a license to do so. 

Scrapkit of Choice: I am using PTU Rebel Dezigns - Tropical Vacation Collab
You can purchase it HERE ...Thanks Gizzy

Template of choice:I am using Toxic Desire Template #172
You can download it HERE...Thanks Kristin

Mask of Choice: I am using Weescotslass Creations mask #12
You can download it HERE...Thanks Chell

Filters used:Eye Candy 4000 gradient glow - HERE

Font for Name and word art is Pamela
Copy write is always done in Pixelette  HERE

Drop shadow use through out H-2/V-2/O-50/B-5.00

Please leave a thank you when you downloading for supplies.


my tag is just a guide...please use your imagination 
and make the tag your own you do not have to 
use any of the supplies I used.


     LET'S BEGIN

Open up Template and Shift D and close original...delete 
copyright layer/close all layers/copy/paste paper of choice
resize to fit canvas/layers/load/save mask/find your mask
and set with these setting/click ok


On the following raster layers follow these directions...

activate rectangle top layer/copy/paste paper of choice/resize 
paper/selections/invert on rectangle top layer/delete on paper 
layer/merge down/add drop shadow

activate rectangle bottom layer/copy/paste paper of choice/resize 
paper/selections/invert on rectangle bottom layer/delete on paper 
layer/merge down/add drop shadow

activate square top layer/copy/paste paper of choice/resize paper
selections/invert on square top layer/delete on paper layer/merge
down/add drop shadow

activate square bottom layer/copy/paste paper of choice/resize paper
selections/invert on square bottom layer/delete on paper layer/merge
down/add drop shadow

activate round rectangle top layer/copy/paste paper of choice/resize 
paper/selections/invert on round rectangle top layer/delete on paper 
layer/merge down/add drop shadow

activate round rectangle bottom layer/copy/paste paper of choice/resize 
paper/selections/invert on round rectangle bottom layer/delete on paper 
layer/merge down/add drop shadow

activate circle layer/copy/paste paper of choice/resize paper/selections
invert on circle layer/delete on paper layer/merge down/keep activated 
copy/paste close up tube/resize to fit circle/add drop shadow to circle

copy/paste your tube of choice/resize if needed/place on your 
tag where it will look best/add drop shadow

add any other elements you wish to use/resize/add drop shadow 
to each element/place where they will look best

add your watermark and copyright credits/give it a slight 
gradient glow.....now give your tag to a friend.

You're done...thank you for trying my tutorial
please send me a copy so that I can show case it on my blog

PTU Amy Marie and Steve Baier

Cherry Bomb

This tutorial was written on June 17,2013. 
Any similarities to another tutorial is purely coincidental.
All my tutorial are register with My Free Copyright. 
Please do not claim as your own.
This tutorial writer assumes you have a working 
knowledge of using Paint Shop Pro.
This tutorial was done in Paint Shop Pro9,
but can be adapted to use in other 
Paint Shop Pro versions.


SUPPLIES NEEDED

Tube of choice: I'm using the awesome work of Steve Baier.
Please do not use unless you have a license to do so. 
You can get his tubes HERE

Scrapkit of Choice: I am using PTU Amy Marie's - Ali
You can purchase it HERE ...Thanks Ali

Template of choice:I am using Tracy F.Designz Template #47
You can download it HERE...Thanks Tracy

Mask of Choice: I am using Weesscotlass Creations mask# 231
You can download it HERE...Thanks Chell

Filters used:Eye Candy 4000 gradient glow - HERE

Font for Name and word art is Santa's Sleigh
Copy write is always done in Pixelette  HERE


Drop shadow use through out H-2/V-2/O-50/B-5.00

Please leave a thank you when you downloading for supplies.


my tag is just a guide...please use your imagination 
and make the tag your own you do not have to 
use any of the supplies I used.


     LET'S BEGIN

Open up Template and Shift D and close original...delete 
copyright layer/close all layers/copy/paste paper of choice
resize to fit canvas/layers/load/save mask/find your mask
and set with these setting/click ok


On the following raster layers follow these directions...

activate circle layer/copy/paste paper of choice/resize paper
selections/invert on circle 1 layer/delete on paper layer/merge 
down/keep  activated/copy/paste close up tube of choice/resize 
to fit/selections/delete on tube layer/duplicate/on original
blend/hard light/place duplicate underneath original/add drop 
shadow to both tubes and circle

activate square 1 layer/copy/paste paper of choice/resize paper
selections/invert on square 1 layer/delete on paper layer/merge 
down/add drop shadow

activate square 2 layer/copy/paste paper of choice/resize paper
selections/invert on square 2 layer/delete on paper layer/merge 
down/keep activated/copy/paste close up tube of choice/resize 
to fit/selections/delete on tube layer/effects/xero/radiance
with these setting/click ok


activate square 3 layer/copy/paste paper of choice/resize paper
selections/invert on square 3 layer/delete on paper layer/merge 
down/copy/paste element of choice/resize/add drop shadow

activate square 4 layer/copy/paste paper of choice/resize  paper
selections/invert on square 4 layer/delete on paper layer/merge 
down/add drop shadow

copy/paste your tube of choice/resize if needed/place on your 
tag where it will look best/add drop shadow

add any other elements you wish to use/resize/add drop shadow 
to each element/place where they will look best

add your choice of word art/add drop shadow

add your watermark and copyright credits/give it a slight 
gradient glow.....now give your tag to a friend.

You're done...thank you for trying my tutorial
please send me a copy so that I can show case it on my blog

6/14/13

PTU Foxy Designz and Martin Abel

Sweet Sweet Candi

This tutorial was written on June 14,2013.
Any similarities to another tutorial is purely coincidental.
All my tutorial are register with My Free Copyright.
Please do not claim as your own.
This tutorial writer assumes you have a working
knowledge of using Paint Shop Pro.
This tutorial was done in Paint Shop Pro9,
but can be adapted to use in other
Paint Shop Pro versions.


SUPPLIES NEEDED

Tube of choice: I'm using the awesome work of Martin Abel.
Please do not use unless you have a license to do so.
You can get is tubes HERE

Scrapkit of Choice: I am using PTU Foxy Designz - Martin Abel IB 40-3
You can purchase it HERE ...Thanks Foxy

Template of choice:I am using Additive Pleasures Template #107
You can download it HERE...Thanks Tamie

Mask of Choice: I am using Weescottlass mask# 219
You can download it HERE...Thanks Chell

Filters used:Eye Candy 4000 gradient glow - HERE
AAA Frame: Foto Frame -HERE
Xero:Porcelaid -HERE

Font for Name is Impact
Copy write is always done in Pixelette HERE

Dropshadow use through out H-2/V-2/O-50/B-5.00

Please leave a thank you when you downloading for supplies.

my tag is just a guide...please use your imagination
and make the tag your own you do not have to
use any of the supplies I used.

LET'S BEGIN

Open up Template and ShiftD and close original...delete
copyright layer/close all layers/copy/paste paper of choice
resize to fit canvas/layers/load/save mask/find your mask
and set with these setting

click ok/open background/effects
AAA Frame/foto frame with these settings


On the following raster layers follow these directions...

activate large rectangle1 layer/copy/paste paper of choice/resize
paper/selections/invert on rectangle1 layer/delete on paper layer
merge down/copy paste frame of choice/resize to fit rectangle/add
drop shadow

activate large circle layer/copy/paste paper of choice/resize paper
selections/invert on circle layer/delete on paper layer/merge down
keep activated/copy/paste close up tube of choice/resize to fit
selections/delete on tube layer/effects/xero/porcelain with these settings


sclick ok/leave small rectangle as is/add drop shadow

activate small circle1 layer/copy/paste paper of choice/resize paper
selections/invert on circle1 layer/delete on paper layer/merge down
keep activated/copy/paste close up tube of choice/resize to fit
selections/delete on tube layer/duplicate tube/on original tube/blend
soft light/place duplicate underneath and lower opacity to 80%/add
drop shadow to both tubes/leave frame as is/add drop shadow

activate large rectangle2 layer/copy/paste paper of choice/resize
paper/selections/invert on rectangle layer/delete on paper layer
merge down/copy paste frame of choice/resize to fit rectangle/add
drop shadow/copy/paste elements of choice/resize/add drop shadow to
each

activate small circle2 layer/copy/paste paper of choice/resize paper
selections/invert on circle2 layer/delete on paper layer/merge down
leave frame as is/add drop shadow

copy/paste your tube of choice/resize if needed/place on your tag where
it will look best/add drop shadow

add any other elements you wish to use/resize/add drop shadow to each
element/place where they will look best

on word art layers change colors to match your tag/on shadows leave as is
add drop shadow to each

add your watermark and copyright credits/give it a slight gradient glow.....
now give your tag to a friend.

You're done...thank you for trying my tutorial
please send me a copy so that I can show case it on my blog


PTU Foxy's Designz and Jennifer Janesko

Whisper Secrets

This tutorial was written on June 9,2013.
Any similarities to another tutorial is purely coincidental.
All my tutorial are register with My Free Copyright.
Please do not claim as your own.
This tutorial writer assumes you have a working
knowledge of using Paint Shop Pro.
This tutorial was done in Paint Shop Pro9,
but can be adapted to use in other
Paint Shop Pro versions.


SUPPLIES NEEDED

Tube of choice: I'm using the awesome work of Jennifer Janesko.
Please do not use unless you have a license to do so.
You can get is tubes HERE

Scrapkit of Choice: I am using PTU Foxy Designz - Jennifer Janesko IB
You can purchase it HERE ...Thanks Foxy

Filters used:Eye Candy 4000 gradient glow - HERE

Font for Name and word art is Majesty
Copy write is always done in Pixelette HERE

Dropshadow use through out H-2/V-2/O-50/B-5.00

Please leave a thank you when you downloading for supplies.

my tag is just a guide...please use your imagination
and make the tag your own you do not have to
use any of the supplies I used.

LET'S BEGIN

Open up new raster layer 831x315/floodfill with white/effects
AAA Frame/foto frame with these settings


copy/paste rose petals element 18/resize/preset tool/elipse/with
these setting


draw out a circle/convert to raster/place in middle
selections/select all/float/unfloat/copy/paste paper of choice
resize/selections/invert on circle layer/delete on paper layer
delete circle/duplicate 2x/overlap circles (see mytag)

copy/paste/element 7/resize/rotate/20 left/place on left circle
duplicate/mirror/place on right circle/add drop shadow to both

copy/paste element 1/resize/ place on top of element on left circle
duplicate/mirror/place on top of element on right circle/add drop
shadow to both

preset tool/elipse with these setting

draw dotted circle/convert to
raster layer/place on top of middle circle

preset tool/rectangle with these setting/draw square 240x240/covert
to raster layer/draw another square 175x175/convert to raster layer
on the large square/floodfill with a color from one of the papers

on the small square/floodfill with the same color/rotate left by 15%
duplicate/mirror/do this twice so you'll have two on the left and
two on the right (see my tag for placement)

going back to the large square/selections/select all/copy/paste tube
of choice/resize so just her face is within the square/selections
invert on square/delete on tube/now make a frame for the square/preset
shape/rectangle/with these settings/convert to raster layer/make frames
also for the four small squares/add drop shadow to the frames/and tube

copy/paste your tube of choice/resize if needed/place on your tag where
it will look best/add drop shadow

add any other elements you wish to use/resize/add drop shadow to each
element/place where they will look best

add the word art "whispers secrets"/add a fat gradient glow/add drop shadow
for the second word art I copied the first four lines from paper #6/use a
dark color from paper and the font is Majesty/add a slight gradient glow 2x
add drop shadow

add your watermark and copyright credits/give it a slight gradient glow.....
now give your tag to a friend.


Avatar

the avatar for facebook is lightly larger than a forum avatar/open new raster
layer 180x175/copy/paster paper ofchoice/resize to fit/copy/paste tube of
choice/resize to fit/make a frame for your avatar like directions from previous
square/add copy/right and name

You're done...thank you for trying my tutorial/please send me a copy so that
I can show case it on my blog/send to.... riggsbee53@gmail.com

6/9/13

PTU Rebel Dezigns and Pinuptoons

Purple Passion

This tutorial was written on June 8,2013. 
Any similarities to another tutorial is purely coincidental.
All my tutorial are register with My Free Copyright. 
Please do not claim as your own.
This tutorial writer assumes you have a working 
knowledge of using Paint Shop Pro.
This tutorial was done in Paint Shop Pro9,
but can be adapted to use in other 
Paint Shop Pro versions.


SUPPLIES NEEDED

Animation Shop 3...You can get it HERE

Tube of choice: I'm using the awesome work of Pinuptoons.
Please do not use unless you have a license to do so. 
You can get is tubes HERE

Scrapkit of Choice: I am using PTU Rebel Dezigns - Purple Passion
You can purchase it HERE ...Thanks Gizzy

Template of choice:I am using Tracy F. Designz Template #60
You can download it HERE...Thanks Tracy

Mask of Choice: I am using Dees'Sign Depot mask# 11
You can download it Here...Thanks Dee

Animation of Choice: I am using Scrappy Bit of Fun animation #418
You can download ...HERE....Thank you Simone

Filters used:Eye Candy 4000 gradient glow - HERE
AAA Frame - Foto Frame - HERE
Xero- Porcelain - HERE

Font for Name and word art is Neurpol
Copy write is always done in Pixelette  HERE


Drop shadow use through out H-2/V-2/O-50/B-5.00

Please leave a thank you when you downloading for supplies.


my tag is just a guide...please use your imagination 
and make the tag your own you do not have to 
use any of the supplies I used.


     LET'S BEGIN

Open up Template and ShiftD and close original...delete 
copyright layer/close all layers/copy/paste paper of choice
resize to fit canvas/layers/load/save mask/find your mask
and set with these setting/click ok


open background/effects
AAA Frame/foto frame with these settings


On the following raster layers follow these directions...

glittered circle as is/activate circle 1 layer/copy/paste paper 
of choice/resize paper/selections/invert on circle 1 layer/delete
on paper layer/merge down/keep  activated/copy/paste close up 
tube of choice/resize to fit/selections/delete on tube layer
duplicate/on original/blend/hard light/place duplicate underneath 
original/add drop shadow to both tubes and circle 1

glittered circle as is/activate circle 2 layer/copy/paste paper 
of choice/resize paper/selections/invert on circle 2 layer/delete
on paper layer/merge down/keep  activated/copy/paste close up 
tube of choice/resize to fit/selections/delete on tube layer
effects/xero/porcelain with these setting/click ok


glittered rectangle layer as is/activate rectangle layer/copy/paste 
paper of choice/resize paper/selections/invert on rectangle layer
delete on paper layer/merge down/add drop shadow/resize/both glittered
rectangle and rectangle

resize doodle and recolor to match tag/duplicate/mirror and flip/add
drop shadow

copy/paste your tube of choice/resize if needed/place on your 
tag where it will look best/add drop shadow

add any other elements you wish to use/resize/add drop shadow 
to each element/place where they will look best

add your watermark and copyright credits/give it a slight 
gradient glow.....

To animate

close all layers except glittered circle 1/circle 1/glittered circle 2
circle2/background/copyright and name/copy/merge paste into animation 
shop/duplicate for a total of 21 frames

open your animation.edit/select all/copy/paste into selected frame 8x
inside both circles

now go back to psp and close those layers that are open/open layers 
that are close/copy/merge/paste into animation shop/duplicate for
a total of 21 frame/edit/select all/copy into selected frame/make
sure you line up the tube to the circle/check animation/if satisfied
save as gif.....now give your tag to a friend.

You're done...thank you for trying my tutorial
please send me a copy so that I can show case it on my blog


PTU Amy Marie and Very Many

The Wonder of You

This tutorial was written on June 7,2013. 
Any similarities to another tutorial is purely coincidental.
All my tutorial are register with My Free Copyright. 
Please do not claim as your own.
This tutorial writer assumes you have a working 
knowledge of using Paint Shop Pro.
This tutorial was done in Paint Shop Pro9,
but can be adapted to use in other 
Paint Shop Pro versions.


SUPPLIES NEEDED

Tube of choice: I'm using the awesome work of Very Many.
Please do not use unless you have a license to do so. 
You can get her tubes HERE

Scrapkit of Choice: I am using PTU Amy Marie - Just Peachy
You can purchase it HERE ...Thanks Amy

Template of choice:I am using Additive Pleasures Template #92
You can download it HERE...Thanks Tamie

Mask of Choice: I am using Dazzled by Beth-Ann mask #4 from 
Creative Misfits...You can download it HERE...Thanks Beth-Ann

Filters used:Eye Candy 4000 gradient glow - HERE

Font for Name and word art is Kingthings Petrock
Copy write is always done in Pixelette  HERE


Dropshadow use through out H-2/V-2/O-50/B-5.00

Please leave a thank you when you downloading for supplies.

my tag is just a guide...please use your imagination 
and make the tag your own you do not have to 
use any of the supplies I used.

     LET'S BEGIN

Open up Template and ShiftD and close original...delete 
copyright layer/close all layers/copy/paste paper of choice
resize to fit canvas/layers/load/save mask/find your mask
and set with these setting/click ok/delete background


On the following raster layers follow these directions...

activate large rectangle layer/copy/paste paper of choice
resize paper/selections/invert on large rectangle layer
delete on paper layer/merge down/keep  activated/copy/paste 
close up tube of choice/resize to fit/selections/delete on 
tube layer/duplicate/on original/blend/hard light/place 
duplicate underneath original/add drop shadowto both tubes 
and rectangle

leave thin rectangle and fat rectangle as is/copy/paste 
elements of choice/resize/place at top/add drop shadow to 
rectangles and elements

activate medium square layer/copy/paste paper of choice
resize paper/selections/invert on medium square layer/delete 
on paperlayer/merge down/copy/paste element of choice/resize
place near top/add drop shadow

activate small circle layer/copy/paste paper of choice
resize paper/selections/invert on small circle layer/delete 
on paper layer/merge down/keep activated/copy/paste tube of 
choice/resize so face is showing/duplicate/on original layer
blend/screen/place duplicate underneath the original layer
add drop shadow to both tubes and circle

activate rounded rectangle1 layer/copy/paste paper of choice
resize paper/selections/invert on rounded rectangle1 layer
delete on paper layer/merge down/add drop shadow

activate rounded rectangle2 layer/copy/paste paper of choice
resize paper/selections/invert on rounded rectangle2 layer
delete on paper layer/merge down/add drop shadow/copy paste 
element of choice/resize/add drop shadow

copy/paste your tube of choice/resize if needed/place on your 
tag where it will look best/add drop shadow

add any other elements you wish to use/resize/add drop shadow 
to each element/place where they will look best

choose a word art from the kit/copy/paste and add drop shadow
the word art I wanted to use didn't go with my tag so I wrote 
it out myself using a font and added drop shadow

add your watermark and copyright credits/give it a slight 
gradient glow.....now give your tag to a friend.

You're done...thank you for trying my tutorial
please send me a copy so that I can show case it on my blog

PTU Amy Marie and Barbara Jensen

Hot to Trot

This tutorial was written on June 7,2013. 
Any similarities to another tutorial is purely coincidental.
All my tutorial are register with My Free Copyright. 
Please do not claim as your own.
This tutorial writer assumes you have a working 
knowledge of using Paint Shop Pro.
This tutorial was done in Paint Shop Pro9,
but can be adapted to use in other 
Paint Shop Pro versions.


SUPPLIES NEEDED
Animation Shop 3...You can get it HERE

Tube of choice: I'm using the awesome work of Barbara Jensen.
Please do not use unless you have a license to do so. 
You can get her tubes HERE

Scrapkit of Choice: I am using PTU Amy Marie - Hot Mama
You can purchase it HERE ...Thanks Amy

Template of choice:I am using Kandi Kisses Template #36
You can download it HERE...Thanks Kandi

Mask of Choice: I am using Insatiable Dreams mask #59
You can download it HERE...Thanks Cat

Animation of Choice: I am using Scrappy Bit of Fun Animation #245
and #246.....You can download HERE...Thanks Simone

Filters used:Eye Candy 4000 gradient glow - HERE
AAA Frame- Foto Frame - HERE

Font for Name is Italian Cursive 16th century
Copy write is always done in Pixelette  HERE


Dropshadow use through out H-2/V-2/O-50/B-5.00

Please leave a thank you when you downloading for supplies.


my tag is just a guide...please use your imagination 
and make the tag your own you do not have to 
use any of the supplies I used.


     LET'S BEGIN

Open up Template and ShiftD and close original...delete 
copyright layer/close all layers/copy/paste paper of choice
resize to fit canvas/layers/load/save mask/find your mask
and set with these setting/click ok


open background/effects
AAA Frame/foto frame with these settings/click ok


On the following raster layers follow these directions...

activate pink circle layer/copy/paste paper of choice/resize
paper/selections/invert on pink circle layer/delete on paper
layer/merge down/add drop shadow/copy/paste element of choice
resize to fit/add drop shadow

activate lg blk rectangle layer/copy/paste paper of choice/resize
paper/selections/invert on lg blk rectangle layer/delete on paper
layer/merge down/add drop shadow/copy/paste element of choice
resize/place near top/add drop shadow

activate lg blk long rectangle layer/copy/paste paper of choice
resize paper/selections/invert on lg blk long rectangle layer/delete 
on paperlayer/merge down/copy/paste element of choice/resize if 
needed/place near top of square/add drop shadow

recolor pink strip red/leave white strip as is/recolor pink stars
red/add drop shadow to all

activate angled pink square layer/copy/paste paper of choice/resize
paper/selections/invert on angled pink square circle layer/delete on 
paper layer/merge down/add drop shadow/copy/paste element of choice
resize/add drop shadow

activate left black square layer/copy/paste paper of choice/resize
paper/selections/invert on left black square layer/delete on paper 
layer/merge down/add drop shadow/leave frame as is/add drop shadow 

activate right black square layer/copy/paste paper of choice/resize
paper/selections/invert on right black square layer/delete on paper 
layer/merge down/add drop shadow/copy/paste element of choice/resize
add drop shadow to element/leave frame as is/add drop shadow 

activate center black square layer/copy/paste paper of choice/resize
paper/selections/invert on center black square layer/delete on paper
layer/merge down/add drop shadow/keep activated/copy/paste closeup
tube of choice/resize to fit/delete on tube layer/duplicate/on
orignal tube/blend/screen/place duplicate tube underneath/add drop \
shadow to both tubes/leave frame as is/add drop shadow

copy/paste your tube of choice/resize if needed/place on your tag
where it will look best/add drop shadow

activate long center back/copy/paste paper of choice/resize/selections
invert on long center back layer/delete on paper layer/keep frame as
is/keep word artas is/resize all three to fit your tag if needed

add any other elements you wish to use/resize/add drop shadow to
each element/place where they will look best

add your watermark and copyright credits/give it a slight 
gradient glow 

to animate

close the following layers/center black square/frame/both tubes/bike/
handcuffs/long center layer/frame/wordart/boots/heart and main tube
copy/merge/paste remaining tag into animation shop

locate both animations that you will be using/resize both animations
by 100/duplicate your tag 5x/then 3x for 21 frames/on your smaller
animation 245/edit/select all/copy in selected frame/place over wine
glass

on the next animation 246/edit select all/copy into selected frame/4x
in both small squares/ and below small squares

now go back to your tag and close what you just paste/and open remaining
layers that you previously closed/copy/merge/paste as a new layer in
animation shop/duplicate this tag until you have 21 frames/edit/select
all/copy into selected frame/make sure you place it just right/use the 
heart as a guide/once done/view animation/if satisfied/save as gif
now give your tag to a friend.

You're done...thank you for trying my tutorial
please send me a copy so that I can show case it on my blog