12/8/10

PTU Hungry Hills and Celine


Deck The Halls


This tutorial was written on November 22nd 2010. Any similarities to another tutorial is purely coincidental.
All my tutorial are register with My Free Copyright. Please do not claim as your own.
This tutorial writer assumes you have a working knowledge of using Paint Shop Pro.
This tutorial was done in Paint Shop Pro9,but can be adapted to use in other
Paint Shop Pro versions.


SUPPLIES NEEDED

Tube of Choice: I am using the awesome artwork of Celine..This was a free Christmas Gift from MPT...You can purchase her tubes HERE
Please do not use without a license to do so

Scrapkit or colors of your choice...I'm using Sarah Hungry Hills PTU Deck The Halls
you can get it HERE...thank you Sarah

Mask of Choice: I'm using one of WSL #118...You can find it HERE
Put mask in mask folder..Thanks so much for the use of your mask Chelle


Template of Choice: I am using one of Denz Designz-Template165..
you can get it HERE...Thanks Denny

Font for name is Chase Callas SH and copy write is always done in Pixelette ... Get them HERE


Drop shadow use througout H-2/V-2/O-50/B-5.00


Please leave a thank you when you downloading for supplies.

     LET'S BEGIN

Open up Template and ShiftD and close original...delete copyright layer
close all layers except the background layer...the one we'll be working on

Choose a paper of choice(I chose paper #3)/copy/paste...now go to layers/Load/
save mask/load mask from disk/ and find your mask of choice...with these setting
see photo below....


go to layers/merge group/resize by 80%

activate each layer separately with these directions below

selection/modify/expand by 1 choose a paper/
copy and paste as a new layer/resize/click on each layer and invert...then
go back to the paper layer and click delete...merge down. add drop shadow to all layers

Open up your close up tube of choice...resize your tube and place on the square left
now sharpen if needed and add drop shadow
now add any other elements of your choosing...make your tag your own, you don't
have to make it like mine...it is only a guide...don't forget to add drop shadow on
all elements.

once finish adding elements...add you main tube...don't forget to add drop shadow

Add your copyright and watermark..and give to a friend

You're done!!!
Thanks for trying my tutorial
If you use send me a copy so I can show case it...thanks

11/8/10

PTU Hungry Hill and Michelle Lynch

Sexy Devil

I've been away for a while dealing with Real Life Issues...
Some are resolved and some are not,but I
needed to get my stress level down 
so I'm back in the swing of things....I have several new tutorial that
I will be posting soon...So with that said here is the first.

Sexy Devil


This tutorial was written on August 23rd 2010.
Any similarities to another tutorial is purely coincidental.
All my tutorial are register with My Free Copyright. Please do not claim as your own.
This tutorial writer assumes you have a working knowledge of using Paint Shop Pro.
This tutorial was done in Paint Shop Pro9,but can be adapted to use in other
Paint Shop Pro versions.


SUPPLIES NEEDED

Tube of Choice: I am using the awesome artwork of Michele Lynch..
You can purchase her tubes HERE
Please do not use without a license to do so

Scrapkit or colors of your choice,I'm using Sarah's 

PTU Kit Ghoulie Ghoul from Hungry Hill Scraps
you can get it HERE...thank you Sarah

Mask of Choice: I'm using one of Vix's # 393...You can find it HERE
Put mask in mask folder..Thanks so much for the use of your mask Vix

Template of Choice: I am using one of Scrapity Scraps & More Halloween #6..you can get it HERE...Thanks

Font for name is Blood Cyrillic and copy write is always done in Pixelette ... Get them HERE


Drop shadow use throughout H--2/V-2/O-50/B-5.00

Please leave a thank you when  downloading for supplies.

     LET'S BEGIN
(Before we begin you can either resize each layer by 90% twice before you start or
after you finish....it's up to you)

Open up Template and ShiftD and close original...delete copyright layer
close all layers except the background layer...the one we'll be working on

Choose a paper of choice(I choose paper #10)/copy/paste...now go to layers/Load/
save mask/load mask from disk/ and find your mask of choice...with these setting
see photo below....go to layers/merge group


activate circle layer/resize by 90%-2x/selection/modify/expand by 1 choose a paper/
copy and paste as a new layer/resize/click on circle layer and invert...then
go back to the paper layer and click delete...merge down.

activate dotted circle and resize 90%-2x/leave dotted circle as is...add drop shadow.

activate circle layer2/resize by 90%-2x/selection/modify/expand by 1 choose a paper/
copy and paste as a new layer/resize/click on circle layer and invert...then
go back to the paper layer and click delete...merge down. add drop shadow.

activate lg rectangle layer/resize by 90%-2x/selection/modify/expand by 1 choose a paper/
copy and paste as a new layer/resize/click on rectangle layer and invert...then
go back to the paper layer and click delete...merge down.

activate sm rectangle layer/resize by 90%-2x/selection/modify/expand by 1 choose a paper/
copy and paste as a new layer/resize/click on rectangle layer and invert...then
go back to the paper layer and click delete...merge down..add drop shadow.

activate lg rectangle frame/resize by 90%-2x and leave as is...add drop shadow.

merge down the 3 squares/resize by 90%-2x/selection/modify/expand by 1 choose a paper/
copy and paste as a new layer/resize/click on square layer and invert...then
go back to the paper layer and click delete...merge down. add drop shadow.

Open up your tube of choice. resize your tube and place at the end of the lg rectangle
now sharpen if needed and add drop shadow...now add any other elements of your choosing from the kit
make your tag your own, you don't have to make it like mine...it is only a guide
...don't forget to add a drop shadow on all elements.

Add your copyright and watermark..and give to a friend

You're done!!!
Thanks for trying my tutorial
If you use send me a copy so I can show case it...thanks

CU Credit

blood splatter from 

8/26/10

I'll be off line for a while

Just want to let everyone know that I'll be off line for a while.
I don't know how long it will be or when I'll be back...
Having a hard time right now with REAL LIFE ISSUES
LIFE can be a real B*tch...and you need to roll with the punches
But right now I  can't  seem to cope and I need to get myself together
if I can......

8/24/10

PTU Creative Crazy Scraps and Cane Hoyer

I'll Bleed Your Heart Dry

This tutorial was written on August 24th 2010. 
Any similarities to another tutorial is purely coincidental.
All my tutorial are register with My Free Copyright. Please do not claim as your own.
This tutorial writer assumes you have a working knowledge of using Paint Shop Pro.
This tutorial was done in Paint Shop Pro9,but can be adapted to use in other
Paint Shop Pro versions.


SUPPLIES NEEDED

Tube of Choice: I am using the awesome artwork of Cane Hoyer..
You can purchase his tubes HERE
Please do not use without a license to do so

Scrapkit or colors of your choice,I'm using PTU Bleeding Love by Creative Crazy Scraps
you can get it HERE...thank you Stu

Mask of Choice: I'm using one of Insatiable Dreams#373 ...You can find it HERE
Put mask in mask folder..Thanks so much for the use of your mask Cat

Template of Choice: I am using a template from Designz by Ali-#159
you can get it HERE...Hurry Ali will be leaving the digital world soon....Thanks Ali

Font for name is dreamscar and copy write is always done in Pixelette ... Get them HERE

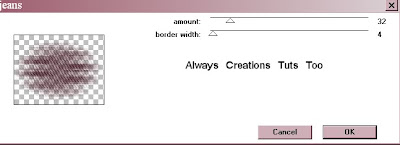
Filter Penta.com-jeans...Please Google for it

Drop shadow use throughout H-2/V-2/O-50/B-5.00

Please leave a thank you when you downloading for supplies.

     LET'S BEGIN

Open up Template and ShiftD and close original...delete copyright layer
close all layers except the background layer...the one we'll be working on

Choose a paper of choice(I chose paper #3)/copy/paste below background...now go to
layers/Load/save mask/load mask from disk/ and find your mask of choice...with
these setting-see photo below....


go to layers/merge group/resize by 75%

resize all layers by 75%...these instructions will be for all layers.
open each layer in concession from the bottom up and name your layers so you don't
get confused...dash/dotted/rectangle/square/frame/circles1/circles2...in that order

activate layer/selection/float/defloat/invert/copy/paste paper of choice
resize paper to fit/delete paper layer/merge down/add drop shadow.

activate your rectangle layer/selections/float/defloat...copy/paste your close up
tube and resize to fit/give a drop shadow/lower opacity to 60%
go to penta.com/jeans with these setting and apply.


depending on what scrap kit you use...now add some elements to your tag to make
it your own...(my tag is just a guide)...once you add your elements/add your
main tube/resize/add drop shadow...I added the word art that came with the kit
resize and place where you like it to be/take your crop tool and crop away all
excess that you don't want.

Add your copyright and watermark..and give to a friend

You're done!!!
Thanks for trying my tutorial
If you use send me a copy so I can show case it...thanks

8/23/10

PTU Broken Sky Designs and Steve Baier

Sirens of the Night

This tutorial was written on August 23rd 2010. Any similarities to another
tutorial is purely coincidental.
All my tutorial are register with My Free Copyright. Please do not claim as your own.
This tutorial writer assumes you have a working knowledge of using Paint Shop Pro.
This tutorial was done in Paint Shop Pro9,but can be adapted to use in other
Paint Shop Pro versions.


SUPPLIES NEEDED

Tube of Choice: I am using the awesome artwork of Steve Baier..You can purchase his tubes HERE
Please do not use without a license to do so

Scrapkit or colors of your choice,I'm using PTU Siren of The Night by Broken Sky Designs
you can get it HERE...thank you Tonya

Mask of Choice: I'm using one of Insatiable Dreams #444...You can find it HERE
Put mask in mask folder..Thanks so much for the use of your mask Cat

Template of Choice: I am using one of Ali from DesignzbyAli-Template2..you need to grab it quick cuz Ali is leaving the tagging world soon...We will miss you Ali, you are a great designer

you can get it HERE...Thanks Ali

Font for name is Organic Elements and copy write is always done in Pixelette ... Get them HERE


Drop shadow use throughout H-2/V-2/O-50/B-5.00

Please leave a thank you when you downloading for supplies.

     LET'S BEGIN

Open up Template and ShiftD and close original...delete copyright layer
close all layers except the background layer...the one we'll be working on

Choose a paper of choice(I chose paper #3)/copy/paste...now go to layers/Load/
save mask/load mask from disk/ and find your mask of choice...with these setting
see photo below....


go to layers/merge group/resize by 80%

activate rectangle1/resize by 85%/selection/modify/expand by 1 choose a paper/
copy and paste as a new layer/resize/click on rectangle layer and invert...then
go back to the paper layer and click delete...merge down. add drop shadow.

activate rectangle2/resize by 85%/selection/modify/expand by 1 choose a paper/
copy and paste as a new layer/resize/click on rectangle layer and invert...then
go back to the paper layer and click delete...merge down. add drop shadow.

activate rectangle3/resize by 85%/selection/modify/expand by 1 choose a paper/
copy and paste as a new layer/resize/click on rectangle layer and invert...then
go back to the paper layer and click delete...merge down. add drop shadow.

activate rectangle4/resize by 85%/selection/modify/expand by 1 choose a paper/
copy and paste as a new layer/resize/click on rectangle layer and invert...then
go back to the paper layer and click delete...merge down. add drop shadow.

activate rectangle5/resize by 85%/selection/modify/expand by 1 choose a paper/
copy and paste as a new layer/resize/click on rectangle layer and invert...then
go back to the paper layer and click delete...merge down. add drop shadow.

activate rectangle6/resize by 85%/selection/modify/expand by 1 choose a paper/
copy and paste as a new layer/resize/click on rectangle layer and invert...then
go back to the paper layer and click delete...merge down. add drop shadow.

activate rectangle7/resize by 85%/selection/modify/expand by 1 choose a paper/
copy and paste as a new layer/resize/click on rectangle layer and invert...then
go back to the paper layer and click delete...merge down. add drop shadow.

Open up your tube of choice (I used two of Steve Baier). resize your tube and place
at either end of rectangle 4 and rectangle 7/now sharpen if needed and add drop
shadow...now add any other elements of your choosing...make your tag your own, you don't
have to make it like mine...it is only a guide...don't forget to add drop shadow on
all elements.

Add your copyright and watermark..and give to a friend

You're done!!!
Thanks for trying my tutorial
If you use send me a copy so I can show case it...thanks

8/19/10

FTU Misfit Scraps and Elias Chatzoudis

Sugar Rush

This tutorial was written on August 17th 2010. Any similarities to another tutorial is purely coincidental. All my tutorial are register with My Free Copyright. Please do not claim as your own.
This tutorial writer assumes you have a working knowledge of using Paint Shop Pro.
This tutorial was done in Paint Shop Pro9,but can be adapted to use in other
Paint Shop Pro versions.


SUPPLIES NEEDED

Tube of Choice: I am using the awesome artwork of Elias Chatzoudis..You can purchase his tubes HERE. Please do not use without a license to do so.

Scrapkit or colors of your choice, I'm using Missy FTU Scrap Kit High On Candy..From Misfits Scraps you can get it HERE thank you Missy

Mask of Choice: I'm using one of Cindy from Chichi Designz ..You can find it HERE

Template of Choice: I am using one of Chichi Designz #4..you can get it HERE...Thanks Cindy

Font for name is PhattPheddy and copy write is always done in Pixelette ... Get them HERE

Filters use is Eye Candy4000-Gradient Glow..HERE
Penta.com jeans-Please goggle for this

Drop shadow use throughout H-2/V-2/O-50/B-5.00

Please leave a thank you when you downloading for supplies.

     LET'S BEGIN

Open up Template and ShiftD and close original...delete copyright layer
close all layers except the background layer...the one we'll be working on

Now I did my background separate because in order to add borders you need to fatten
all layers, and I wanted my layers to remain in case I needed to change something.

So now on your template background layer choose a color, mine was #ffe716/floor fill
with that color and then copy/pastes as a new layer...now go to image/add borders
click yes when prompt... first border color is ee488c with these setting
 

the next color is ffe716 with these setting/and last color is ee488c with the
same setting....


once that's done, activate your first border(the dark one)...go to adjust
add/remove noise/add noise with these setting.


Do this with both dark borders.
Now copy and paste back on template/make sure it's at the bottom and resize it so
you can see the borders

ok I re-sized all layers by 80%...make sure you add a drop shadow on each layer except
oval and wrap layers

Choose a paper of choice(I chose paper #4)/copy/paste...make sure mask is minimize
in psp...now go to layers/new mask
from image/create mask from /source luminance/click ok
 ... now go to layers/merge/merge group.

leave the wrap layer as is..go to wrap back layer and activate/choose another paper/copy/
paste/resize go to wrap layer/selection/invert...paper layer/delete.
now go to your oval back and repeat the same process you did with the wrap back.

activate your oval layer and take your tube and copy/paste as a new layer...place it
where you want it and then go to oval layer/selection invert ...now go back to tube layer
and delete.. now go to filter jeans with these setting and apply


put your tube layer underneath your pixie word layer.

go to your sugar rush layer and activate..pick two colors for your gradient..I used cf81a1
and ffe716 (angle-55/repeat-0/invert checked) and flood fill your sugar rush word art/
go to adjust/add/remove noise/add noise with the same setting as before...you will also do
the same thing with your name.
Now add your main tube/resize and place where you want it. Now let's have some fun and add
your elements.choose which ever you like to make it your own.

add your copyright/watermark and name..now don't forget to jazz up your name with some noise
then go to gradient glow with these setting 


and give it a dark pink glow.


You're done!!!
Thanks for trying my tutorial
If you use send me a copy so I can show case it...thanks

8/6/10

PTU Tyger Tibits and Elias Chatzoudis

Goth Babe

This tutorial was written on Aug 5th 2010.Here's another tutorial using a Tyger Tibits
PTU Scrap Kit.Any similarities to another tutorial is purely coincidental.
All my tutorial are register with My Free Copyright. Please do not claim as your own.
This tutorial writer assumes you have a working knowledge of using Paint Shop Pro.
This tutorial was done in Paint Shop Pro9,but can be adapted to use in other
Paint Shop Pro versions.


SUPPLIES NEEDED

Tube of Choice: I am using the awesome artwork of Elias Chatzoudis..one with a closeup.
You can go here to check out his artwork HERE..Please make sure you have a license to use.

Template of Choice:Sara's-Sinful Creations #8...you can get it HERE

Scrapkit or colors of your choice, I'm using OH My Goth[cyber edition] PTU kit from Tyger Tidbits
you can purchase it HERE....thank you Tyger

Mask of Choice: I'm using Designs by Vaybs #131 ..You can find it HERE
Put mask in mask folder..Thanks so much for the use of your mask Vaybs

Font for name is  and copy write is always done in Pixelette ... Get them HERE

Effect-Toadies -where are you....Get It HERE

Drop shadow use throughout H-1/V-1/O-50/B-5.00

Please leave a thank you when you downloading for supplies.
 
     LET'S BEGIN

Open up the template shift/D and close original template.Close all layers and add new layer.

Choose a paper of choice/copy/paste...now go to layers/Load/
save mask/load mask from disk/ and find your mask of choice...with these setting
see photo below....go to layers/merge group


open up the each layer and resize by 85% and then close each layer.

activate the first rectangle/Choose a paper of choice/copy/paste/resize....go to rectangle layer
and invert/ now go back to paper layer and delete.....

do this with each layer choosing a different paper for each layer.

now open up your tube and choose the closeup tube and copy/paste /resize to fit the square layer
add a drop shadow..duplicate closeup/go to layer and choose luminance legacy...now for a twist
I use an effect on the closeup...the choice is yours.I used toadies-where are you

now add some elements to your tag/resize/ you don't have to choose the ones I did...
make your tag your own...once that's done add a drop shadow to each element...
Add your main tube/resize and add a drop shadow.
add your copyright and watermark and give to a friend

You're done!!!
Thanks for trying my tutorial
If you use send me a copy so I can show case it...thanks

No Scrap Tutorial - Ismael Rac

Shaking My Hips


Here's another tutorial I wrote.This is a very simple tutorial,although it's animated

it's really easy. Any similarities to another tutorial is purely coincidental.

All my tutorial are register with My Free Copyright. Please do not claim as your own.
This tutorial writer assumes you have a working knowledge of using Paint Shop Pro.
This tutorial was done in Paint Shop Pro9,but can be adapted to use in other
Paint Shop Pro versions.


SUPPLIES NEEDED

Tube of Choice: I am using the awesome artwork of Ismael Rac..

You can purchase his tubes HERE
Please do not use without a license to do so

Scrapkit or colors of your choice...I chose to do colors.

Mask of Choice: I'm using one of Weescotslass template WSL#189..You can find it HERE
Put mask in mask folder..Thanks so much for the use of your mask

Template of Choice: I am using Blissfully Beth template#84..you can get it HERE...Thanks Beth

Font for name is Poor Richard,Rockwell and copy write is always done in Pixelette ... Get them HERE

Effects use dbs flux-bright noise.....Get it HERE

Dropshadow use througout H-2/V-2/O-50/B-6.72

Please leave a thank you when you downloading for supplies.


     LET'S BEGIN

Open up Template and ShiftD and close original...delete copyright layer
close all layers except the background layer...the one we'll be working on

Choose a color or paper of choice/copy/paste...now go to layers/Load/
save mask/load mask from disk/ and find your mask of choice...with these setting
see photo below....go to layers/merge group


now make circle layer active/ choose paper or color of choice and do each circle a different color

now active frame2 background/magic wand/mode[shift]/match mode[RGB Value]/Tolerance [55]
Contiguous[checked]/Feather[0]/anti-alias[checked]/click Inside
and duplicate 2x....rename each layer bkg frame 1,2 and 3
close off top two layers and choose a color for the bkg frame 1
go to dbs flux with these setting...see photo below...


click ok
now deactivate 1st layer and go to 2nd layers/choose different color/go to dbs flux and hit ok 2x
now deactivate 2nd layer and go to 3rd layer/choose different color/go to dbs flux and hit ok 3x
deactivate layers 2 and 3 for the time being...leave 1st layer open.

go to frame2/magic wand/same setting as above...click inside/flood-filled with color black.


Now repeat process from frame1 background as above,rename these layers bkgr 4,5and 6
using three different colors than frame2/color each layer and do the dbs flux
repeat process for frame1...close layers 5 and 6 and leave layer4 open

now place your tube where you want it and duplicate 2x. close top tube and on the middle
tube/mirror it /move to the left side a little...close this layer and on the bottom tube
move it over a little to the right.(see my tag for reference)
close the top two layers of the tube

add saying of choice or use the saying I have..I did it in Rockwell
add your copyright and watermark and your done

Now it time to animate......


If you have your board set up right you should have this


Copy merge and paste into animation shop
go back to paint shop pro and activate layers
fra2bkgr2/fra1bkgr5 and tube 2/copy merge and paste
into animation shop after first layer
go back to paint shop pro and activate
fra2bkgr3/fra2bkgr6 and tube3/copy merge and paste
into animation shop after 2nd layer
edit select all frames/animation/frame properties/set to 30
save as gif at these setting


You're done!!!...Save as Gif
Thanks for trying my tutorial
If you use send me a copy so I can show case it...thanks

FTU Always Creations and David Boller - Paint My World

Paint My World

Here's another tutorial I wrote.This is great for a beginner.
Any similarities to another tutorial is purely coincidental.All my tutorial are register
with My Free Copyright. Please do not claim as your own.This tutorial writer assumes you
have a working knowledge of using Paint Shop Pro. This tutorial was done in Paint Shop Pro9,
but can be adapted to use in other Paint Shop Pro versions.


SUPPLIES NEEDED

Tube of Choice: I am using the awesome artwork of David Boller..

You can purchase his tubes HERE
Please do not use without a license to do so

Template of Choice: I'm using Missy template#105..You can find it HERE
Thanks Missy for the use of your work.

Mask of Choice: I am using Babes Designs Mask#15..you can get it HERE...Thanks Babe

Scrap kit is one of my FTU Kits Called Rapsody In Blue..

you can find it HERE.....please do not
share, direct them to my site....thanks

Wordart from Wench Designs..you can get it HERE...thanks Vella

Font for name is Saginaw and copyright is always done in Pixelette ... Get them HERE

Drop shadow use throughout H-2/V-2/O-50/B-6.72


     LET'S BEGIN

Open up Template and ShiftD and close original...delete copyright layer
close all layers except the background layer...the one we'll be working on

Go to layers/new raster layer/click ok.Flood fill this layer with color from
your tube. I chose 5261a3...

Go to layers/load/save mask/load mask from disk...find your mask and set it with
these setting....


layers/merge group

Activate square 1/click on magic wand...mode-add/match-RGB value/Tolerance 10
contigous checked/feather 0/anti-alias checked/inside

Choose a paper from the kit...I chose 9. copy/paste on top of square 1 with this
paper...click on square1/selection/invert..now go to paper layer and delete/layers
merge/merge down...add a drop shadow

Activate square 2 and repeat the same process as square 1 choosing another paper
from the kit...I chose 12

actvate square 3 and repeat the same process as square 2 choosing another color
from your tube...I chose 8.

Open your word art and copy/paste on top of square3...place it so that the tube
doesn't cover it/I cut and pasted the bottom part so it would be closer to the
top part...add drop shadow

For the thin rectangles I resized and mirror/ chose a color from the tube and
flood filled and put the credits on it.

Now comes the fun part...add whatever elements you wish to add...don't forget to
 add drop shadow as you go along.

add your copyright and watermark and your done

Thanks for trying my tutorial
If you use send me a copy so I can show case it...thanks

7/21/10

PTU Tyger Tibits and David Desbois - Shut Up and Drive

Shut Up and Drive

This tutorial was written on July 20th 2010.This is a really simply to do tutorial.
Any similarities to another tutorial is purely coincidental.
All my tutorial are register with My Free Copyright. Please do not claim as your own.
This tutorial writer assumes you have a working knowledge of using Paint Shop Pro.
This tutorial was done in Paint Shop Pro9, but can be adapted to use in other
Paint Shop Pro versions.


SUPPLIES NEEDED

Tube of Choice: I am using the awesome artwork of David Deb..
You can go here to check out his artwork HERE..Please make sure you have permission to use.


Scrapkit or colors of your choice, I'm using Shut Up and Drive PTU kit from Tyger Tidbits
you can get it HERE....thank you Tyger

Mask of Choice: I'm using Vix #100 ..You can find it HERE
Put mask in mask folder..Thanks so much for the use of your mask Vix

Font for name is Ajile and copy write is always done in Pixelette ... Get them HERE

Drop shadow use throughout H-1/V-1/O-50/B-5.00

Please leave a thank you when you downloading for supplies.

     LET'S BEGIN

Open up a new raster layer 700x700 transparency

Choose a paper of choice/copy/paste...now go to layers/Load/
save mask/load mask from disk/ and find your mask of choice...with these setting
see photo below....go to layers/merge group

open up the highway and copy/paste as a new layer/take your raster deform tool and strecth
out to the size you want/ now give it a drop shadow.

open up the yellow race car and shift/d to get a new layer. I added a few elements to the car,
but you don't have too...once you finish adding elements merge your layer and copy/paste to the
canvas we're working on...place it at the end of the road.

now find the tube you want to use..I chose Alice..open up the frame and adjust the frame
around the tube... now open up a paper of choice for the back ground of the frame.
make frame active and copy/paste paper as a new layer...go to frame layer/selections/invert
and go to paper layer and delete...add a drop shadow to the frame.

now add some elements to your tag/ add a drop shadow to each element...
once that's done place your framed picture behind the car.
You can add some word art or not..it's up to you.
I added a call box from preset shapes and added the words that 
Alice said to Edward when she
took Bella to protect her from the hunter

add your copyright and watermark and give to a friend

You're done!!!
Thanks for trying my tutorial
If you use send me a copy so I can show case it...thanks

7/20/10

CT Call For The North Wing Asylum


You must be able to write a new tutorial at least once a month using a kit from our store.
You may choose from any designer in the store, but preferably you will work with all designers and not favor just one!
You must be Copyright Compliant.
You must agree NEVER to share our PTU kits with others.
You shall provide links and tags to our Gallery Leader for display!
All tutorials will be checked by the CT leader before being added!

You must agree to display the store blinkie on your blog or tut site
All tutorials will be displayed in our gallery and in our CT blog

7/17/10

FTU Queen Brat Designs and Ismael Rac - Attitude

Attitude

This tutorial was written on July 17, 2010.Any similarities to 
another tutorial is purely coincidental.
All my tutorial are register with My Free Copyright. Please do not claim as your own.
This tutorial writer assumes you have a working knowledge of using Paint Shop Pro.
This tutorial was done in Paint Shop Pro9,but can be adapted to use in other
Paint Shop Pro versions.


SUPPLIES NEEDED

Tube of Choice: I am using the awesome artwork of Ismael Rac ..You can purchase his tubes HERE
Please do not use without a license to do so

Scrapkit or colors of your choice, I'm using Queen Brat Designs..It's A Girl Thing. you can get it HERE....thank you Queen

Template of Choice: I am using one of Missy & Rachael color template#3..you can get it HERE...Thanks ladies

Font for name is Papyrus and copy write is always done in Pixelette ... Get them HERE

Effects DBS - Linear Transmission...it's a free filter, you can get it HERE

Drop shadow use throughout H-2/V-2/O-50/B-5.00

Please leave a thank you when you downloading for supplies.

     LET'S BEGIN

Open up Template and ShiftD and close original...delete copyright layer
delete the background layer

activate the large glitter circle layer/select the pink side only/copy/paste paper of choice
while circle layer is active go to selection/invert...then go to paper layer and delete
selections none/layers/merge/merge down...now go to adjust/add/remove noise/add noise
with these setting -insert photo.

duplicate large glitter circle and go to effect dbs linear transmission with these setting


now move it over to the left just a bit...and place underneath original glitter layer
I left the large circle as is..you can change it if you so desire...add a drop
shadow to the top glitter circle.

recolor the top of your frame back so that it matches your tag. leave the white frame as is.
now activate your frame back /copy/paste a close up tube of your choosing.go to selection
invert/ then go to tube layer and delete.color your dotted line to match your tag.

now activate your rectangle layer/cop/paste paper of choice.while still on the rectangle
layer go to selections/invert then go back to paper layer and hit delete. add drop shadow
change the color of pink rectangle to match your tag...leave black rectangle as is.

now we're going to do the small circle the same way we did the large glitter circle. activae
circle/cop/paste paper of choice...go back to circle layer and selection invert/got to paper
layer and hit delete....remember to resize all paper so there are no shadows showing when you
saved your tag...layers/merge/merge down...duplicate small circle layer and on the copy layer
go to dbs linear transmission with the same setting as before...put the copy layer underneath
the small circle layer...add drop shadow to the original small circle layer.

leave the glittered circle layer as is and on the small circle layer change the color to match
your tag...on the word art I also change the color on the two letters.now you can add your
main tube and place it where it looks best to you....don't forget to give it and your elements
a drop shadow...add any elements you wish your tag to have to make it your own.
add your copyright and watermark..and give your friend a tag.

You're done!!!
Thanks for trying my tutorial
If you use send me a copy so I can show case it...thanks
FTU Dark Yarrow and Robert Alvarado - Feeling Funky

Feeling Funky

This tutorial was written July 16, 2010. Any similarities to another tutorial is purely coincidental.
All my tutorial are register with My Free Copyright. Please do not claim as your own.
This tutorial writer assumes you have a working knowledge of using Paint Shop Pro.
This tutorial was done in Paint Shop Pro9,but can be adapted to use in other
Paint Shop Pro versions.


SUPPLIES NEEDED

Tube of Choice: I am using the awesome artwork of Robert Alvarado..
You can purchase his tubes HERE
Please do not use without a license to do so

Scrapkit or colors of your choice, I'm using Dark Yarrow FTU kit Sweet. you can get it HERE
thank you Yarrow

Mask and Template of Choice: Vix has a goodie bag with mask,templates and word art...both the
mask and template came from Vix-Mask-GBso902 and template GB05...thanks Vix

Get It HERE

Font for name is Poor Richard and copy write is always done in Pixelette ... Get them HERE

Drop shadow use througout H-2/V-2/O-50/B-6.72

Please leave a thank you when you downloading for supplies.

     LET'S BEGIN

Open up Template and ShiftD and close original...delete copyright layer
close all layers except the background layer...the one we'll be working on

load your mask into PSP/Choose a paper of choice/copy/paste...now go to layers/new mask layers/
from image/source window/ and find your mask of choice/create mask from source luminance
click ok....go to layers/merge group

now make circle layer active/selection/modify/smooth with these setting(see photo below)
choose paper of choice/ now resize to fit cirlce go to selection/invert
and click ok/go to paper layer and delete/layers/merge/merge down
keep actvated...copy/paste the close up tube and arrange to your liking.
while still on the circle layer go to selections invert/ then go to tube layer and delete
de-activate/add drop shadow.


now we're going to activate the top left layer/ I left this one the color it was
activate the top right layer/use smooth process/copy/paste paper of choice
while still on the top right layer go to selections invert/ then go to paper layer and delete
layers/merge/merge down/add drop shadow

go to the bottom left and bottom right layer and repeat the same process as you did with the
previous layer...give each layer a drop shadow

now come the great part....it's time to decorate...you can either follow my tag or you can use
whatever element you chose to use. I used the flower,two bows,butterfly and bee
make sure you add a drop shadow to each element...I used H-1/V-1/H40/B-5.00

add your main tube and place where you think it will look best...give a drop shadow
add your copyright and water mark
if you're adding a name go to text tool and find your font. once you type the name
go to Eyecandy4000- Gradient Glow with these setting...see below


You're done!!!
Thanks for trying my tutorial
If you use send me a copy so I can show case it...thanks

7/16/10

PTU Hungry Hill and Susanne Woolcott

This tutorial was written on July 15,2010.
Any similarities to another tutorial is purely coincidental.

All my tutorial are register with My Free Copyright.
Please do not claim as your own.

This tutorial writer assumes you have a working knowledge
of using Paint Shop Pro and Animation Shop

This tutorial was done in Paint Shop Pro9,but can be adapted 
to use in other Paint Shop Pro versions.


                                                                  SUPPLIES NEEDED

                     Tube of Choice: I am using the awesome artwork of Suzanne Woolcott..
You can purchase her tubes HERE 
  Please do not use without a license to do so


Scrapkit or colors of your choice, I'm using Sarah Hungry Hill Puddles PTU kit. 
No longer available  ... thank you Sarah


Mask of Choice: I'm using one of Sunf from Urban Fairytales # 20..You can find it HERE

Put mask in mask folder..Thanks so much for the use of your mask


Template of Choice: I am using one of Sara's from Sinful Pleasures #20..you can get it HERE...Thanks Sara

Font for name is Papyrus and copy write is always done in Pixelette ... Get them HERE

Effects Sqirlz Water Reflections...it's a free filter, you can get it HERE

Drop shadow use throughout H-2/V-2/O-50/B-6.72

Please leave a thank you when you downloading for supplies.


     LET'S BEGIN


Open up Template and ShiftD and close original...delete copyright layer
close all layers except the background layer...the one we'll be working on

Choose a paper of choice(I chose paper #4)/copy/paste...now go to layers/Load/
save mask/load mask from disk/ and find your mask of choice...with these setting
see photo below....go to layers/merge group/resize by 80%


Puddles


now make circle layer active/selection/modify/smooth with these setting(see photo below)
choose paper of choice(I chose paper #6) now resize to 
fit circle go to selection/invert and click ok/go to paper layer and delete/layers
merge/merge down/keep activated...copy/paste the word art on top of circle layer
while still on the circle layer go to selections invert/ then go to word art layer and delete
de-activate/add drop shadow.


now we're going to activate the rectangle layer and copy/paste your paper of choice
while still on the rectangle layer go to selections invert/ then go to paper layer and delete
layers/merge/merge down/add drop shadow

go to the rectangle2 and rectangle3 layer and repeat the same process as you did with the
previous layer...do the same with ribbon1 and ribbon2
make sure you resize all your layers by 80% after each copy/paste

now come the great part....it's time to decorate...you can either follow my tag or you can use
whatever element you chose to use. I used the water,ducks,tree,cloud w/ sun and tag
make sure you add a drop shadow to each element...I used H-1/V-1/H40/B-5.00

To animate or not is up to you..the filter is very easy to follow,but I will try to explain it.

ok because I wanted the water puddle to be animated and have it rain too...I used the
Sqirlz Water Reflections filter...first you need to close off your three ducks if you're
using them. Copy merge your tag and paste as a new layer...now save this tag as a jpg.
Now open up the filter and go to open and find your tag.Once the tag comes up, go to
reflect option/customize rain/snow with these setting

number of raindrops/snowflakes-1967
Length-70   brightness-255    softness-100
Depth of field-10    width-2    speed 0.4
transparency-50   direction variation-0   direction-213

now click on the Y picture and click on rain/snow/ripple combination
next click on the red ring and draw a line around the water area
once that's done click on the animation...if satisfied click on the gif
button and save as a gif...once your tag is saved go back to PSP and
close all layers except the ducks...copy merge/paste as a new layer
remove all the excess surrounding area and copy/paste to animation shop
once in animation shop find your tag that your saved(make sure it's the gif tag)
this tag has 20 frames so you need to duplicate the ducks to 20 frames
copy and paste the ducks into the tag on top of the water...once satisfied
with your animation save as gif.

You're done!!!
Thanks for trying my tutorial
If you use send me a copy so I can show case it...thanks
riggsbee53@gmail.com

7/14/10

PTU Hungry Hill and Pinuptoons - Coffee Date

Coffee Date


I am now a CT for Sarah Hungry Hill 
I've just finish doing a tutorial called Coffee Date.
from the scrap kit of the same name. 
It's a beautiful kit full of beautiful papers and elements.
So this tutorial is the results.

This tutorial was written on July 14 2010. 
Any similarities to another tutorial is purely coincidental.
All my tutorial are register with My Free Copyright. Please do not claim as your own.
This tutorial writer assumes you have a working knowledge of using Paint Shop Pro.
This tutorial was done in Paint Shop Pro9,but can be adapted to use in other
Paint Shop Pro versions.


SUPPLIES NEEDED


Tube of Choice: I am using the awesome artwork of Pinuptoons..
 You can purchase his tubes at CDO HERE
Please do not use without a license to do so

Scrapkit of choice: I am using Sarah Hungry Hill PUT kit Coffee Date.
Sorry but this kit is no longer available...
please use another one....Thanks Sarah

Mask of Choice: I'm using mask #31 from Butterfly Nutterby Creations..
You can find it HERE
Put mask in mask folder..Thanks Butter

Template of Choice: I am using Creation by Sanie template#17..
you can get it HERE...Thanks Sanie

Word art by me you can download HERE

Font for name is Poor Richard and copy write is always done in Pixelette ... Get them HERE

Effects use gradient glow (eye candy 4000) get it HERE

Drop shadow use throughout H-2/V-2/O-50/B-6.72

Please leave a thank you when you downloading for supplies.

     LET'S BEGIN

Open up Template and ShiftD and close original...delete copyright layer
close all layers except the background layer...the one we'll be working on

Choose a paper of choice( I chose paper#12 )/copy/paste...now go to layers/Load/
save mask/load mask from disk/ and find your mask of choice...with these setting
see photo below....go to layers/merge group


now make circle layer active/go to selections/modify/smooth with these setting
see photo below/click ok/choose a paper of choice ( I chose paper 10 )/copy/paste and resize to fit
circle layer...go to selection invert/go back to paper layer and hit delete/layers/merge/merge down.
deactivate/add drop shadow.


now active rectangle layer/repeat smooth process/choose a paper of choice
 ( I chose paper 10 )/copy/
paste and resize to fit rectangle layer...go to selection invert/go back to paper layer and hit delete
layers/merge/merge down/de-activate. Activate frame layer and either use a paper of choice or color
(I chose #523100)repeat smooth process/flood fill frame with color/add drop shadow.

repeat the same process (noted above) with the second rectangle as you did with the first one.
Also repeat for the second frame too, don't forget to add drop shadow to frame.

now go back to your first rectangle layer and activate/copy and paste your tube of choice/position
the tube where just part of it is showing on the left side of the frame/go to selections/invert/delete
add drop shadow.

now for the square,square1 and square2 we are going to repeat the copy/paste paper process (see above)
Once that is done , we'll going to color the three frames for the squares. I used #a2793e..add dop shadow

Now comes the fun part. decorate you tag to your liking using the elements from the scrap kit.
I chose the table,chair,candle cup of java,teddy bear,both coffee jars.(see my tag for reference)
add a light shadow to these elements H-0/V-0/O-40/B-5...
now add your tube to the right side and give it the original drop shadow.

Add the word art and on the word Wanna/highlight it and go to Eye candy4 gradient 
glow with these setting
Basic-glow width 3.00/soft corners 25/overall opacity 100
Color-color #a2793e opacity 100 and apply to the word.

Add your copyright and watermark and gift to a friend!!!!


You're done!!!
Thanks for trying my tutorial
If you use send me a copy so I can show case it...thanks

2/16/10

Hot Kisses

Here's another tutorial I wrote.This is a very simple but elegant tutorial.
Any similarities to another tutorial is purely coincidental.All my tutorial are register
with My Free Copyright. Please do not claim as your own.This tutorial writer assumes you
have a working knowledge of using Paint Shop Pro. This tutorial was done in Paint Shop Pro9,
but can be adapted to use in other Paint Shop Pro versions.


SUPPLIES NEEDED

Tube of Choice: I am using the awesome artwork of Joe Cano..You can purchase his tubes HERE
Please do not use without a license to do so
Scrap kit of Choice: I'm using one of my own called Hot Kisses...you can download HERE
Template of Choice: I'm using one of Missy templates#160..You can find it HERE
Please do not share with other,direct them to her site...Thanks Missy
Mask of Choice: I am using mask WSL207 ..you can get it HERE...Thanks Chelle
Font for name is Copper Penny dtp and copy write is always done in Pixelette ... Get them HERE
Drop shadow use throughout H-2/V-2/O-50/B-6.72
Filter used Alien Skin Eye Candy5-Nature- Fire get it HERE


     LET'S BEGIN

Open up Template and ShiftD and close original...delete copyright layer
close all layers except the background layer...the one we'll be working on

Choose a paper from the kit/copy and paste paper n top of background layer/resize to fit layer/
Go to layers/Load/save mask/load mask from disk/ and find your mask of choice...with these setting: create mask from source luminance..../orientation: fit to layer.../Options: Hide all masks/load /Layers/merge/merge group.

Now open up thin rectangle layer/activate the layer /choose paper of choice/copy paste paper/go to rectangle
layer and invert/go to paper layer and delete.
Repeat process with the second thin rectangle and the square layer

Now I deleted the large rectangle layer and used a heart frame/ Place heart frame over top of square layer
activate heart frame layer/selections/select all/float/defloat/modify/expand by 1
select another paper from kit and after resizing place on top of heart frame layer
Go to frame layer and invert/then to paper layer and delete/merge frame layer and paper layer

Now it's time to have fun with your imagination. Use whatever elements you want to make your tag your own.
I used the bow,heart charm and the lips

I changed the word art to Hot Kisses /selections/select all/float defloat/copy and paste with paper of
choice/go to word art layer and invert/go to paper layer and delete

Duplicate the word art 2 times for a total of three layers/ closed top two layers
go to effects/plug in and find the filter/use filter with these setting below


and random seed 0f 11/apply to first layer
close first layer and open 2nd layer and apply filter with random seed at 629
close 2nd layer and open 3rd layer and apply filter with random seed 1006

put drop shadow on all your layers except the word art layer
add your copyright and watermark and you're done

Now let's go to animation shop
closed top 2 layers of word art and copy-merge all layer and paste in animation
closed 1st word art layer and open 2nd layer and copy-merge layers and paste after current frame
in animation
closed 2nd layer and open 3rd layer of word art and copy-merge layers and paste after current frame


in animation/select all/ view animation..if ok saved as gif.

Thanks for trying my tutorial
If you use send me a copy so I can show case it...thanks

I'd like to thank Vicky over at The North Wing for this fabulous tag...