12/23/13

PTU Foxy's Designz and Marika - Punked Out In Pink

Punked Out In Pink

This tutorial was written on December 14,2013. 
Any similarities to another tutorial is purely coincidental.
All my tutorial are register with My Free Copyright. 
Please do not claim as your own.
This tutorial writer assumes you have a working 
knowledge of using Paint Shop Pro.
This tutorial was done in Paint Shop Pro9,
but can be adapted to use in other 
Paint Shop Pro versions.


SUPPLIES NEEDED

Tube of choice: I'm using the awesome work of Marika.
Please do not use unless you have a license to do so. 
Get it HERE

Scrapkit of Choice: I am using PTU Foxy's Designz Patty's
Nightmare....You can purchase it HERE ...Thanks Foxy

Template of choice:I am using Additive Designz- A Creative Chicks
Template #1.....You can download it HERE...Thanks Tamie

Mask of Choice: I am using Insatible Dreams Mask #375
You can download it HERE.... Thank You Cat

Filters used:Eye Candy 4000 gradient glow - HERE

Font for Name is Neuropol
Copy write is always done in Pixelette  HERE

Dropshadow use through out H-2/V-2/O-60/B-6.85

Please leave a thank you when you downloading for supplies.

my tag is just a guide...please use your imagination 
and make the tag your own you do not have to 
use any of the supplies I used.


     LET'S BEGIN

Open up Template and ShiftD and close original...delete 
copyright layer/close all layers/copy/paste paper of choice
resize to fit canvas/layers/load/save mask/find your mask
and set with these setting/click ok


On the following raster layers follow these directions...

activate large circle layer/copy/paste paper of choice/resize 
paper/selections/invert on large circle layer/delete on paper 
layer/merge down/add drop shadow/

activate long rectangle layer/copy/paste paper of choice/resize 
paper/selections/invert on long rectangle layer/delete on paper 
layer/merge down/add drop shadow/add drop shadow

activate long rectangle 2 layer/copy/paste paper of choice/resize 
paper/selections/invert on long rectangle 2 layer/delete on paper 
layer/merge down/add drop shadow/add drop shadow

leave large circle ring as is/add drop shadow

activate medium circle layer/copy/paste paper of choice/resize 
paper/selections/invert on medium circle layer/delete on paper 
layer/merge down/add drop shadow

activate medium circle2 layer/copy/paste paper of choice/resize 
paper/selections/invert on medium circle 2 layer/delete on paper 
layer/merge down/add drop shadow

leave both medium circle rings as is/add drop shadow

activate large circle 2 layer/copy/paste paper of choice/resize 
paper/selections/invert on large circle 2 layer/delete on paper 
layer/merge down/add drop shadow/copy/paste close up tube within
circle/resize if needed/add drop shadow

copy/paste your main tube of choice/resize if needed/place where 
it will look best/add drop shadow

leave large circle 2 ring as is/add drop shadow

activate rectangle layer/copy/paste paper of choice/resize 
paper/selections/invert on rectangle layer/delete on paper 
layer/merge down/add drop shadow/add drop shadow

activate inside rectangle layer/copy/paste paper of choice/resize 
paper/selections/invert on inside rectangle layer/delete on paper 
layer/merge down/add drop shadow/add drop shadow

leave word art as is/recolor to match tag/add drop shadow

copy/paste your main tube of choice/resize if needed/place where 
it will look best/add drop shadow

add any other elements you wish to use/resize if needed/add drop 
shadow to each element/place where they will look best

add your watermark and copyright credits/give it a slight gradient 
glow.......now give your tag to a friend.

You're done...thank you for trying my tutorial
please send me a copy so that I can show case it on my blog

12/15/13

PTU Honored Scraps and Elias Chatzoudis - Snowflake Kisses

Snowflake Kisses

This tutorial was written on December 13, 2013. 
Any similarities to another tutorial is purely coincidental.
All my tutorial are register with My Free Copyright. 
Please do not claim as your own.
This tutorial writer assumes you have a working 
knowledge of using Paint Shop Pro.
This tutorial was done in Paint Shop Pro9,
but can be adapted to use in other 
Paint Shop Pro versions.


SUPPLIES NEEDED
Animation Shop3 ....HERE

Animation of Choice: I am using Scrappy Bit of Fun Animation #016 snowflake falling
you can download HERE .... Thank you Simone

Tube of choice: I'm using the awesome work of Elias Chatzoudis.
Please do not use unless you have a license to do so. 
Get Them HERE

Scrapkit of Choice: I am using PTU Honored Scraps Winter Wishes
You can purchase it HERE ...Thanks Patty

Template of choice:I am using Dees'Sign Depot Snowflake Kisses Template
You can download it HERE...Thanks Dee

Mask of Choice: I am using Insatiable Dreams Mask #376
You can download it HERE.... Thank You Cat

Filters used:Eye Candy 4000 gradient glow - HERE

Font for Name is Segoe Script
Copy write is always done in Pixelette  HERE

Dropshadow use through out H-2/V-2/O-60/B-6.85

Please leave a thank you when you downloading for supplies.

my tag is just a guide...please use your imagination 
and make the tag your own you do not have to 
use any of the supplies I used.

     LET'S BEGIN

Open up Template and ShiftD and close original...delete 
copyright layer/close all layers/copy/paste paper of choice
resize to fit canvas/layers/load/save mask/find your mask
and set with these setting/click ok


on background layer/effects/AAA Frame/foto frame with these setting


On the following raster layers follow these directions...

activate right blue rectangle layer/copy/paste paper of choice
resize paper/selections/invert on rectangle layer/delete on paper 
layer/merge down/add drop shadow

activate left blue rectangle layer/copy/paste paper of choice
resize paper/selections/invert on rectangle layer/delete on paper 
layer/merge down/add drop shadow

activate large glittered oval layer/copy/paste paper of choice
resize paper/selections/invert on oval layer/delete on paper 
layer/merge down/add drop shadow

activate aqua oval layer/copy/paste paper of choice/resize paper
selections/invert on oval layer/delete on paper/layer/merge 
down/add drop shadow

activate blue rectangle layer/copy/paste paper of choice/resize
paper/selections/invert on rectangle layer/delete on paper 
layer/merge down/add drop shadow/leave white strip as is/and
recolor aqua frame to match tag/add drop shadow to both
leave white dots as is

activate aqua strip layer/copy/paste paper of choice/resize paper
selections/invert on strip layer/delete on paper/layer/merge 
down/add drop shadow

activate blue circle layer/copy/paste paper of choice/resize paper
selections/invert on blue circle layer/delete on paper/layer/merge 
down/add drop shadow/keep activated/copy/paste tube of choice/place
tube topart that you want showing/ invert on circle/delete on tube
add drop shadow/change snowflakes to white/leave white circle as is
change aqua circle to match tag/leave word art as is/add drop 
shadow to all 

add any other elements you wish to use/resize if needed/add drop 
shadow to each element/place where they will look best

add your watermark and copyright credits/give it a slight gradient 
glow.....

To animate

copy/paste tag into animation shop
duplicate tag 27 times
open up animation of choice
edit select all
copy/paste into selection 4x at different spots
animation/frame property/change to 20


now give your tag to a friend.

You're done...thank you for trying my tutorial
please send me a copy so that I can show case it on my blog
send to.... riggsbee53@gmail.com


CDO Honored Scraps and Jennifer Jaesko - All That Glitters

All That Glitters

This tutorial was written on December 12,2013. 
Any similarities to another tutorial is purely coincidental.
All my tutorial are register with My Free Copyright. 
Please do not claim as your own.
This tutorial writer assumes you have a working 
knowledge of using Paint Shop Pro.
This tutorial was done in Paint Shop Pro9,
but can be adapted to use in other 
Paint Shop Pro versions.


SUPPLIES NEEDED

Tube of choice: I'm using the awesome work of Jennifer Janesko.
Please do not use unless you have a license to do so. 
Get Them HERE

Scrapkit of Choice: I am using PTU Honor Scraps IB Jennifer Janesko 62-2
You can purchase it HERE ...Thanks Patty

Template of choice:I am using Additive Pleasures Template #99
You can download it HERE...Thanks Tamie

Mask of Choice: I am using Insatiable Dreams Mask #373
You can download it HERE.... Thank You Cat

Filters used:Eye Candy 4000 gradient glow - HERE

Font for Name is Lauren Script
Copy write is always done in Pixelette  HERE

Dropshadow use through out H-2/V-2/O-60/B-6.85

Please leave a thank you when you downloading for supplies.

my tag is just a guide...please use your imagination 
and make the tag your own you do not have to 
use any of the supplies I used.


     LET'S BEGIN

Open up Template and ShiftD and close original...delete 
copyright layer/close all layers/copy/paste paper of choice
resize to fit canvas/layers/load/save mask/find your mask
and set with these setting/click ok


On the following raster layers follow these directions...

activate circle layer/copy/paste paper of choice/resize paper
selections/invert on circle layer/delete on paper layer/merge 
down/activate/effects add noise with these setting


click ok/keep 
activated/copy/paste tube of choice/place the portion of the tube 
that you want to show/invert on circle layer/delete on tube layer
add drop shadow to circle layer and tube

activited long rectangle layer/copy/paste paper of choice/resize 
paper/selections/invert on rectangle layer/delete on paper layer
merge down/add drop shadow to rectangle layer

activate rectangle2 layer/copy/paste paper of choice/resize paper
selections/invert on rectangle2 layer/delete on paper layer/merge 
down/effects/add noise with these setting/click ok/add drop shadow

activate large square layer/copy/paste paper of choice/resize paper
selections/invert on large square layer/delete on paper layer/merge 
down/add drop shadow/add element of choice/resize if needed/add drop 
shadow

activate rectangle3 layer/copy/paste paper of choice/resize paper
selections/invert on rectangle3 layer/delete on paper layer/merge 
down/activate/effects add noise with these setting


Click ok/add drop shadow

activate small circle layer/copy/paste paper of choice/resize paper
selections/invert on small circle layer/delete on paper layer/merge 
down/keep activated/copy/paste tube of choice/place the portion of 
the tube that you want to show/invert on circle layer/delete on tube 
layer/add drop shadow to circle layer and tube

activate small square layer/copy/paste paper of choice/resize paper
selections/invert on small square layer/delete on paper layer/merge 
down/add drop shadow/keep activated/copy/paste tube of choice/place 
the portion of the tube that you want to show/invert on square layer
delete on tube layer/add drop shadow to square layer and tube

add any other elements you wish to use/resize if needed/add drop 
shadow to each element/place where they will look best

copy/paste word art that is in the kit/resize by 60%/effects/eye 
candy 4000/gradient glow/with these settings


add drop shadow 

add your watermark and copyright credits/give it a slight gradient 
glow.....now give your tag to a friend.

You're done...thank you for trying my tutorial
please send me a copy so that I can show case it on my blog


12/12/13

CDO WWDesignz and Jennifer Janesko - Simply Beautiful

Simply Beautiful

This tutorial was written on December 12,2013. 
Any similarities to another tutorial is purely coincidental.
All my tutorial are register with My Free Copyright. 
Please do not claim as your own.
This tutorial writer assumes you have a working 
knowledge of using Paint Shop Pro.
This tutorial was done in Paint Shop Pro9,
but can be adapted to use in other 
Paint Shop Pro versions.


SUPPLIES NEEDED

Tube of choice: I'm using the awesome work of Jennifer Janesko.
Please do not use unless you have a license to do so. 
Get Them HERE

Scrapkit of Choice: I am using PTU WW Designz IB Jennifer Janesko 43-2
This kit is no longer available ...Thanks Melissa

Template of choice:I am using Toxic Desirez Template #114
You can download it HERE...Thanks Kristin

Mask of Choice: I am using Insatiable Dreams Mask #376
You can download it HERE.... Thank You Cat

Filters used:Eye Candy 4000 gradient glow - HERE

Font for Name is Segoe Script
Copy write is always done in Pixelette  HERE

Dropshadow use through out H-2/V-2/O-60/B-6.85

Please leave a thank you when you downloading for supplies.

my tag is just a guide...please use your imagination 
and make the tag your own you do not have to 
use any of the supplies I used.


     LET'S BEGIN

Open up Template and ShiftD and close original...delete 
copyright layer/close all layers/copy/paste paper of choice
resize to fit canvas/layers/load/save mask/find your mask
and set with these setting/click ok


On the following raster layers follow these directions...

activate large rectangle layer/copy/paste paper of choice/resize 
paper/selections/invert on rectangle layer/delete on paper layer
merge down/add drop shadow

activited long rectangle layer/copy/paste paper of choice/resize 
paper/selections/invert on rectangle layer/delete on paper layer
merge down/add drop shadow to rectangle layer

activate white circle layer/copy/paste paper of choice/resize paper
selections/invert on small circle layer/delete on paper layer/merge 
down/keep activated/copy/paste tube of choice/duplicate and close
place the portion of the tube that you want to show/invert on circle 
layer/delete on tube layer/blend/overlay/add drop shadow to circle 
layer and tube

activate purple circle layer/copy/paste paper of choice/resize paper
selections/invert on purple circle layer/delete on paper layer/merge 
down/move close tube over top this layer/invert on purple circle
delete on tube/add drop shadow

activate green circle layer/copy/paste paper of choice/resize paper
selections/invert on green circle layer/delete on paper layer/merge 
down/move close tube over top this  layer/invert on purple circle
delete on tube/add drop shadow

activate small white circle layer/copy/paste paper of choice/resize 
paper/selections/invert on small circle layer/delete on paper layer
merge down/keep activated/copy/paste tube of choice/invert on small 
white circle/delete on tube/add drop shadow

activate star layer/selections/modify/expand by 2/choose a color from
one of the papers/flood fill with color/add noise with these settings


click ok/add dropshadow

add any other elements you wish to use/resize if needed/add drop 
shadow to each element/place where they will look best

copy/paste word art that is in the kit/resize by 60%/effects/eye 
candy 4000/gradient glow/with these settings


add drop shadow 

add your watermark and copyright credits/give it a slight gradient 
glow.....now give your tag to a friend.

You're done...thank you for trying my tutorial
please send me a copy so that I can show case it on my blog

12/9/13

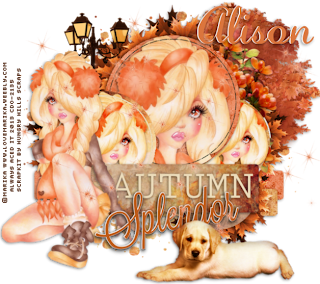
CDO Hungry Hills Scraps and Marika - Autumn Splendor II

Autumn Splendor II

This tutorial was written on December 9, 2013. 
Any similarities to another tutorial is purely coincidental.
All my tutorial are register with My Free Copyright. 
Please do not claim as your own.
This tutorial writer assumes you have a working 
knowledge of using Paint Shop Pro.
This tutorial was done in Paint Shop Pro9,
but can be adapted to use in other 
Paint Shop Pro versions.


SUPPLIES NEEDED

Tube of choice: I'm using the awesome work of Marika.
Please do not use unless you have a license to do so. 
This is an exclusive to CDO....Get it HERE

Scrapkit of Choice: I am using PTU Hungry Hills Autumn Glow
You can purchase it HERE ...Thanks Ali

Template of choice:I am using Dees'Sign Depot- Autumn Splendor
Template #17....You can download it HERE...Thanks Dee

Mask of Choice: I am using Vix's PSP Mask #45
You can download it HERE.... Thank You Vix

Filters used:Eye Candy 4000 gradient glow - HERE

Font for Name is Lauren Script
Copy write is always done in Pixelette  HERE

Drop shadow use through out H-2/V-2/O-60/B-6.85

Please leave a thank you when you down loading for supplies.

my tag is just a guide...please use your imagination 
and make the tag your own you do not have to 
use any of the supplies I used.


     LET'S BEGIN

Open up Template and ShiftD and close original...delete 
copyright layer/close all layers/copy/paste paper of choice
resize to fit canvas/layers/load/save mask/find your mask
and set with these setting/click ok


On the following raster layers follow these directions...

activate blue strip/copy paste paper of choice/resize paper
selections/invert on blue strip layer/delete on paper layer
merge down/add drop shadow

activate rust strip layer/copy/paste paper of choice/resize 
paper/selections/invert on rust strip layer/delete on paper 
layer/merge down/add drop shadow

recolor leaves and overlay leaves to match tag

activate cream circle layer/copy/paste paper of choice/resize
paper/selections/invert on cream circle layer/delete on paper
layer/merge down/add drop shadow/leave medium cream circle as 
is/add drop shadow

activate brown circle layer/copy/paste paper of choice/resize
paper/selections/invert on brown circle layer/delete on paper
layer/merge down/keep activated/copy paste tube of choice
resize/place tube so face is showing/selections/invert on 
circle/delete on tube layer/duplicate tube/on original layer
blend/soft light/place duplicate underneath/add drop shadow

activate blue circle layer/copy/paste paper of choice/resize 
paper/selections/invert on circle layer/delete on paper layer
merge down/keep activated/copy/paste tube of choice/resize if 
needed/selections/invert on circle/delete on tube layer/add
drop shadow/leave dotted circle as is

activate rust circle layer/copy/paste paper of choice/resize
paper/selections/invert on rust circle layer/delete on paper
layer/merge down/keep activated/copy paste tube of choice
resize/place tube so face is showing/selections/invert on 
circle/delete on tube layer/duplicate tube/on original layer
blend/soft light/place duplicate underneath/add drop shadow
to tube/leave white open circle as is

activate green strip layer/copy/paste paper of choice/resize 
paper/selections/invert on green strip layer/delete on paper 
layer/merge down/add drop shadow

copy/paste your main tube of choice/resize if needed/place 
where it will look best/add drop shadow

add any other elements you wish to use/resize if needed/add 
drop shadow to each element/place where they will look best
recolor "Splendor" word art to match tag

add your watermark and copyright credits/give it a slight 
gradient glow.....now give your tag to a friend.

You're done...thank you for trying my tutorial
please send me a copy so that I can show case it on my 
blog....send to.... riggsbee53@gmail.com


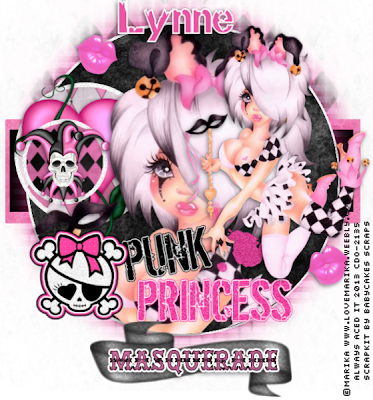
CDO BabyCakes Scraps and Marika - Punk Princess Masquerade

Punk Princess Masquerade

This tutorial was written on December 9,2013. 
Any similarities to another tutorial is purely coincidental.
All my tutorial are register with My Free Copyright. 
Please do not claim as your own.
This tutorial writer assumes you have a working 
knowledge of using Paint Shop Pro.
This tutorial was done in Paint Shop Pro9,
but can be adapted to use in other 
Paint Shop Pro versions.


SUPPLIES NEEDED

Tube of choice: I'm using the awesome work of Marika.
Please do not use unless you have a license to do so. 
Get it HERE

Scrapkit of Choice: I am using PTU Baby Cakes Scraps Marika IB-17-2
You can purchase it HERE ...Thanks Lynne

Template of choice:I am using Divine Intentionz
Template #276.....You can download it HERE...Thanks Missy

Mask of Choice: I am using Weescotslass Creations Mask #241
You can download it HERE.... Thank You Chell

Filters used:Eye Candy 4000 gradient glow - HERE

Font for Name is Decaying
Copy write is always done in Pixelette  HERE

Drop shadow use through out H-2/V-2/O-60/B-6.85

Please leave a thank you when you downloading for supplies.

my tag is just a guide...please use your imagination 
and make the tag your own you do not have to 
use any of the supplies I used.


     LET'S BEGIN

Open up Template and ShiftD and close original...delete 
copyright layer/close all layers/copy/paste paper of choice
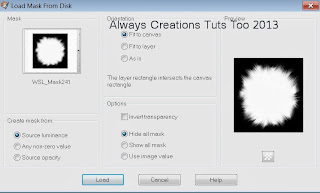
resize to fit canvas/layers/load/save mask/find your mask
and set with these setting/click ok


On the following raster layers follow these directions...

activate rectangle layer/copy/paste paper of choice/resize 
paper/selections/invert on rectangle layer/delete on paper 
layer/merge down/add drop shadow/

leave rectangle 2 layer as is/add drop shadow/leave transmission
layer as is/add drop shadow/leave glittered circle as is/add
drop shadow

activate large circle layer/copy/paste paper of choice/resize 
paper/selections/invert on large circle layer/delete on paper 
layer/merge down/keep activated/copy/paste tube of choice
resize if needed/delete on tube layer/add drop shadow

activate small circle layer/click inside pink circle/copy/paste 
paper of choice/resize paper/selections/invert on pink circle 
layer/delete on paper layer/merge down/add drop shadow

activate small circle2 layer/click inside pink circle/copy/paste 
paper of choice/resize paper/selections/invert on pink circle 2
layer/delete on paper layer/merge down/add drop shadow

leave word art as is/recolor to match tag/add drop shadow

copy/paste your main tube of choice/resize if needed/place where 
it will look best/add drop shadow

add any other elements you wish to use/resize if needed/add drop 
shadow to each element/place where they will look best

add your watermark and copyright credits/give it a slight gradient 
glow.......now give your tag to a friend.

You're done...thank you for trying my tutorial
please send me a copy so that I can show case it on my blog
send to.... riggsbee53@gmail.com

12/8/13

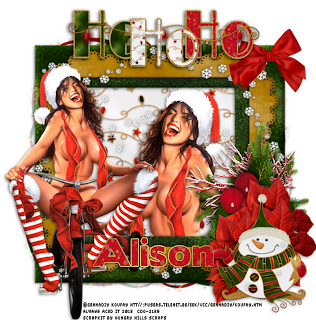
CDO Hungry Hills Scraps and Gennadiy Koufay - Ho Ho Ho


Ho Ho Ho

This tutorial was written on December 8,2013. 
Any similarities to another tutorial is purely coincidental.
All my tutorial are register with My Free Copyright. 
Please do not claim as your own.
This tutorial writer assumes you have a working 
knowledge of using Paint Shop Pro.
This tutorial was done in Paint Shop Pro9,
but can be adapted to use in other 
Paint Shop Pro versions.


SUPPLIES NEEDED

Tube of choice: I'm using the awesome work of Gennadiy Koufay.
Gennadiy is no longer selling at CDO. Please use another tube.

Scrapkit of Choice: I am using PTU Hungry Hills Ho Ho Ho
You can purchase it HERE ...Thanks Ali

Mask of Choice: I am using Vix's PSP Mask #433
You can download it HERE.... Thank You Vix

Filters used:Eye Candy 4000 gradient glow - HERE

Font for Name is Arial Black
Copy write is always done in Pixelette  HERE

Drop shadow use through out H-2/V-2/O-60/B-6.85

Please leave a thank you when you downloading for supplies.

my tag is just a guide...please use your imagination 
and make the tag your own you do not have to 
use any of the supplies I used.


     LET'S BEGIN

Open up Template and ShiftD and close original...delete 
copyright layer/close all layers/copy/paste paper of choice
resize to fit canvas/layers/load/save mask/find your mask
and set with these setting/click ok


On the following raster layers follow these directions...

Chose frame of choice/resize if needed/click inside/selections
moditfy/expand by 10/copy/paste paper of choice/resize paper
selections/invert on frame/delete on paper/place underneath
frame/add drop shadow to frame

Copy/paste tube of choice/resize if needed/place underneath
frame/add drop shadow

add any other elements you wish to use/resize if needed/add drop 
shadow to each element/place where they will look best

copy/paste your main tube of choice/resize if needed/place where 
it willlook best/add drop shadow

add your watermark and copyright credits/give it a slight gradient 
glow.....now give your tag to a friend.

You're done...thank you for trying my tutorial
please send me a copy so that I can show case it on my blog
send to.... riggsbee53@gmail.com

12/7/13

CDO Dees'Sign Depot and Alicia Mujica - Merry Christmas

Merry Christmas

This tutorial was written on December 7,2013. 
Any similarities to another tutorial is purely coincidental.
All my tutorial are register with My Free Copyright. 
Please do not claim as your own.
This tutorial writer assumes you have a working 
knowledge of using Paint Shop Pro.
This tutorial was done in Paint Shop Pro9,
but can be adapted to use in other 
Paint Shop Pro versions.


SUPPLIES NEEDED

Animation Shop ..... HERE

Tube of choice: I'm using the awesome work of Alicia Mujica.
Please do not use unless you have a license to do so. 
This is an exclusive to CDO....Get it HERE

Scrapkit of Choice: I am using PTU Dees'Sign Depot Alicia Mujica
IB- Exclusive 1C.. This kit is no longer avaiable ...Thanks Dee

Template of choice:I am using Aqua Rebel 315 DSNZ Template #99
You can download it HERE...Thanks Aqua

Mask of Choice: I am using Vix's  PSP Mask #45
You can download it HERE.... Thank You Vix

Animation of Choice: I am using White Twinkle...HERE

Filters used:Eye Candy 4000 gradient glow - HERE
AAA Frame - Foto Frame - HERE

Font for Name is Organic Elements
Copy write is always done in Pixelette  HERE

Drop shadow use through out H-2/V-2/O-60/B-6.85

Please leave a thank you when you downloading for supplies.

my tag is just a guide...please use your imagination 
and make the tag your own you do not have to 
use any of the supplies I used.


     LET'S BEGIN

Open up Template and ShiftD and close original...delete 
copyright layer/close all layers/copy/paste paper of choice
resize to fit canvas/layers/load/save mask/find your mask
and set with these setting/click ok


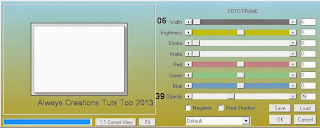
open back ground/effects
AAA Frame/foto frame with these setting/click ok


On the following raster layers follow these directions...

leave white circle layer as is/activate brown circle/copy
paste paper of choice/resize paper/selections/invert on 
circle layer/delete on paper layer/merge down/add drop shadow

activate white square layer/copy/paste paper of choice/resize 
paper/selections/invert on white square layer/delete on paper 
layer/merge down/add drop shadow/recolor ribbon backs to match 
tag

activate green rectangle layer/copy/paste paper of choice
resize paper/selections/invert on rectangle layer/delete on 
paper layer/merge down/add drop shadow/leave dashed shadow layer
as is/add slight drop shadow

activate large rectangle layer/copy/paste paper of choice/resize 
paper/selections/invert on large rectangle layer/delete on paper
layer/merge down/add drop shadow/leave glittered rectangle as is
leave inner rectangle as is/add drop shadow

recolor red strip 1 and red stripe 2 to match tag/add drop shadow

activate light green circle layer/copy/paste paper of choice/resize
paper/selections/invert on circle layer/delete on paper layer/merge 
down/keep activated/copy/paste tube of choice/resize if needed
duplicate/close this layer/selections/invert on circle/delete on tube
layer/open duplicated tube/take eraser tool and erase all excess tube
leave glass effect as is/copy/paste frame of choice/resize so frame 
fits on top of glass effect

recolor ring to match tag/leave ribbon top shadow as is/recolor ribbon
top to match tad/add drop shadow/leave word art as is/recolor other
ribbon to match tag/add drop shadow

copy/paste your main tube of choice/resize if needed/place where it will
look best/add drop shadow

add any other elements you wish to use/resize if needed/add drop 
shadow to each element/place where they will look best

add your watermark and copyright credits/give it a slight gradient 
glow.....now give your tag to a friend.

To animated

Copy/merge paste tag into animation shop
open your animation
edit/select all on your animation
on your tag duplicate the number of frames that the animation has
edit/select all on you tag
on animation/copy/paste into selected frame on you tag
place twinkle on each bulb on the tree
until all bulbs are lit
you choose how fast or slow you want the lights to blink
view animation/if satisfied save as gif

You're done...thank you for trying my tutorial
please send me a copy so that I can show case it on my blog
send to.... riggsbee53@gmail.com

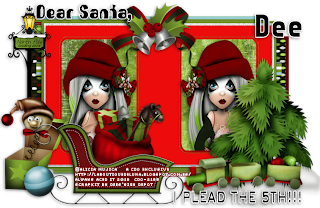
PTU Dees'Sign Deepot and Alicia Mujica

Dear Santa

This tutorial was written on December 7,2013. 
Any similarities to another tutorial is purely coincidental.
All my tutorial are register with My Free Copyright. 
Please do not claim as your own.
This tutorial writer assumes you have a working 
knowledge of using Paint Shop Pro.
This tutorial was done in Paint Shop Pro9,
but can be adapted to use in other 
Paint Shop Pro versions.


SUPPLIES NEEDED

Tube of choice: I'm using the awesome work of Alicia Mujica.
Please do not use unless you have a license to do so. 
This is an exclusive to CDO....Get it HERE

Scrapkit of Choice: I am using PTU Dees'Sign Depot Alicia Mujica
IB- Exclusive 1A....You can purchase it HERE ...Thanks Dee

Template of choice:I am using Aqua Rebel 315 DSNZ Template #99
You can download it HERE...Thanks Aqua

Mask of Choice: I am using Dees'Sign Depot Winter Mask #12
You can download it HERE.... Thank You Dee

Filters used:Eye Candy 4000 gradient glow - HERE

Font for Name is Front Page News
Copy write is always done in Pixelette  HERE

Drop shadow use through out H-2/V-2/O-60/B-6.85

Please leave a thank you when you downloading for supplies.

my tag is just a guide...please use your imagination 
and make the tag your own you do not have to 
use any of the supplies I used.


     LET'S BEGIN

Open up Template and ShiftD and close original...delete 
copyright layer/close all layers/copy/paste paper of choice
resize to fit canvas/layers/load/save mask/find your mask
and set with these setting/click ok


On the following raster layers follow these directions...

activate rectangle layer/copy/paste paper of choice/resize 
paper/selections/invert on rectangle layer/delete on paper 
layer/merge down/add drop shadow

activate rectangle 2 layer/copy/paste paper of choice/resize 
paper/selections/invert on rectangle 2 layer/delete on paper 
layer/merge down/add drop shadow

activate set of rectangles layer/copy/paste paper of choice 
resize paper/selections/invert on rectangle layer/delete on 
paper layer/merge down/add drop shadow

activate large rectangle layer/copy/paste paper of choice/resize 
paper/selections/invert on large rectangle layer/delete on paper
layer/merge down/add drop shadow/leave glittered rectangle as is
leave inner rectangle as is/add drop shadow

activate double rounded rectangles layer/copy/paste paper of choice
resize paper/selections/invert on rectangles layer/delete on paper 
layer/merge down/keep activated/copy/paste tube of choice/resize
if needed/selections/invert on rectangle/delete on tube/duplicate
tube/image/mirror/add drop shadow/leave rectangle outlines as is

add any other elements you wish to use/resize if needed/add drop 
shadow to each element/place where they will look best

add your watermark and copyright credits/give it a slight gradient 
glow.....now give your tag to a friend.

You're done...thank you for trying my tutorial
please send me a copy so that I can show case it on my blog
send to.... riggsbee53@gmail.com