8/26/10

I'll be off line for a while

Just want to let everyone know that I'll be off line for a while.
I don't know how long it will be or when I'll be back...
Having a hard time right now with REAL LIFE ISSUES
LIFE can be a real B*tch...and you need to roll with the punches
But right now I  can't  seem to cope and I need to get myself together
if I can......

8/24/10

PTU Creative Crazy Scraps and Cane Hoyer

I'll Bleed Your Heart Dry

This tutorial was written on August 24th 2010. 
Any similarities to another tutorial is purely coincidental.
All my tutorial are register with My Free Copyright. Please do not claim as your own.
This tutorial writer assumes you have a working knowledge of using Paint Shop Pro.
This tutorial was done in Paint Shop Pro9,but can be adapted to use in other
Paint Shop Pro versions.


SUPPLIES NEEDED

Tube of Choice: I am using the awesome artwork of Cane Hoyer..
You can purchase his tubes HERE
Please do not use without a license to do so

Scrapkit or colors of your choice,I'm using PTU Bleeding Love by Creative Crazy Scraps
you can get it HERE...thank you Stu

Mask of Choice: I'm using one of Insatiable Dreams#373 ...You can find it HERE
Put mask in mask folder..Thanks so much for the use of your mask Cat

Template of Choice: I am using a template from Designz by Ali-#159
you can get it HERE...Hurry Ali will be leaving the digital world soon....Thanks Ali

Font for name is dreamscar and copy write is always done in Pixelette ... Get them HERE

Filter Penta.com-jeans...Please Google for it

Drop shadow use throughout H-2/V-2/O-50/B-5.00

Please leave a thank you when you downloading for supplies.

     LET'S BEGIN

Open up Template and ShiftD and close original...delete copyright layer
close all layers except the background layer...the one we'll be working on

Choose a paper of choice(I chose paper #3)/copy/paste below background...now go to
layers/Load/save mask/load mask from disk/ and find your mask of choice...with
these setting-see photo below....


go to layers/merge group/resize by 75%

resize all layers by 75%...these instructions will be for all layers.
open each layer in concession from the bottom up and name your layers so you don't
get confused...dash/dotted/rectangle/square/frame/circles1/circles2...in that order

activate layer/selection/float/defloat/invert/copy/paste paper of choice
resize paper to fit/delete paper layer/merge down/add drop shadow.

activate your rectangle layer/selections/float/defloat...copy/paste your close up
tube and resize to fit/give a drop shadow/lower opacity to 60%
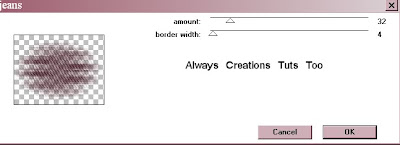
go to penta.com/jeans with these setting and apply.


depending on what scrap kit you use...now add some elements to your tag to make
it your own...(my tag is just a guide)...once you add your elements/add your
main tube/resize/add drop shadow...I added the word art that came with the kit
resize and place where you like it to be/take your crop tool and crop away all
excess that you don't want.

Add your copyright and watermark..and give to a friend

You're done!!!
Thanks for trying my tutorial
If you use send me a copy so I can show case it...thanks

8/23/10

PTU Broken Sky Designs and Steve Baier

Sirens of the Night

This tutorial was written on August 23rd 2010. Any similarities to another
tutorial is purely coincidental.
All my tutorial are register with My Free Copyright. Please do not claim as your own.
This tutorial writer assumes you have a working knowledge of using Paint Shop Pro.
This tutorial was done in Paint Shop Pro9,but can be adapted to use in other
Paint Shop Pro versions.


SUPPLIES NEEDED

Tube of Choice: I am using the awesome artwork of Steve Baier..You can purchase his tubes HERE
Please do not use without a license to do so

Scrapkit or colors of your choice,I'm using PTU Siren of The Night by Broken Sky Designs
you can get it HERE...thank you Tonya

Mask of Choice: I'm using one of Insatiable Dreams #444...You can find it HERE
Put mask in mask folder..Thanks so much for the use of your mask Cat

Template of Choice: I am using one of Ali from DesignzbyAli-Template2..you need to grab it quick cuz Ali is leaving the tagging world soon...We will miss you Ali, you are a great designer

you can get it HERE...Thanks Ali

Font for name is Organic Elements and copy write is always done in Pixelette ... Get them HERE


Drop shadow use throughout H-2/V-2/O-50/B-5.00

Please leave a thank you when you downloading for supplies.

     LET'S BEGIN

Open up Template and ShiftD and close original...delete copyright layer
close all layers except the background layer...the one we'll be working on

Choose a paper of choice(I chose paper #3)/copy/paste...now go to layers/Load/
save mask/load mask from disk/ and find your mask of choice...with these setting
see photo below....


go to layers/merge group/resize by 80%

activate rectangle1/resize by 85%/selection/modify/expand by 1 choose a paper/
copy and paste as a new layer/resize/click on rectangle layer and invert...then
go back to the paper layer and click delete...merge down. add drop shadow.

activate rectangle2/resize by 85%/selection/modify/expand by 1 choose a paper/
copy and paste as a new layer/resize/click on rectangle layer and invert...then
go back to the paper layer and click delete...merge down. add drop shadow.

activate rectangle3/resize by 85%/selection/modify/expand by 1 choose a paper/
copy and paste as a new layer/resize/click on rectangle layer and invert...then
go back to the paper layer and click delete...merge down. add drop shadow.

activate rectangle4/resize by 85%/selection/modify/expand by 1 choose a paper/
copy and paste as a new layer/resize/click on rectangle layer and invert...then
go back to the paper layer and click delete...merge down. add drop shadow.

activate rectangle5/resize by 85%/selection/modify/expand by 1 choose a paper/
copy and paste as a new layer/resize/click on rectangle layer and invert...then
go back to the paper layer and click delete...merge down. add drop shadow.

activate rectangle6/resize by 85%/selection/modify/expand by 1 choose a paper/
copy and paste as a new layer/resize/click on rectangle layer and invert...then
go back to the paper layer and click delete...merge down. add drop shadow.

activate rectangle7/resize by 85%/selection/modify/expand by 1 choose a paper/
copy and paste as a new layer/resize/click on rectangle layer and invert...then
go back to the paper layer and click delete...merge down. add drop shadow.

Open up your tube of choice (I used two of Steve Baier). resize your tube and place
at either end of rectangle 4 and rectangle 7/now sharpen if needed and add drop
shadow...now add any other elements of your choosing...make your tag your own, you don't
have to make it like mine...it is only a guide...don't forget to add drop shadow on
all elements.

Add your copyright and watermark..and give to a friend

You're done!!!
Thanks for trying my tutorial
If you use send me a copy so I can show case it...thanks

8/19/10

FTU Misfit Scraps and Elias Chatzoudis

Sugar Rush

This tutorial was written on August 17th 2010. Any similarities to another tutorial is purely coincidental. All my tutorial are register with My Free Copyright. Please do not claim as your own.
This tutorial writer assumes you have a working knowledge of using Paint Shop Pro.
This tutorial was done in Paint Shop Pro9,but can be adapted to use in other
Paint Shop Pro versions.


SUPPLIES NEEDED

Tube of Choice: I am using the awesome artwork of Elias Chatzoudis..You can purchase his tubes HERE. Please do not use without a license to do so.

Scrapkit or colors of your choice, I'm using Missy FTU Scrap Kit High On Candy..From Misfits Scraps you can get it HERE thank you Missy

Mask of Choice: I'm using one of Cindy from Chichi Designz ..You can find it HERE

Template of Choice: I am using one of Chichi Designz #4..you can get it HERE...Thanks Cindy

Font for name is PhattPheddy and copy write is always done in Pixelette ... Get them HERE

Filters use is Eye Candy4000-Gradient Glow..HERE
Penta.com jeans-Please goggle for this

Drop shadow use throughout H-2/V-2/O-50/B-5.00

Please leave a thank you when you downloading for supplies.

     LET'S BEGIN

Open up Template and ShiftD and close original...delete copyright layer
close all layers except the background layer...the one we'll be working on

Now I did my background separate because in order to add borders you need to fatten
all layers, and I wanted my layers to remain in case I needed to change something.

So now on your template background layer choose a color, mine was #ffe716/floor fill
with that color and then copy/pastes as a new layer...now go to image/add borders
click yes when prompt... first border color is ee488c with these setting
 

the next color is ffe716 with these setting/and last color is ee488c with the
same setting....


once that's done, activate your first border(the dark one)...go to adjust
add/remove noise/add noise with these setting.


Do this with both dark borders.
Now copy and paste back on template/make sure it's at the bottom and resize it so
you can see the borders

ok I re-sized all layers by 80%...make sure you add a drop shadow on each layer except
oval and wrap layers

Choose a paper of choice(I chose paper #4)/copy/paste...make sure mask is minimize
in psp...now go to layers/new mask
from image/create mask from /source luminance/click ok
 ... now go to layers/merge/merge group.

leave the wrap layer as is..go to wrap back layer and activate/choose another paper/copy/
paste/resize go to wrap layer/selection/invert...paper layer/delete.
now go to your oval back and repeat the same process you did with the wrap back.

activate your oval layer and take your tube and copy/paste as a new layer...place it
where you want it and then go to oval layer/selection invert ...now go back to tube layer
and delete.. now go to filter jeans with these setting and apply


put your tube layer underneath your pixie word layer.

go to your sugar rush layer and activate..pick two colors for your gradient..I used cf81a1
and ffe716 (angle-55/repeat-0/invert checked) and flood fill your sugar rush word art/
go to adjust/add/remove noise/add noise with the same setting as before...you will also do
the same thing with your name.
Now add your main tube/resize and place where you want it. Now let's have some fun and add
your elements.choose which ever you like to make it your own.

add your copyright/watermark and name..now don't forget to jazz up your name with some noise
then go to gradient glow with these setting 


and give it a dark pink glow.


You're done!!!
Thanks for trying my tutorial
If you use send me a copy so I can show case it...thanks

8/6/10

PTU Tyger Tibits and Elias Chatzoudis

Goth Babe

This tutorial was written on Aug 5th 2010.Here's another tutorial using a Tyger Tibits
PTU Scrap Kit.Any similarities to another tutorial is purely coincidental.
All my tutorial are register with My Free Copyright. Please do not claim as your own.
This tutorial writer assumes you have a working knowledge of using Paint Shop Pro.
This tutorial was done in Paint Shop Pro9,but can be adapted to use in other
Paint Shop Pro versions.


SUPPLIES NEEDED

Tube of Choice: I am using the awesome artwork of Elias Chatzoudis..one with a closeup.
You can go here to check out his artwork HERE..Please make sure you have a license to use.

Template of Choice:Sara's-Sinful Creations #8...you can get it HERE

Scrapkit or colors of your choice, I'm using OH My Goth[cyber edition] PTU kit from Tyger Tidbits
you can purchase it HERE....thank you Tyger

Mask of Choice: I'm using Designs by Vaybs #131 ..You can find it HERE
Put mask in mask folder..Thanks so much for the use of your mask Vaybs

Font for name is  and copy write is always done in Pixelette ... Get them HERE

Effect-Toadies -where are you....Get It HERE

Drop shadow use throughout H-1/V-1/O-50/B-5.00

Please leave a thank you when you downloading for supplies.
 
     LET'S BEGIN

Open up the template shift/D and close original template.Close all layers and add new layer.

Choose a paper of choice/copy/paste...now go to layers/Load/
save mask/load mask from disk/ and find your mask of choice...with these setting
see photo below....go to layers/merge group


open up the each layer and resize by 85% and then close each layer.

activate the first rectangle/Choose a paper of choice/copy/paste/resize....go to rectangle layer
and invert/ now go back to paper layer and delete.....

do this with each layer choosing a different paper for each layer.

now open up your tube and choose the closeup tube and copy/paste /resize to fit the square layer
add a drop shadow..duplicate closeup/go to layer and choose luminance legacy...now for a twist
I use an effect on the closeup...the choice is yours.I used toadies-where are you

now add some elements to your tag/resize/ you don't have to choose the ones I did...
make your tag your own...once that's done add a drop shadow to each element...
Add your main tube/resize and add a drop shadow.
add your copyright and watermark and give to a friend

You're done!!!
Thanks for trying my tutorial
If you use send me a copy so I can show case it...thanks

No Scrap Tutorial - Ismael Rac

Shaking My Hips


Here's another tutorial I wrote.This is a very simple tutorial,although it's animated

it's really easy. Any similarities to another tutorial is purely coincidental.

All my tutorial are register with My Free Copyright. Please do not claim as your own.
This tutorial writer assumes you have a working knowledge of using Paint Shop Pro.
This tutorial was done in Paint Shop Pro9,but can be adapted to use in other
Paint Shop Pro versions.


SUPPLIES NEEDED

Tube of Choice: I am using the awesome artwork of Ismael Rac..

You can purchase his tubes HERE
Please do not use without a license to do so

Scrapkit or colors of your choice...I chose to do colors.

Mask of Choice: I'm using one of Weescotslass template WSL#189..You can find it HERE
Put mask in mask folder..Thanks so much for the use of your mask

Template of Choice: I am using Blissfully Beth template#84..you can get it HERE...Thanks Beth

Font for name is Poor Richard,Rockwell and copy write is always done in Pixelette ... Get them HERE

Effects use dbs flux-bright noise.....Get it HERE

Dropshadow use througout H-2/V-2/O-50/B-6.72

Please leave a thank you when you downloading for supplies.


     LET'S BEGIN

Open up Template and ShiftD and close original...delete copyright layer
close all layers except the background layer...the one we'll be working on

Choose a color or paper of choice/copy/paste...now go to layers/Load/
save mask/load mask from disk/ and find your mask of choice...with these setting
see photo below....go to layers/merge group


now make circle layer active/ choose paper or color of choice and do each circle a different color

now active frame2 background/magic wand/mode[shift]/match mode[RGB Value]/Tolerance [55]
Contiguous[checked]/Feather[0]/anti-alias[checked]/click Inside
and duplicate 2x....rename each layer bkg frame 1,2 and 3
close off top two layers and choose a color for the bkg frame 1
go to dbs flux with these setting...see photo below...


click ok
now deactivate 1st layer and go to 2nd layers/choose different color/go to dbs flux and hit ok 2x
now deactivate 2nd layer and go to 3rd layer/choose different color/go to dbs flux and hit ok 3x
deactivate layers 2 and 3 for the time being...leave 1st layer open.

go to frame2/magic wand/same setting as above...click inside/flood-filled with color black.


Now repeat process from frame1 background as above,rename these layers bkgr 4,5and 6
using three different colors than frame2/color each layer and do the dbs flux
repeat process for frame1...close layers 5 and 6 and leave layer4 open

now place your tube where you want it and duplicate 2x. close top tube and on the middle
tube/mirror it /move to the left side a little...close this layer and on the bottom tube
move it over a little to the right.(see my tag for reference)
close the top two layers of the tube

add saying of choice or use the saying I have..I did it in Rockwell
add your copyright and watermark and your done

Now it time to animate......


If you have your board set up right you should have this


Copy merge and paste into animation shop
go back to paint shop pro and activate layers
fra2bkgr2/fra1bkgr5 and tube 2/copy merge and paste
into animation shop after first layer
go back to paint shop pro and activate
fra2bkgr3/fra2bkgr6 and tube3/copy merge and paste
into animation shop after 2nd layer
edit select all frames/animation/frame properties/set to 30
save as gif at these setting


You're done!!!...Save as Gif
Thanks for trying my tutorial
If you use send me a copy so I can show case it...thanks
FTU Always Creations and David Boller - Paint My World

Paint My World

Here's another tutorial I wrote.This is great for a beginner.
Any similarities to another tutorial is purely coincidental.All my tutorial are register
with My Free Copyright. Please do not claim as your own.This tutorial writer assumes you
have a working knowledge of using Paint Shop Pro. This tutorial was done in Paint Shop Pro9,
but can be adapted to use in other Paint Shop Pro versions.


SUPPLIES NEEDED

Tube of Choice: I am using the awesome artwork of David Boller..

You can purchase his tubes HERE
Please do not use without a license to do so

Template of Choice: I'm using Missy template#105..You can find it HERE
Thanks Missy for the use of your work.

Mask of Choice: I am using Babes Designs Mask#15..you can get it HERE...Thanks Babe

Scrap kit is one of my FTU Kits Called Rapsody In Blue..

you can find it HERE.....please do not
share, direct them to my site....thanks

Wordart from Wench Designs..you can get it HERE...thanks Vella

Font for name is Saginaw and copyright is always done in Pixelette ... Get them HERE

Drop shadow use throughout H-2/V-2/O-50/B-6.72


     LET'S BEGIN

Open up Template and ShiftD and close original...delete copyright layer
close all layers except the background layer...the one we'll be working on

Go to layers/new raster layer/click ok.Flood fill this layer with color from
your tube. I chose 5261a3...

Go to layers/load/save mask/load mask from disk...find your mask and set it with
these setting....


layers/merge group

Activate square 1/click on magic wand...mode-add/match-RGB value/Tolerance 10
contigous checked/feather 0/anti-alias checked/inside

Choose a paper from the kit...I chose 9. copy/paste on top of square 1 with this
paper...click on square1/selection/invert..now go to paper layer and delete/layers
merge/merge down...add a drop shadow

Activate square 2 and repeat the same process as square 1 choosing another paper
from the kit...I chose 12

actvate square 3 and repeat the same process as square 2 choosing another color
from your tube...I chose 8.

Open your word art and copy/paste on top of square3...place it so that the tube
doesn't cover it/I cut and pasted the bottom part so it would be closer to the
top part...add drop shadow

For the thin rectangles I resized and mirror/ chose a color from the tube and
flood filled and put the credits on it.

Now comes the fun part...add whatever elements you wish to add...don't forget to
 add drop shadow as you go along.

add your copyright and watermark and your done

Thanks for trying my tutorial
If you use send me a copy so I can show case it...thanks