9/26/12

PTU Designs by Ali and Miss Kajun Kitty

Miss Priss


This tutorial was written on August 25,2012.
Any similarities to another tutorial is purely coincidental.
All my tutorial are register with My Free Copyright.
Please do not claim as your own.
This tutorial writer assumes you have a working
knowledge of using Paint Shop Pro.
This tutorial was done in Paint Shop Pro9,
but can be adapted to use in other
Paint Shop Pro versions.


SUPPLIES NEEDED

Tube of choice: I'm using the awesome work of Miss Kajun Kitty .
Please do not use unless you have a license to do so.
You can get her tubes HERE

Scrapkit of Choice: I am using Ali Designs PTU As Pretty as
a Picture ...sorry, Ali is no longer on the net

Template of choice:I am using Addicitve Pleasures #66
You can download it HERE...Thank you Tamie

Mask of Choice: I am using Insatiable Dreams #139
You can download it HERE...Thank you Cat

Filters used:EyeCandy 4000 gradient glow HERE
Xero Tweaker and Xero Porcelaid HERE

Font for Name Microsoft Yattei HERE
Copy write is always done in Pixelette HERE

Dropshadow use through out H-2/V-2/O-50/B-5.00
Please leave a thank you when you downloading for supplies.

my tag is just a guide...please use your imagination
and make the tag your own you do not have to
use any of the supplies I used.
LET'S BEGIN

Open up Template and ShiftD and close original...delete
copyright layer/close all layers except background layer
layers/copy/paste paper of choice/load/save mask/load mask
from disc/find your mask/load with these setting below/click ok


On the following raster layers follow these directions...

activate circle1 layer/copy/paste paper of choice/resize
selection/invert on rectangle layer/delete on paperlayer/merge
down/add drop shadow

activate rectangle1 layer/copy/paste paper of choice/resize
selection/invert on rectangle1 layer/delete on paper layer
merge down/add drop shadow

activate rectangle2 layer/copy/paste paper of choice/resize
selection/invert on rectangle2 layer/delete on paper layer
merge down/add drop shadow

activate circle2 layer/copy/paste paper of choice/resize
selection/invert on circle2 layer/delete on paper layer/merge
down/keep activated/copy/paste tube of choice/resize/delete
make sure there is no excess tube/effects/xero/tweaker with
these setting/add drop shadow


activate circle3 layer/copy/paste paper of choice/resize
selection/invert on circle3 layer/delete on paper layer/merge
down/add drop shadow

activate circle4 layer/copy/paste paper of choice/resize
selection/invert on circle4 layer/delete on paper layer/merge
down/add drop shadow/keep activated/copy/paste tube of choice
resize/delete/make sure there is no excess tube/effects/porcelaid
with/these setting/add drop shadow


add your tube of choice/place where it will look best/resize
add drop shadow

color word art to match tag/add dropshadow

add any other elements to make your tag your own/add drop
shadow on each element/resize your tag

add your watermark and copyright credits/give it a slight gradient
glow ...now give your tag to a friend.

You're done...thank you for trying my tutorial
please send me a copy so that I can show case it on my blog

FTU Bel Vidotti Scraps and Joe Peck

Special Gift


This tutorial was written on August 25,2012.
Any similarities to another tutorial is purely coincidental.
All my tutorial are register with My Free Copyright.
Please do not claim as your own.
This tutorial writer assumes you have a working
knowledge of using Paint Shop Pro.
This tutorial was done in Paint Shop Pro9,
but can be adapted to use in other
Paint Shop Pro versions.


SUPPLIES NEEDED

Tube of choice: I'm using the awesome work of Joe Peck .
Please do not use unless you have a license to do so.
You can get his tubes HERE

Scrapkit of Choice: I am using Bel Vidotti Scrap FTU
Beautiful ...Her site has been removed from the net

Template of choice:I am using Addicitve Pleasures #80
You can download it HERE...Thank you Tamie

Mask of Choice: I am using Insatiable Dreams #199
You can download it HERE...Thank you Cat

Filters used:EyeCandy 4000 gradient glow HERE,
Xero - Fritillary HERE

Font for Name Cream Bold HERE
Copy write is always done in Pixelette HERE

Dropshadow use through out H-2/V-2/O-50/B-5.00
Please leave a thank you when you downloading for supplies.


my tag is just a guide...please use your imagination
and make the tag your own you do not have to
use any of the supplies I used.


LET'S BEGIN

Open up Template and ShiftD and close original...delete
copyright layer/close all layers except background layer
layers/copy/paste paper of choice/load/save mask/load mask
from disc/find your mask/load with these setting below/click ok


On the following raster layers follow these directions...

leave glitter circle layer as is/add drop shadow

activate circle layer/copy/paste paper of choice/resize
selection/invert on circle layer/delete on paper layer
merge down/add drop shadow/copy/paste doodle in circle
layer/resize to fit/add drop shadow/leave text layer as is

activate heart layer/copy/paste paper of choice/resize
selection/invert on heart layer/delete on paper layer
merge down/add drop shadow/keep activated/copy/paste
tube ofchoice/resize/delete on tube layer/effect/xero
fritillary with these settings/click ok/add drop shadow


replace the small hearts with the heart from the kit/resize
add drop shadow

add your tube of choice/place where it will look best/resize

add drop shadow/color word art layers to match tag/add dropshadow

add any other elements to make your tag your own/add drop
shadow on each element/resize your tag

add your watermark and copyright credits/give it a slight gradient
glow ...now give your tag to a friend.

You're done...thank you for trying my tutorial
please send me a copy so that I can show case it on my blog

FTU Lacarolita Designz and Joe Peck

Naughty and Bad

 
This tutorial was written on August 25,2012.
Any similarities to another tutorial is purely coincidental.
All my tutorial are register with My Free Copyright.
Please do not claim as your own.
This tutorial writer assumes you have a working
knowledge of using Paint Shop Pro.
This tutorial was done in Paint Shop Pro9,
but can be adapted to use in other
Paint Shop Pro versions.


SUPPLIES NEEDED

 
Tube of choice: I'm using the awesome work of Joe Peck .
Please do not use unless you have a license to do so.
You can get his tubes HERE

Scrapkit of Choice: I am using Lacarolita Designz FTU Seduction
You can download it HERE ...Lacarolita

Template of choice:I am using Addicitve Pleasures #65
You can download it HERE...Thank you Tamie
Mask of Choice: I am using Insatiable Dreams #59
You can download it HERE...Thank you Cat
Filters used:EyeCandy 4000 gradient glow...HERE

Font for Name Arial Black
Copy write is always done in Pixelette HERE


Dropshadow use through out H-2/V-2/O-50/B-5.00
Please leave a thank you when you downloading for supplies.


my tag is just a guide...please use your imagination
and make the tag your own you do not have to
use any of the supplies I used.


LET'S BEGIN

Open up Template and ShiftD and close original...delete
copyright layer/close all layers except background layer
layers/copy/paste paper of choice/load/save mask/load mask
from disc/find your mask/load with these setting below/click ok


On the following raster layers follow these directions...

activate rectangle layer/copy/paste paper of choice/resize
selection/invert on rectangle layer/delete on paper layer/merge
down/add drop shadow/leave worart1 as is

activate rectangle1 layer/copy/paste paper of choice/resize
selection/invert on rectangle1 layer/delete on paper layer
merge down/add drop shadow/leave dotted rectangle and black
circle/ and glitter circle as is

activate circle layer/copy/paste paper of choice/resize
selection/invert on circle layer/delete on paper layer
merge down/keep activated/copy/paste tube of
choice/resize/deleted/add drop shadow to layer and tube
leave double rectangle and glitter layer as is/add drop shadow

activate rectangle2 layer/color the rectangle to match the tube
add drop shadow

activate rectangle3 layer/copy/paste paper of choice/resize
selection/invert on rectangle3 layer/delete on paper layer/merge
down/keep lg wordart layers as is/add drop layer to both

leave fat strip1 layer as is/color thin strip layer to match
tag/add drop shadow/leave wordart 2,3 and 4 layer as is

add any other elements to make your tag your own/add drop
shadow on each element/resize your tag

add your tube of choice/place where it will look best/resize
add drop shadow

add your watermark and copyright credits/give it a slight gradient
glow ...now give your tag to a friend.

You're done...thank you for trying my tutorial
please send me a copy so that I can show case it on my blog


FTU Fantasy Moments and Jacqueline Collen-Tarrolly

Tortured Heart
This tutorial was written on August 25,2012.
Any similarities to another tutorial is purely coincidental.
All my tutorial are register with My Free Copyright.
Please do not claim as your own.
This tutorial writer assumes you have a working
knowledge of using Paint Shop Pro.
This tutorial was done in Paint Shop Pro9,
but can be adapted to use in other
Paint Shop Pro versions.


SUPPLIES NEEDED


Tube of choice: I'm using the awesome work of Jacqueline Collen-Tarrolly .
Please do not use unless you have a license to do so.
You can get her tubes HERE

Scrapkit of Choice: I am using Fantasy Moments FTU Tortured Heart
You can download it HERE ...Thank you Sylvie

Template of choice:I am using Essence of Creativity #17
Thank you Yvette...Essence of Creativity is no longer on the net

Mask of Choice: I am using Insatiable Dreams #187
You can download it HERE...Thank you Cat

Filters used:EyeCandy 4000 gradient glow...HERE
Font for Name and wordart is Arial
Copy write is always done in Pixelette HERE

Dropshadow use through out H-2/V-2/O-50/B-5.00
Please leave a thank you when you downloading for supplies.


my tag is just a guide...please use your imagination
and make the tag your own you do not have to
use any of the supplies I used.


LET'S BEGIN

Open up Template and ShiftD and close original...delete
copyright layer/close all layers except bakground layer
layers/load/save mask/load mask from disc/find your mask
load with these setting below/click ok


On the following raster layers follow these directions...
activate heart layer/copy/paste paper of choice/resize
selection/invert on heart layer/delete on paperlayer/merge
down/add drop shadow

activate heart frame1 layer/copy/paste paper of choice/resize
selection/invert on heart frame1 layer/delete on paper layer
merge down/add drop shadow

activate rectangle1 layer/copy/paste paper of choice/resize
selection/invert on rectangle1 layer/delete on paper layer
merge down/effects/add drop shadow

activate frame1 layer/copy/paste paper of choice/resize
selection/invert on frame1 layer/delete on paper layer
merge down/add drop shadow

activate rectangle2 layer/copy/paste paper of choice/resize
selection/invert on rectangle2 layer/delete on paper layer
merge down/add drop shadow

activate frame2 layer/copy/paste paper of choice/resize
selection/invert on frame2 layer/delete on paper layer/merge
down/keep doodle as is

activate heart frame top/copy/paste paper of choice/resize
selection/invert on heart frame top/delete on paper layer
merge down/add drop shadow

add any other elements to make your tag your own/add drop
shadow on each element/resize your tag

add your tube of choice/place where it will look best/resize
add drop shadow

now select font of choice and type out (message in my bottle/
My heart is tortured/ Without you/place within the rectangle2
layer/effect gradient glow on wordart/using the same font type
To My Heart/ and place on the envelope letter

add your watermark and copyright credits/give it a slight gradient
glow ...now give your tag to a friend.

You're done...thank you for trying my tutorial
please send me a copy so that I can show case it on my blog

9/19/12

PTU Additive Pleasures and Tori Beveridge

Dangerous Beauty
This tutorial was written on September 12,2012.
Any similarities to another tutorial is purely coincidental.
All my tutorial are register with My Free Copyright.
Please do not claim as your own.
This tutorial writer assumes you have a working
knowledge of using Paint Shop Pro.
This tutorial was done in Paint Shop Pro9,
but can be adapted to use in other
Paint Shop Pro versions.

SUPPLIES NEEDED


Tube of choice: I'm using the awesome work of Tori Beveridge .
Please do not use unless you have a license to do so.
You can get her tubes
HERE


Scrapkit of Choice: I am using PTU Additive Pleasure Bad Girl
You can download it
HERE ...Thank you Tamie
Template of choice:I am using Additive Pleasure #22
You can download it
HERE...Thank you Tamie
Mask of choice: I am using Vix mask #309
You can download it
HERE...Thank you Vix
Filters used:Xero-radiance and Eye Candy 4000-Gradient Glow
Font for Name is Classic HERE
Copy write is always done in Pixelette  HERE

Dropshadow use through out H-2/V-2/O-50/B-5.00
Please leave a thank you when you downloading for supplies.

my tag is just a guide...please use your imagination
and make the tag your own you do not have to use any of
the supplies I used.


     LET'S BEGIN

Open up Template/resize template 600x573/and ShiftD and close
original...delete copyright layer/close all layers/delete
background layer/copy/paste paper of choice/layers/load/save
mask/load mask from disk/find your mask and load with these
 settings/click ok
On the following raster layers follow these directions...
activate circle layer/copy/paste paper of choice/resize
selection/invert on circle layer/delete on paper layer
merge down/add drop shadow
activate square layer/copy/paste tube of choice/resize to fit
selection/invert on square layer/delete on tube layer/effects/
xero/radiance with these settings
add drop shadow/leave strip as is
activate rectangle layer/copy/paste paper of choice on pink
side only/resize/selection/invert on rectangle layer/delete
on paperlayer/merge down/leave strip2 layer as is/add drop
shadow
activate sm circle layer/copy/paste paper of choice on pink side
only/resize/selection/invert on sm circle layer/delete on paper
layer/merge down/add drop shadow
add your main tube/resize/place on the black side of the small
circle/add drop shadow
leave small word art as is/separte the large word art to place
where you want to put it
add any other elements to make your tag your own/add drop
shadow on each element/on name I added noise on white edging
with these setting
add your watermark and copyright credits/give it a slight
gradient glow ...now give your tag to a friend.
You're done...thank you for trying my tutorial
please send me a copy so that I can show case it on my blog
send
to.... riggsbee53@gmail.com


FTU Blue Dreams Designs and Robin Pushay

Witching Hour
This tutorial was written on September 12,2012.
Any similarities to another tutorial is purely coincidental.
All my tutorial are register with My Free Copyright.
Please do not claim as your own.
This tutorial writer assumes you have a working
knowledge of using Paint Shop Pro.
This tutorial was done in Paint Shop Pro9,
but can be adapted to use in other
Paint Shop Pro versions.


SUPPLIES NEEDED


Tube of choice: I'm using the awesome work of Robin Pushay .

Please do not use unless you have a license to do so.
You can get her tubes HERE

Scrapkit of Choice: I am using FTU Blue Dream Halloween kit 09
You can download it
HERE ...Thank you
Template of choice:I am using Toxic Desire #91
You can download it
HERE...Thank you Kristin
Mask of choice: I am using Melissa Creations Halloween #1
You can download it
HERE...Thank you Melissa
Filters used:None
Font for Name is TriniganFG
Copy write is always done in Pixelette  HERE

Dropshadow use through out H-2/V-2/O-50/B-5.00
Please leave a thank you when you downloading for supplies.

my tag is just a guide...please use your imagination
and make the tag your own you do not have to use any of
the supplies I used.This will be a simple and quick tutorial.


     LET'S BEGIN

Open up Template/resize template 600x560/and ShiftD and close
original...delete copyright layer/close all layers/delete
background layer/copy/paste paper of choice/layers/load/save
mask/load mask from disk/find your mask and load with these
 settings/click ok


On the following raster layers follow these directions...
activate rectangle layer/copy/paste paper of choice/resize
selection/invert on rectangle layer/delete on paperlayer
merge down/add drop shadow/leave words as is
replace moon with one greyscale in the kit/colorize blue
change the color to the tree/change the tombstone to the
one that's in the kit/leave all other layers as they are
add your main tube and place where it will lokk best/add drop
shadow/change color of word art to match tag/add drop shadow
add any other elements to make your tag your own/add drop
shadow on each element/resize your tag
add your watermark and copyright credits/give it a slight
gradient glow ...now give your tag to a friend.
You're done...thank you for trying my tutorial
please send me a copy so that I can show case it on my blog
send
to.... riggsbee53@gmail.com


FTU CDO Halloween Collab and Pinuptoons

Spooktacular
This tutorial was written on September 12,2012.
Any similarities to another tutorial is purely coincidental.
All my tutorial are register with My Free Copyright.
Please do not claim as your own.
This tutorial writer assumes you have a working
knowledge of using Paint Shop Pro.
This tutorial was done in Paint Shop Pro9,
but can be adapted to use in other
Paint Shop Pro versions.

SUPPLIES NEEDED
Tube of choice: I'm using the awesome work of Pinuptoons .
Please do not use unless you have a license to do so.
You can get her tubes
HERE
Scrapkit of Choice: I am using CDO Halloween Collab
You can download it
HERE ...Thank you Foxy's
Template of choice:I am using Creative Misfit Halloween Temps
You can download it
HERE...Thank you Annu
Mask of choice: I am using Halloween #2
You can download it
HERE...Thank you Jenny
Filters used:None
Font for Name is Solotice of Suffering HERE
Copy write is always done in Pixelette  HERE

Dropshadow use through out H-2/V-2/O-50/B-5.00
Please leave a thank you when you downloading for supplies.

my tag is just a guide...please use your imagination
and make the tag your own you do not have to
use any of the supplies I used.


     LET'S BEGIN
Open up Template and ShiftD and close original...delete
copyright layer/close all layers/delete background layer/
copy/paste paper of choice/layers/load/save mask/load mask
from disk/find your mask and load with these settings/click ok
On the following raster layers follow these directions...
activate rectangle layer/copy/paste paper of choice/resize
selection/invert on rectangle layer/delete on paperlayer
merge down/add drop shadow
activate rectangle2 layer/color fill with black/add drop shadow
activate circle layer/copy/paste paper of choice/resize
selection/invert on circle layer/delete on paperlayer/merge
down/add drop shadow
activate circle2 layer/copy/paste paper of choice/resize
selection/invert on circle layer/delete on paperlayer/merge
down/add drop shadow
activate circle2 layer/copy/paste paper of choice/resize
selection/invert on circle layer/delete on paperlayer/merge
down/add drop shadow
activate circle4 layer/copy/paste paper of choice/resize
selection/invert on circle layer/delete on paperlayer/merge
down/add drop shadow/keep activated/copy paste tube/resize
selections/invert on circle layer/delete on tube layer/add
drop shadow
activate circle5 layer/copy/paste paper of choice/resize
selection/invert on circle layer/delete on paperlayer/merge
down/add drop shadow/keep activated/copy paste tube/resize
selections/invert on circle layer/delete on tube layer/add
drop shadow
activate large square layer/copy/paste paper of choice/resize
selections/invert on square layer/delete on paper layer/merge
down/add drop shadow/leave word art as is
activate film square back layer/make a gradient from two colors
from the kit/fill into square back/recolor flim top to match the
back layer/add drop shadow
add your main tube and place where it will lokk best/add drop
shadow/change color of word art to match tag/add drop shadow
add any other elements to make your tag your own/add drop
shadow on each element/resize your tag
add your watermark and copyright credits/give it a slight
gradient glow ...now give your tag to a friend.
You're done...thank you for trying my tutorial
please send me a copy so that I can show case it on my blog
send
to.... riggsbee53@gmail.com


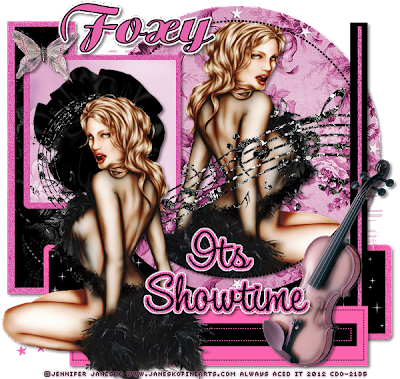
PTU Foxy's Designz and Jennifer Janesko

It's Showtime
This tutorial was written on September 12,2012.
Any similarities to another tutorial is purely coincidental.
All my tutorial are register with My Free Copyright.
Please do not claim as your own.
This tutorial writer assumes you have a working
knowledge of using Paint Shop Pro.
This tutorial was done in Paint Shop Pro9,
but can be adapted to use in other
Paint Shop Pro versions.

SUPPLIES NEEDED
Tube of choice: I'm using the awesome work of Jennifer Janesko .
Please do not use unless you have a license to do so.
You can get her tubes
HERE
Scrapkit of Choice: I am using Foxy's Designs IB JJ 28-1
You can download it
HERE ...Thank you Foxy's
Template of choice:I am using Addititive Pleasures #17
You can download it
HERE...Thank you Tamie
Mask of choice: I am using Insatiable Dreams #182
You can download it
HERE...Thank you Cat
Filters used:None
Font for Name is Milan Bold HERE
Copy write is always done in Pixelette  HERE

Dropshadow use through out H-2/V-2/O-50/B-5.00
Please leave a thank you when you downloading for supplies.

my tag is just a guide...please use your imagination
and make the tag your own you do not have to
use any of the supplies I used.


     LET'S BEGIN
Open up Template and ShiftD and close original...delete
copyright layer/close all layers/delete background layer/
copy/paste paper of choice/layers/load/save mask/load mask
from disk/find your mask and load with these settings/click ok
On the following raster layers follow these directions...
on glitter rectangle layer leave as is/activate rectangle layer
copy/paste paper of choice/resize selection/invert on rectangle
layer/delete on paperlayer/merge down/add drop shadow
activate rectangle2 layer/copy/paste paper of choice/resize
selection/invert on rectangle layer/delete on paperlayer/merge
down/add drop shadow
activate rectangle3 layer/copy/paste paper of choice/resize
selection/invert on rectangle layer/delete on paperlayer/merge
down/add drop shadow
activate circle layer/copy/paste paper of choice/resize
selection/invert on circle layer/delete on paperlayer/merge
down/add drop shadow/leave star and dotted layer as is/magic
wand/click inside dotted circle/copy/paste tube of choice
resize if needed/selections/invert on dotted line/delete
on tube layer/add drop shadow to tube
leave glitter square layer as is/on square layer/copy/paste
paper of choice/resize/selections/invert on square layer
delete on paper layer/merge down/add drop shadow/copy paste
element of choice/resize if needed/add drop shadow
leave all other layers as is/add drop shadow/add your main
tube/resize if needed/place on left side of tag/add drop
shadow
add any other elements to make your tag your own/add drop
shadow on each element/resize your tag
add your watermark and copyright credits/give it a slight
gradient glow ...now give your tag to a friend.
You're done...thank you for trying my tutorial
please send me a copy so that I can show case it on my blog
send
to....  riggsbee53@gmail.com