Showing posts with label CDO Inspired By Tube Scrapkit. Show all posts

3/10/16

CDO BabyCakes Scraps and Alena Lazareva

Beautiful

This tutorial was written on March 10,2016. 
Any similarities to another tutorial is purely coincidental.
All my tutorial are register with My Free Copyright. 
Please do not claim as your own.
This tutorial writer assumes you have a working 
knowledge of using Paint Shop Pro.
This tutorial was done in Paint Shop Pro9,
but can be adapted to use in other 
Paint Shop Pro versions.


SUPPLIES NEEDED

Tube of choice: I'm using the awesome work of Alena Lazareva.
Please do not use unless you have a license to do so. 
Get Them HERE

Scrapkit of Choice: I am using PTU BabyCakes Scraps Alena Lazareva IB 5-3
Pack 86...You can purchase it HERE ...Thank You Lynne

Template of choice:I am using Brulicious Designs-Beautiful Template
You can download it HERE...Thanks Brunette 

Mask of Choice: I am using Urban Fairytales Mask 58
You can download it HERE.... Thank You 

Filters used:Eye Candy 4000 gradient glow - HERE
Xero-Porclein -HERE
Blend - Overlay

Font for Name is Kingthings Organica
Copy write is always done in Pixelette  HERE

Drop shadow use through out H-2/V-2/O-60/B-6.85
Drop shadow used on tube H-1/V-1/O-50/B-5.00

Please leave a thank you when you downloading for supplies.

my tag is just a guide...please use your imagination 
and make the tag your own you do not have to 
use any of the supplies I used.


     LET'S BEGIN

Open up Template and ShiftD and close original...delete 
copyright layer/close all layers/copy/paste paper of choice
resize to fit canvas/layers/load/save mask/find your mask
and set with these setting/click ok


On the following raster layers follow these directions...

activate bottom square layer/copy/paste paper of choice/resize
paper/selections/invert on square layer/delete on paper layer
merge down/add drop shadow

activate top square layer/copy/paste paper of choice/resize
paper/selections/invert on square layer/delete on paper layer
merge down/add drop shadow

activate circle layer/copy/paste paper of choice resize paper
selections/invert on circle layer/delete on paper layer/merge 
down/add drop shadow

activate top left square layer/copy/paste paper of choice resize paper
selections/invert on rectangle layer/delete on paper layer/merge 
down/leave double square layers as is/add drop shadow

activate bottom right square layer/copy/paste paper of choice/resize
paper/selections/invert on square layer/delete on paper layer
merge down/add drop s

change middle square layer to a circle/ellipse tool/color grey/make
a medium size circle with these setting/click apply


activate/copy/paste paper of choice/invert on 
circle layer/delete on paper layer/merge down

change glitter square to glitter circle/ellipse tool/color white
size 10/with these setting


make a circle/adjust/add noise with these setting/click ok

copy/paste tube of choice/resize if needed/place in center of circle
duplicate/on original layer effect/porcelain with these setting/on 
duplicate layer/blend/overlay/lower opacity by 40%/add light shadow

add any other elements you wish to use/resize if needed/add drop shadow
to each element/place where they will look best

add your watermark and copyright credits/give it a slight gradient 
glow.....now give your tag to a friend.

You're done...thank you for trying my tutorial
please send me a copy so that I can show case it on my blog

2/2/16

CDO Gimptastic Scraps and PinUpToons

I Love You

This tutorial was written on February 2,2016. 
Any similarities to another tutorial is purely coincidental.
All my tutorial are register with My Free Copyright. 
Please do not claim as your own.
This tutorial writer assumes you have a working 
knowledge of using Paint Shop Pro.
This tutorial was done in Paint Shop Pro9,
but can be adapted to use in other 
Paint Shop Pro versions.


SUPPLIES NEEDED

Tube of choice: I'm using the awesome work of PinUpToons.
Please do not use unless you have a license to do so. 
Get Them HERE

Scrapkit of Choice: I am using CDO Gimptastic Scraps IB PinUpToons 140-1 
You can purchase it HERE ...Thank You Amy

Template of choice:I am using Dees'Sign Depot Valentine Template #7
You can download it HERE...Thanks Dee

Mask of Choice: I am using Tonya Temptations Mask #1
You can download it HERE.... Thank You Tonya

Filters used:Eye Candy 4000 gradient glow - HERE
Blend - Overlay

Font for Name is Love Letters
Copy write is always done in Pixelette  HERE

Drop shadow use through out H-2/V-2/O-60/B-6.85

Please leave a thank you when you downloading for supplies.

my tag is just a guide...please use your imagination 
and make the tag your own you do not have to 
use any of the supplies I used.


     LET'S BEGIN

Open up Template and ShiftD and close original...delete 
copyright layer/close all layers/copy/paste paper of choice
resize to fit canvas/layers/load/save mask/find your mask
and set with these setting/click ok


On the following raster layers follow these directions...

activate large pink oval layer/copy/paste paper of choice/resize
paper/selections/invert on oval layer/delete on paper layer
merge down/add drop shadow

leave white heart layer as is/activate center heart layer/copy/paste 
paper of choice resize paper/selections/invert on heart layer/delete 
on paper layer/merge down/add drop shadow

activate red small circle layer/copy/paste paper of choice resize paper
selections/invert on circle layer/delete on paper layer/merge down
leave white ring layer as is/add drop shadow to both

activate top pink rectangle layer/copy/paste paper of choice resize paper
selections/invert on rectangle layer/delete on paper layer/merge 
down/leave dotted rectangle as is/add drop shadow 

leave white glittered heart as is/activate right red heart layer/copy/paste
paper of choice resize paper/selections/invert on heart layer/delete on 
paper layer/merge down/leave heart criss cross shadow and heart criss cross 
as is/copy/paste close up tube of choice/place within heart/erase excess
tube underneath/add drop shadow

leave white circle as is/activate circle layer/copy/paste tube of choice
resize tube so head is within the circle/invert on circle layer/delete 
on tube layer/erase excess tube/duplicate tube/on original/blend/overlay
place duplicate underneath original/leave red ring as is/add drop shadow 
to both tubes

activate bottom pink rectangle layer/copy/paste paper of choice resize paper
selections/invert on rectangle layer/delete on paper layer/merge down/leave
dotted rectangle as is/add drop shadow 

leave all layers of wordart as is/leave both layers of little hearts as is
add drop shadow to hearts

copy/paste main tube of choice/resize if needed/place on left side of tag
add drop Shadow

add any other elements you wish to use/resize if needed/add drop shadow
to each element/place where they will look best

add your watermark and copyright credits/give it a slight gradient 
glow.....now give your tag to a friend.

You're done...thank you for trying my tutorial
please send me a copy so that I can show case it on my blog

1/22/16

CDO Creative Crazy Scraps and Michael Calandra

Behind Every Tree

This tutorial was written on January 22,2016. 
Any similarities to another tutorial is purely coincidental.
All my tutorial are register with My Free Copyright. 
Please do not claim as your own.
This tutorial writer assumes you have a working 
knowledge of using Paint Shop Pro.
This tutorial was done in Paint Shop Pro9,
but can be adapted to use in other 
Paint Shop Pro versions.


SUPPLIES NEEDED

Tube of choice: I'm using the awesome work of Michael Calandra.
Please do not use unless you have a license to do so. 
Get Them HERE

Scrapkit of Choice: I am using PTU Creative Crazy Scraps Michael 
Calandra IB 13-1....You can purchase it HERE ...Thanks Stu

Mask of Choice: I am using Insatiable Dreams Mask #67
You can download it HERE....Thank you Cat

Filters used:Eye Candy 4000 gradient glow - HERE

Font for Name is Kingthings Petrock
Copy write is always done in Pixelette  HERE

Drop shadow use through out H-2/V-2/O-60/B-6.85

Please leave a thank you when you downloading for supplies.

my tag is just a guide...please use your imagination 
and make the tag your own you do not have to 
use any of the supplies I used.


     LET'S BEGIN

Open up new raster layer 800x800/copy/paste paper of choice
resize to fit canvas/layers/load/save mask/find your mask
and set with these setting/click ok


copy/paste frame #2/resize if needed/place in center of mask/copy
paste element #2- stairs/resize by 70%place inside the frame/add
drop shadow

copy/paste element #3-branch/resize so it's within the frame,but 
behind it/copy/paste element #4-tree/place on top of branches 
layer/resize by 70%/do not add drop shadow to these layers

copy/paste tube of choice/resize by 70%/place tube on top of stairs
placing feet othe bottom step/add drop shadow

now it's time to have some fun/add any other elements you wish to 
use/resize if needed/add drop shadow to each element/place where 
they will look best

add wordart if you wish/I used the wordart in the kit,but wrote it myself
with my font choice/add fat gradient glow/add drop shadow

add your watermark and copyright credits/give it a slight gradient 
glow.....now give your tag to a friend.

You're done...thank you for trying my tutorial
please send me a copy so that I can show case it on my blog

12/22/15

PTU Foxy Designz and Sheena Pike

Self Affliction

This tutorial was written on December 22,2015. 
Any similarities to another tutorial is purely coincidental.
All my tutorial are register with My Free Copyright. 
Please do not claim as your own.
This tutorial writer assumes you have a working 
knowledge of using Paint Shop Pro.
This tutorial was done in Paint Shop Pro9,
but can be adapted to use in other 
Paint Shop Pro versions.


SUPPLIES NEEDED

Tube of choice: I'm using the awesome work of Sheena Pike.
Please do not use unless you have a license to do so. 
Get Them HERE

Scrapkit of Choice: I am using PTU Foxy Designz Sheena Pike IB 2-1
You can purchase it HERE ...Thanks Ann

Mask of Choice: I am using Sophistical Simone Mask # 73 
You can download it HERE .... Thank You Simone

Filters used:Eye Candy 4000 gradient glow - HERE
Blend of Choice

Font for Name is DK Father Frost 
Copy write is always done in Pixelette  HERE

Drop shadow use through out H-2/V-2/O-60/B-6.85

Please leave a thank you when you downloading for supplies.

my tag is just a guide...please use your imagination 
and make the tag your own you do not have to 
use any of the supplies I used.


     LET'S BEGIN

Open up new raster layer 800x800/copy/paste paper of choice
resize to fit canvas/layers/load/save mask/find your mask
and set with these setting/click ok/merge group/duplicate
move this mask over to the right/merge mask


copy/paste element #15/resize if needed/place in center of canvas
resize if needed/add drop shadow

copy/paste element #17/resize if needed/place in on top od broken
photo frame/resize if needed/add drop shadow

copy/paste tbe of choice/resize if needed/place in center of swirl
add drop shadow

copy/paste element #20/resize if needed/place on right side of tube
resize if needed/add drop shadow

copy/paste element #12/resize if needed/place on top of leaves/right
side of frame/resize if needed/add drop shadow

copy/paste element #16/resize if needed/place on top of flower/right
rside of frame/esize if needed/add drop shadow

copy/paste element #10/resize if needed/place on top of feather/right
size of frame/resize if needed/add drop shadow

copy/paste element #13/resize if needed/place on left side near the
top of photo frame/resize if needed/add drop shadow

copy/paste element #3/resize if needed/place on top of arrow heart
left side of frame/resize if needed/add drop shadow

copy/paste element #8/resize if needed/place on top of pearl/right
side of frame/resize if needed/add drop shadow

add wordart if you wish/look at the tube and think of a slogon to 
add/use font of choice/add fat gradient glow/add drop shadow

add your watermark and copyright credits/give it a slight gradient 
glow.....now give your tag to a friend.

For name use this inner bevel with these settings/gradient glow/thin 
setting/twice add drop shadow

You're done...thank you for trying my tutorial
please send me a copy so that I can show case it on my blog

12/14/15

CDO Gimptastic Scraps and Maryline Cavenaze

Christmas Ho Ho Ho

This tutorial was written on December 13,2015. 
Any similarities to another tutorial is purely coincidental.
All my tutorial are register with My Free Copyright. 
Please do not claim as your own.
This tutorial writer assumes you have a working 
knowledge of using Paint Shop Pro.
This tutorial was done in Paint Shop Pro9,
but can be adapted to use in other 
Paint Shop Pro versions.


SUPPLIES NEEDED

Tube of choice: I'm using the awesome work of Maryline Cavenaze.
Please do not use unless you have a license to do so. 
Get Them HERE

Scrapkit of Choice: I am using PTU Gimptastic Scraps CDO Melissa
Dawn IB 19-1...You can purchase it HERE ...Thank You Amy

Template of choice:I am using Punky Butts Template Winter/Holiday #3
You can download HERE ...Thank you Punky

Mask of Choice: I am using Insatiable Dreams#598
You can download it HERE.... Thank You at

Filters used:Eye Candy 4000 gradient glow - HERE

Font for Name is Remachine Script Personal
Copy write is always done in Pixelette  HERE

Drop shadow use through out H-2/V-2/O-60/B-6.85

Please leave a thank you when you downloading for supplies.

my tag is just a guide...please use your imagination 
and make the tag your own you do not have to 
use any of the supplies I used.


     LET'S BEGIN

Open up Template and ShiftD and close original...delete 
copyright layer/close all layers/copy/paste paper of choice
resize to fit canvas/layers/load/save mask/find your mask
and set with these setting/click ok


On the following raster layers follow these directions...

This template fitted the tube and the scrapkit perfectly 
so leave all layers of the template as is/you'll just be 
adding elements to complete the template.

copy/paste element #17 on top of the four window layers
place on right side of tag/add drop shadow

copy/paste tube of choice/place on top of the for window/add
drop shadow

copy/paste element #10/ resize by 70%/place beside tube layer
add drop shadow

add any other elements you wish to use/resize if needed/add drop 
shadow to each element/place where they will look best

add your watermark and copyright credits/give it a slight gradient 
glow.....now give your tag to a friend.

You're done...thank you for trying my tutorial
please send me a copy so that I can show case it on my blog

12/13/15

CDO Gimptastic and Maryline Cazenave


Christmas Cheese Please

This tutorial was written on December 12,2015. 
Any similarities to another tutorial is purely coincidental.
All my tutorial are register with My Free Copyright. 
Please do not claim as your own.
This tutorial writer assumes you have a working 
knowledge of using Paint Shop Pro.
This tutorial was done in Paint Shop Pro9,
but can be adapted to use in other 
Paint Shop Pro versions.

 photo MC_Chesse Please-Amy.gif


SUPPLIES NEEDED

Animation Shop - HERE

Animation of Choice: Rebel Dezigns Animation Pack 155-#466
You can purchase it HERE.....Thank you Gizzy

Tube of choice: I'm using the awesome work of Maryline Cazenave.
Please do not use unless you have a license to do so. 
Get Them HERE

Scrapkit of Choice: I am using Gimptastic Scraps - Melissa
Dawn IB -19-1. You Can purchase HERE....Thank you Amy

Mask of Choice: I am using Gimptastic Tuts Mask 12
You can download it HERE.... Thank You Leah

Word Art of Choice: I used my own Word art

Filters used:Eye Candy 4000 gradient glow - HERE

Font for Name is Christmas Card
Copy write is always done in Pixelette  HERE

Drop shadow use through out H-2/V-2/O-60/B-6.85

Please leave a thank you when you downloading for supplies.

my tag is just a guide...please use your imagination 
and make the tag your own you do not have to 
use any of the supplies I used.


     LET'S BEGIN

Open up new raster layer 800x800/copy/paste paper of choice
resize to fit canvas/layers/load/save mask/find your mask
and set with these setting/click ok

Copy/past christmas Tree/resize by 70%/place in center of mask
add drop shadow

copy/paste house/ resize by 70%/place in front ofchristmas tree
add drop shadow

Copy/paste top hat/resize by 70%/place on top of house/add
drop shadow

Copy/paste christmas hat/resize by 70%/place behind house on right
side/add drop shadow

Copy/paste christmas gift/resize by 70%/place in front of house
on right side/add drop shadow

Copy/paste tube of choice/resize by 70%place on left side of tag
add drop shadow

write a wordart using font of choice/ incolor to match tag/add
fat gradient glow/sharpen/ and add drop shadow

add any other elements you wish to use/depending on what you want 
your tag to look like

add your watermark and copyright credits/give it a slight gradient 
glow.....

To Animate

close all layers except tree and mask/copy/merge/paste as new animation
into animation shop

Open the animation/you will see it has 25 frames/edit/select all

click on tag/edit/duplicate 5 times/then click on top frame
duplicate 4 times/you should have 25 frames/edit select all

copy/past animation on seleted frame/place on top of tree twice

now go back to psp and close those two layers and open the rest
copy/merge into animation shop as new animation

click on tag and duplicate as above for 25 frames/edit select all
copy into selected frame/place on top of animation/view animation
if satisfied/save  as gif 

now give your tag to a friend.

You're done...thank you for trying my tutorial
please send me a copy so that I can show case it on my blog
send to.... riggsbee53@gmail.com


CDO BabyCake Scraps and Maryline Cavenaze

Raising Cane

This tutorial was written on December 13,2015. 
Any similarities to another tutorial is purely coincidental.
All my tutorial are register with My Free Copyright. 
Please do not claim as your own.
This tutorial writer assumes you have a working 
knowledge of using Paint Shop Pro.
This tutorial was done in Paint Shop Pro9,
but can be adapted to use in other 
Paint Shop Pro versions.


SUPPLIES NEEDED

Tube of choice: I'm using the awesome work of Maryline Cavenaze.
Please do not use unless you have a license to do so. 
Get Them HERE

Scrapkit of Choice: I am using PTU BabyCakes Scraps Holiday Sparkle
You can purchase it HERE ...Thank You Lynne

Template of choice:I am using Punky Butts Template # 148
You can download HERE

Mask of Choice: I am using Tonya's Temptationz-Mask 9
You can download it HERE.... Thank You Tonya

Filters used:Eye Candy 4000 gradient glow - HERE

Font for Name is Bauhaus
Copy write is always done in Pixelette  HERE

Drop shadow use through out H-2/V-2/O-60/B-6.85

Please leave a thank you when you downloading for supplies.

my tag is just a guide...please use your imagination 
and make the tag your own you do not have to 
use any of the supplies I used.


     LET'S BEGIN

Open up Template and ShiftD and close original...delete 
copyright layer/close all layers/copy/paste paper of choice
resize to fit canvas/layers/load/save mask/find your mask
and set with these setting/click ok


On the following raster layers follow these directions...

This template fitted the tube and the scrapkit perfectly 
so leave all layers of the template as is/you'll just be 
adding elements to complete the template.

on the left large square/copy/paste element #13/resize if needed
copy/paste elemennt #16/resize if needed/see tag for placement
add drop shadow

on the right large square/copy/paste element #13/resize if needed
copy/paste elemennt #16/resize if needed/see tag for placement
add drop shadow

on the left small square/copy/paste element #12/resize if needed
see tag for placement/add drop shadow

on the right small square/copy/paste element #12/resize if needed
see tag for placement/add drop shadow

copy/paste tube of choice/place on top of rectangle frame/activate 
oval layer/invert on oval layer/delete on tube layer/select none

copy/paste element 10/ resize by 70%/place beside tube layer/add
drop shadow

add any other elements you wish to use/resize if needed/add drop 
shadow to each element/place where they will look best

add your watermark and copyright credits/give it a slight gradient 
glow.....now give your tag to a friend.

You're done...thank you for trying my tutorial
please send me a copy so that I can show case it on my blog
send to.... riggsbee53@gmail.com

12/8/15

CDO Chichi Designz and Enamorte

Dove Wings

This tutorial was written on December 09,2015. 
Any similarities to another tutorial is purely coincidental.
All my tutorial are register with My Free Copyright. 
Please do not claim as your own.
This tutorial writer assumes you have a working 
knowledge of using Paint Shop Pro.
This tutorial was done in Paint Shop Pro9,
but can be adapted to use in other 
Paint Shop Pro versions.

 photo Enamorte-Dove Wings-Cindy.gif


SUPPLIES NEEDED
Animation Shop 3 ....HERE

Animation of Choice: I am using Scrappy Bit of Fun Animation 
you can download HERE .... Thank you Simone

Tube of choice: I'm using the awesome work of Enamorte.
Please do not use unless you have a license to do so. 
Get Them HERE

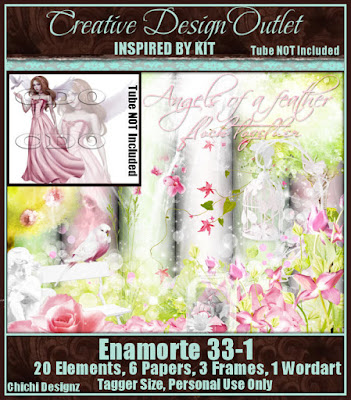
Scrapkit of Choice: I am using PTU Chichi Designz Enamorte IB 33-1
You can purchase it HERE ...Thank You Cindy

Template of choice:I am using Leah Template #6.Amy&Leah Gimptastic Tuts
You can download it HERE...Thanks Leah

Mask of Choice: I am using Insatiable Dreams-Mask 37
You can download it HERE.... Thank You Cat

Filters used:Eye Candy 4000 gradient glow - HERE
Penta.com- Dot and Cross - HERE

Font for Name is Arizonia
Copy write is always done in Pixelette  HERE

Dropshadow use through out H-2/V-2/O-60/B-6.85

Please leave a thank you when you downloading for supplies.

my tag is just a guide...please use your imagination 
and make the tag your own you do not have to 
use any of the supplies I used.


     LET'S BEGIN

Open up Template and ShiftD and close original...delete 
copyright layer/close all layers/copy/paste paper of choice
resize to fit canvas/layers/load/save mask/find your mask
and set with these setting/click ok

On the following raster layers follow these directions...

activate small circle 2 back/copy/flood fill with white-#ffffff
add drop shadow

activate small circle layer/copy/paste paper of choice resize paper
selections/invert on circle layer/delete on paper layer/merge 
down/add drop shadow

activate small circle 1 back/copy/flood fill with white-#ffffff
add drop shadow

activate small circle layer/copy/paste paper of choice resize paper
selections/invert on circle layer/delete on paper layer/merge 
down/add drop shadow

Leave large circle  back layer as is/add drop shadow
activate large circle/taking a color from the paper #2 and flood fill
the large circle

activate rectangle 3 back layer/copy/flood fill with white-#ffffff
add drop shadow

activate rectangle 3 layer/copy/paste paper of choice resize paper
selections/invert on rectangle layer/delete on paper layer/merge 
down/keep activated/copy/paste closeup tube/delete on tube layer
effects/penta.com-dot and cross/with these setting/click ok/add 
drop shadow to tube and rectangle

activate rectangle 2 back layer/copy/flood fill with white-#ffffff
add drop shadow

activate rectangle 2 layer/copy/paste paper of choice resize paper
selections/invert on rectangle layer/delete on paper layer/merge 
down/keep activated/copy/paste closeup tube/delete on tube layer
effects/penta.com-dot and cross/with these setting/click ok/add 
drop shadow to tube and rectangle

activate rectangle 1 back layer/copy/flood fill with white-#ffffff
add drop shadow

activate rectangle 1 layer/copy/paste paper of choice resize paper
selections/invert on rectangle layer/delete on paper layer/merge 
down/keep activated/copy/paste main tube/add drop shadow to tube 
and rectangle

add any other elements you wish to use/resize if needed/add drop 
shadow to each element/place where they will look best

add your watermark and copyright credits/give it a slight gradient 
glow.....

To animated

close name,white angle and flower
copy/merge tag and take to animation shop
edit/duplicate 5 times/click on top frame and duplicate 3 times
edit/select all
open your animation of choice/edit select all/paste into selected
frame/place on both sides of smaller frame/see my tag for placement
go back to psp and close layers and open the three that were closed.
copy/merge and take to animation shop
edit/duplicate 5 times/click on top frame and duplicate 3 times
edit/select all/paste into selected frame on top of animated frame
view animation/if satisfied/save as gif
You're done...thank you for trying my tutorial
now give your tag to a friend.

please send me a copy so that I can show case it on my blog
send to.... riggsbee53@gmail.com

Here's another tag I made with this kit


11/2/15

Honored Scraps and Steve Baier

Finish Line

This tutorial was written on November 02,2015. 
Any similarities to another tutorial is purely coincidental.
All my tutorial are register with My Free Copyright. 
Please do not claim as your own.
This tutorial writer assumes you have a working 
knowledge of using Paint Shop Pro.
This tutorial was done in Paint Shop Pro9,
but can be adapted to use in other 
Paint Shop Pro versions.


SUPPLIES NEEDED

Tube of choice: I'm using the awesome work of Steve Baier.
Please do not use unless you have a license to do so. 
Get Them HERE

Scrapkit of Choice: I am using PTU Honored Scraps  Steve Baier IB 1-1
You can purchase it HERE ...Thanks Alison

Mask of Choice: I am using Insatiable Dreams Mask # 30
You can download it HERE  ....Thanks Cat

Filters used:Eye Candy 4000 gradient glow - HERE

Font for Name is Louisianne
Copy write is always done in Pixelette  HERE

Drop shadow use through out H-2/V-2/O-60/B-6.85

Please leave a thank you when you downloading for supplies.

my tag is just a guide...please use your imagination 
and make the tag your own you do not have to 
use any of the supplies I used.


     LET'S BEGIN

Open up new raster layer 800 x 800/copy/paste paper of choice
resize to fit canvas/layers/load/save mask/find your mask
and set with these setting/click ok

Copy/paste paper 03/resize at 70%/place on lower center/see tag 
for placement/add a drop shadow

copy/paste element 5/resize by 70%/place in front of paper/see tag
for placement/add drop shadow

copy/paste element 4/resize by 70%/place in front of element 5/see tag
for placement/add drop shadow

copy/paste element 13/resize by 70%/place in front o element 4/see tag
for placement/add drop shadow

copy/paste tube of choice/resize at 70%/place on top of element 13 
layer/see tag for placement/add drop shadow

add any other elements you wish to use/the ones below are the one 
I used/resize each element/see tag for placement/add drop shadow to 
each element/place where they will look best

element 08
element 12
element 14

add wordart if you wish/add fat gradient glow/add drop shadow

add your watermark and copyright credits/give it a slight gradient 
glow.....now give your tag to a friend.

You're done...thank you for trying my tutorial
please send me a copy so that I can show case it on my blog

send to.... riggsbee53@gmail.com

11/1/15

Mellie Beans and Pinuptoons

My Gothic Heart

This tutorial was written on November 1,2015. 
Any similarities to another tutorial is purely coincidental.
All my tutorial are register with My Free Copyright. 
Please do not claim as your own.
This tutorial writer assumes you have a working 
knowledge of using Paint Shop Pro.
This tutorial was done in Paint Shop Pro9,
but can be adapted to use in other 
Paint Shop Pro versions.


SUPPLIES NEEDED

Tube of choice: I'm using the awesome work of PinupToons.
Please do not use unless you have a license to do so. 
You can get her tubes HERE

Scrapkit of Choice: I am using PTU Mellie Beans PinupToons IB 224-1
You can purchase it HERE ...Thank you Melissa

Mask of Choice: element 16 within kit

Filters used:Eye Candy 4000 gradient glow - HERE
Mura Meister - copies - HERE

Font for Name is Cambria
Copy write is always done in Pixelette  HERE

Drop shadow use through out H-3/V-3/O-60/B-8.76

Please leave a thank you when you downloading for supplies.


my tag is just a guide...please use your imagination 
and make the tag your own you do not have to 
use any of the supplies I used.


     LET'S BEGIN

Open up new raster layer 800 x 800/copy/paste frame #1/resize by 70%
twice/close/copy/paste element #18/resize by 70% twice and 90% once
effects/mura meister/copies/with these setting/click ok/now you're
going to delete the stem of the flower in the middle (see pic)


open frame #1 and place on top of flower frame/click inside flower 
frame/modify/expand with these setting/click ok


keep activated/copy paste closeup tube of choice
add drop shadow to both frames and tube

copy/paste element #16/duplicate/mirror/place below frame

now comes the time when you can let your creativity flow/add any 
other elements you wish to use/resize if needed/add drop shadow
to each element

Copy/paste your main tube/resize if needed/place where you would
think it will look best/add drop shadow/resize tag if needed

add word art from the kit/add black gradient glow/on the name place
inner bevel with these setting/click ok 


add your watermark and copyright credits/give it a fat gradient  
glow ...now give your tag to a friend.

You're done...thank you for trying my tutorial
please send me a copy so that I can show case it on my blog
send to.... riggsbee53@gmail.com