Showing posts with label PTU Scrapkit. Show all posts

11/21/19

PTU Curious Creative Dreams And Very Many

Christmas Cheer

This tutorial was written on November 22,2019. 
Any similarities to another tutorial is purely coincidental.
All my tutorial are register with My Free Copyright. 
Please do not claim as your own.
This tutorial writer assumes you have a working 
knowledge of using Paint Shop Pro.
This tutorial was done in Paint Shop Pro9,
but can be adapted to use in other 
Paint Shop Pro versions.


SUPPLIES NEEDED

Tube of choice: I'm using the awesome artwork of Very Many.
Please do not use unless you have a license to do so. 
Get Them HERE

Scrapkit of Choice: I am featuring the scrapkit of Curious Creative
Dreams-Christmas Dreams ...You can purchase it HERE ...Thanks Stu


Mask of Choice: I am using a mask by Rebel Dezigns Mask 86
You can download this HERE  Thank You GiZZy
Mask of Choice: I am also using Spiderwebs and Moonbeams Mask 14
You can download it HERE Thank you Stacie

Filters used:Eye Candy 4000 gradient glow - HERE
Toadies - Ommadawn HERE
Penta.com-Color Dot HERE

Font for Name is Santa's Sleigh Full Deluxe
Copy write is always done in Pixelette  HERE

Drop shadow use through out H-3/V-3/O-60/B-6.85

Please leave a thank you when you downloading for supplies.

my tag is just a guide...please use your imagination 
and make the tag your own you do not have to 
use any of the supplies I used.


     LET'S BEGIN

Open up new raster layer 800x800/copy/paste element 18/resize by 70%
place in center of canvas/magic wand/click inside/selections/modify
by 10/invert on frame/copy/paste paper 10/delete on paper/keep
selected/copy paste close up tube/resize to fit the frame/delete on
tube/keep selected/duplicate tube/place on top of frame/eraser tool
erase  any extra tube at the bottom of frame/selection none/add a drop 
shadow on frame

On the bottom tube go to your plugin and select Toadies/Ommadawn
with these selections/add drop shadow


On your top tube Penta dot. com/select color dot with these selections
add drop shadow


copy/paste element 26/now comes the tricky part/depending on the color 
of your tube you may have to change the color of the elements to match
your tube. To do so go to color change tool/change to target/size 8
color all the element you want to change to the color you want/once
done then you can place element where you want on your tag
resize all element to fit your tag/don't forget to add a drop shadow

now it's time to have some fun/add all elements you wish to use/place
where they will look best on your tag/once your tag is finish you can 
place your mask underneath the tag. 
I used two masks/open paper of 
choice/ recolor paper if needed/find your mask/ I used Rebel Dezigns 86


and Spiderwebs and Moonbeams 14/with these setting


add your watermark and copyright credits/give it a slight gradient glow
now give your tag to a friend.

You're done...thank you for trying my tutorial
please send me a copy so that I can show case it on my blog

1/14/18

Barbara Jensen-Memories of Love

Memories of Love

This tutorial was written on January 14,2018. 
Any similarities to another tutorial is purely coincidental.
All my tutorial are register with My Free Copyright. 
Please do not claim as your own.
This tutorial writer assumes you have a working 
knowledge of using Paint Shop Pro.
This tutorial was done in Paint Shop Pro9,
but can be adapted to use in other 
Paint Shop Pro versions.


SUPPLIES NEEDED

Tube of choice: I'm using the awesome work of Barbara Jensen.
Please do not use unless you have a license to do so. 
Get Them HERE

Scrapkit of Choice: I am using LadyHawwk Designs Exclusive 
Barbara Jensen-Beloved......You can purchase it HERE ...Thanks Cat

Mask of Choice: I am using mask by Rebel Designz #182 and #219
You can download them HERE

Filters used:Eye Candy 4000 gradient glow - HERE
Penta.com - Jeans- HERE
Toadies - Omnadawn - HERE

Font for Name and Wordart is Bosk - HERE
Word Art is my own - HERE (Or you can use your own)
Copy write is always done in Pixelette  HERE

Dropshadow use through out H-2/V-2/O-60/B-6.85

Please leave a thank you when you downloading for supplies.

my tag is just a guide...please use your imagination 
and make the tag your own you do not have to use any of 
the supplies I used. Also make sure you read each
designer or artist TOU.Make sure you save as you go along so
you don't lose anything.


     LET'S BEGIN

Open up new raster layer 800x800/copy/paste paper of choice
resize to fit canvas/layers/load/save mask/find your mask
and set with these setting/click ok


copy/paste another paper of choice
resize to fit canvas/layers/load/save mask/find your mask


Copy/paste frame 3/resize by 70%
place in center of canvas/magic wand/click inside/selections/modify
by 20/invert on frame/copy/paste paper of choice/delete on paper
selection none/add drop shadow on frame

copy/paste tube close up/place on outside of frame/duplicate/effects
penta.com-jeans with these setting on the top tube


On bottom tube/effects-Toadies-Omnadawn with these setting


add drop shadow to both

copy/paste elements/resize to suit the tag/place where you would like 
them to be/It doesn't have to look like mine/make it your own 

add drop shadow to each element after resizing and placement

Elements used:
element 1
element 6
elemeny 8
element 13
element 14
element 15
element 33
element 34
element 39
element 44
element 46

add any other elements you wish to use/resize if needed/add drop shadow 
to each element/place where they will look best
you can add my wordart or use one of your own

add your watermark and copyright credits/give it a slight gradient glow
now give your tag to a friend

You're done...thank you for trying my tutorial
please send me a copy so that I can show case it on my blog

9/19/17

PTU Freeks Creations - Spooky Fun

Chills and Thrills

This tutorial was written on September 19,2017. 
Any similarities to another tutorial is purely coincidental.
All my tutorial are register with My Free Copyright. 
Please do not claim as your own.
This tutorial writer assumes you have a working 
knowledge of using Paint Shop Pro.
This tutorial was done in Paint Shop Pro9
but can be adapted to use in other 
Paint Shop Pro versions.


SUPPLIES NEEDED

Scrapkit of Choice: I am using PTU Freeks Creations-Spooky Fun
You can download it HERE ...Thank You Holly

Template of choice:I am using DeesSign Depot Template Chills and Thrills
This is an exclusive CDO template.PU Only.You can download it HERE...Thanks Dee

Mask of Choice: I am using DBV Mask 104
You can download it HERE.... Thank You Vabs

Filters used:Eye Candy 4000 gradient glow - HERE

Font for Name is Back to Fanatic Lite
Copy write is always done in Pixelade  HERE

Dropshadow use through out H-2/V-2/O-60/B-6.85

Please leave a thank you when you downloading for supplies.
my tag is just a guide...please use your imagination 
and make the tag your own you do not have to 
use any of the supplies I used.


     LET'S BEGIN

Open up Template and ShiftD and close original...delete 
copyright layer/close all layers/copy/paste paper of choice
resize to fit canvas/layers/load/save mask/find your mask
and set with these setting/click ok


On the following raster layers follow these directions...

activate orange strip layer/copy/paste paper of choice/resize
paper/selections/modify/smooth with these setting


invert on 
strip layer/delete on paper layer/merge down/add drop shadow

activate purple square layer/copy/paste paper of choice/resize
paper/selections/modify/smooth with these setting above/invert on 
square layer/delete on paper layer/merge down/add drop shadow

leave green strip layer as is/add drop shadow

activate blue circle layer/copy/paste paper of choice resize paper
selections/modify/smooth with setting above/invert on circle layer
delete on paper layer/merge down/add drop shadow

activate green rectangle layer/copy/paste paper of choice resize paper
selections/modify/smooth with setting above/invert on rectangle layer
delete on paper layer/merge down/add drop shadow

leave black glitter layer and orange oval layer as is/add drop shadow

activate purple circle layer/copy/paste paper of choice/resize paper
selections/modify/smooth with setting above/invert on circle layer
delete on paper layer/merge down/leave large dotted circle layer as is

leave large dotted circle layer and blue circle layer as is/add drop shadow
leave all other layers as is

Now is the time to make your tag any way you want using elements from the kit
add as many as you like/resize if needed/add drop shadow to each element/
place where they will look best./once you finish/resize tag

add your watermark and copyright credits/give it a slight gradient 
glow.....now give your tag to a friend.

You're done...thank you for trying my tutorial
please send me a copy so that I can show case it on my blog

5/13/16

PTU Crystal Creations and Tezza Dezignz Tube Art

Bee

This tutorial was written on May 13,2016. 
Any similarities to another tutorial is purely coincidental.
All my tutorial are register with My Free Copyright. 
Please do not claim as your own.
This tutorial writer assumes you have a working 
knowledge of using Paint Shop Pro.
This tutorial was done in Paint Shop Pro9,
but can be adapted to use in other 
Paint Shop Pro versions.


SUPPLIES NEEDED

Tube of choice: I'm using the awesome work of Tezza Dezignz Tube Art.
Please do not use unless you have a license to do so. 
Purchase Them HERE

Scrapkit of Choice: I am using PTU Crystal Creations - Beatrice
You can purchase it HERE ...Thanks Crystal

Mask of Choice: I am using Vix's PSP Big Mask #19 
You can download it HERE - Thanks Vix

Filters used:Eye Candy 4000 gradient glow - HERE

Font for Name is Connie
Copy write is always done in Pixelette  HERE

Drop shadow use through out H-2/V-2/O-60/B-6.85

Please leave a thank you when you downloading for supplies.

my tag is just a guide...please use your imagination 
and make the tag your own you do not have to 
use any of the supplies I used.


     LET'S BEGIN

Open up new raster layer 800x800/copy/paste paper of choice
resize to fit canvas/layers/load/save mask/find your mask
and set with these setting/click ok

copy/paste element #30/resize
by 70%/place in center of canvas/add drop shadow

copy/paste element #27/resize by 70% twice/place in front of fence 
layer/duplicate 2x/overlap each flower along front of fence/merge
each layer down/add drop shadow

copy/paste element #1/resize by 70%/place in front of flowers/add
drop shadow

copy/paste element #20/resize by 70%/place in behind fence in center
add drop shadow

copy/paste element #15/resize by 70%/place in front of grass on left
side/add drop shadow

copy/paste tube of choice/resize by 70% twice/place on right side of
 grass/add drop shadow

now it's time to have some fun/add any other elements you wish to use
resize if needed/add drop shadow to each element/place where they will 
look best

add your watermark and copyright credits/give it a slight gradient 
glow.....now give your tag to a friend.

You're done...thank you for trying my tutorial
please send me a copy so that I can show case it on my blog


5/9/16

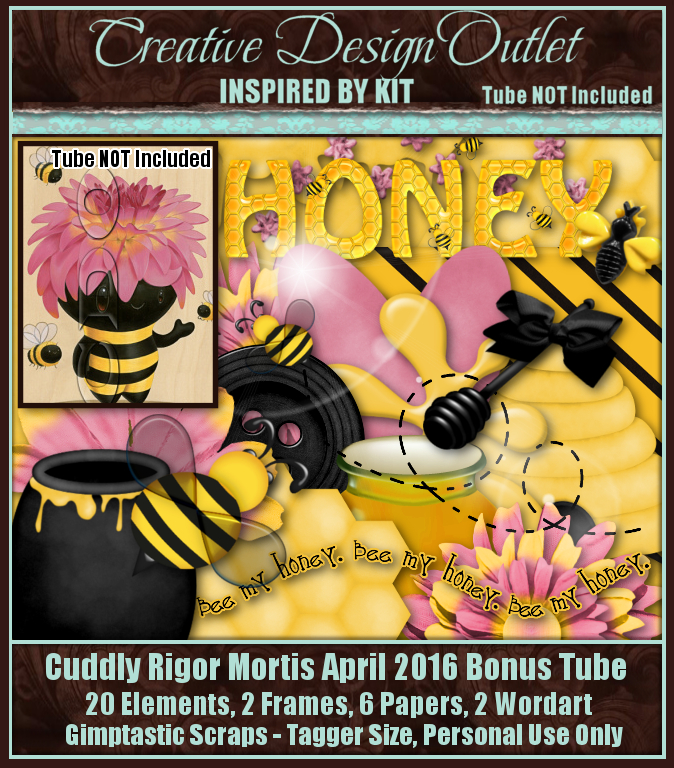
CDO Gimptastic Scraps and Cuddly Rigor Mortis

Honey

This tutorial was written on May 9,2016. 
Any similarities to another tutorial is purely coincidental.
All my tutorial are register with My Free Copyright. 
Please do not claim as your own.
This tutorial writer assumes you have a working 
knowledge of using Paint Shop Pro.
This tutorial was done in Paint Shop Pro9,
but can be adapted to use in other 
Paint Shop Pro versions.


SUPPLIES NEEDED

Tube of choice: I'm using the awesome work of Cuddly Rigor Mortis.
Please do not use unless you have a license to do so. 
Get Them HERE

Scrapkit of Choice: I am using CDO Gimptastic Scraps IB Cuddly Rigor Motis BT 2016
Pack 86...You can purchase it HERE ...Thank You Amy

Template of choice:I am using Aqua Rebel 315 Template # 87
You can download it HERE...Thanks Aqua

Mask of Choice: I am using Babes Designz Mask 37  HERE 
and Designz by Vabys mask #101
You can download it HERE.... Thank You 

Filters used:Eye Candy 4000 gradient glow - HERE

Font for Name is Impact
Copy write is always done in Pixelette  HERE

Drop shadow use through out H-2/V-2/O-60/B-6.85

Please leave a thank you when you downloading for supplies.

my tag is just a guide...please use your imagination 
and make the tag your own you do not have to 
use any of the supplies I used.


     LET'S BEGIN

Open up Template and ShiftD and close original...delete 
copyright layer/close all layers/copy/paste paper of choice
resize to fit canvas/layers/load/save mask/find your mask
and set with these setting/click ok


copy/paste paper of choice
resize to fit canvas/layers/load/save mask/find your mask
and set with these setting/click ok


On the following raster layers follow these directions...

activate right circle layer/copy/paste paper of choice/resize
paper/selections/modify/smooth with these setting


invert on 
circle layer/delete on paper layer/merge down/add drop shadow

activate left circle layer/copy/paste paper of choice resize paper
selections/modify/smooth with setting above/invert on circle layer
delete on paper layer/merge down/add drop shadow

leave right back rectangle as is/activate right slanted rectangle 
layer/copy/paste paper of choice/resize paper/selections/modify
smooth with setting above/invert on rectangle layer/delete on paper 
layer/merge down/add drop shadow

leave left back rectangle as is/activate left slanted rectangle 
layer/copy/paste paper of choice/resize paper/selections/modify
smooth with setting above/invert on rectangle layer/delete on paper 
layer/merge down/add drop shadow

activate center circle layer/copy/paste paper of choice/resize paper
selections/modify/smooth with setting above/invert on circle layer
delete on paper layer/merge down/leave middle circle layers as is

activate top circle/copy/paste paper of choice/resize paper/selections/
modify/smooth with setting above/invert on circle layer/delete on paper 
layer/merge down/add drop shadow/copy/paste tube of choice/resize if needed
place in middle of top layer/add drop shadow 

leave left small square as is/activate left small square layer/copy/paste 
paper of choice resize paper/selections/modify/smooth with setting above
invert on square layer/delete on paper layer/merge down/add drop shadow

leave left small bottom square as is/activate left small square layer/copy
paste paper of choice resize paper/selections/modify/smooth with setting 
above/invert on square layer/delete on paper layer/merge down/add drop shadow

leave left small middle square as is/activate left small square layer/copy
paste paper of choice resize paper/selections/modify/smooth with setting 
above/invert on square layer/delete on paper layer/merge down/add drop shadow

add any other elements you wish to use/resize if needed/add drop shadow
to each element/place where they will look best

add your watermark and copyright credits/give it a slight gradient 
glow.....now give your tag to a friend.

You're done...thank you for trying my tutorial
please send me a copy so that I can show case it on my blog

5/5/16

PTU Exclusive LadyHawwk Designs and Barbara Jensen

Elegance

This tutorial was written on May 5,2016. 
Any similarities to another tutorial is purely coincidental.
All my tutorial are register with My Free Copyright. 
Please do not claim as your own.
This tutorial writer assumes you have a working 
knowledge of using Paint Shop Pro.
This tutorial was done in Paint Shop Pro9,
but can be adapted to use in other 
Paint Shop Pro versions.


SUPPLIES NEEDED

Tube of choice: I'm using the awesome work of Barbara Jensen.
Please do not use unless you have a license to do so. 
Get Them HERE

Scrapkit of Choice: I am using PTU LadyHawwk Designs Exclusive 
for Barbara Jensen-Elegance...You can purchase it HERE ...Thank You Cat

Template of choice:I am using Gimptastic Tuts Template #1
You can download it HERE...Thanks Leah

Mask of Choice: I am using Insatiable Dreams Mask #395
You can download it HERE.... Thank You Cat

Filters used:Eye Candy 4000 gradient glow - HERE
Eye Candy 4000- Glass

Font for Name is Precious
Copy write is always done in Pixelette  HERE

Dropshadow use through out H-2/V-2/O-60/B-6.85

Please leave a thank you when you downloading for supplies.

my tag is just a guide...please use your imagination 
and make the tag your own you do not have to 
use any of the supplies I used.


     LET'S BEGIN

Open up Template and ShiftD and close original...delete 
copyright layer/close all layers/copy/paste paper of choice
resize to fit canvas/layers/load/save mask/find your mask
and set with these setting/click ok


On the following raster layers follow these directions...

activate circle backing layer/copy/paste paper # 9/resize
paper/recolor paper a little darker/I used e6bf60/selections
modify/smooth with these setting


click ok/invert on circle 
layer/delete on paper layer/merge down/add drop shadow

activate large circle layer/copy/paste paper # 6/resize paper
selections/modify/smooth setting above/click ok/invert on 
circle layer/delete on paper layer/merge down/keep activated
copy/pase  tube of choice/resize by 120%/place in middle of
circle/delete on tube/erase all excess tube/add drop shadow
to circle and tube

activate rectangle backing2 layer/copy/paste paper of choice
resize paper/selections/modify/smooth setting above/click 
ok/invert on rectangle layer/delete on paper layer/merge down
add drop shadow

activate rectangle #2 layer/copy/paste paper of choice/resize
paper/selections/modify/smooth setting above/click ok
invert on rectangle layer/delete on paper layer/merge down/add
drop shadow

activate rectangle backing #1 layer/recolor black/add drop shadow
activate rectangle 1/copy/paste paper # 10/recolor this paper the
samecolor as you did the other one/resize paper/selections/modify
smooth setting above/click ok/invert on rectangle layer/delete
on paper layer/merge down/now merge this layer to the backing layer
add drop shadow

activate long strip backing layer/recolor black/activate long strip
layer/copy/paste paper of choice/recolor with the same color/resize 
paper/selections/modify/smooth  setting above/click ok/invert on 
Strip layer/delete on paper layer/merge down/now merge this layer to 
the backing layer/add drop shadow
recolor thin strip 1 layer and thinstrip2 layer black/add drop shadow

copy/paste tube of choice/resize if needed/place on left side of tag
mirror/add drop Shadow

add any other elements you wish to use/resize if needed/add drop shadow
to each element/place where they will look best
Forword art I wrote the word Elegance with same font for name/add drop 
shadow

add your watermark and copyright credits/give it a slight gradient glow
.....now give your tag to a friend.

You're done...thank you for trying my tutorial
please send me a copy so that I can show case it on my blog

Exclusive PTU LadyHawwk Designs and Barbara Jensen

Fabulous

This tutorial was written on May 5,2016. 
Any similarities to another tutorial is purely coincidental.
All my tutorial are register with My Free Copyright. 
Please do not claim as your own.
This tutorial writer assumes you have a working 
knowledge of using Paint Shop Pro.
This tutorial was done in Paint Shop Pro9,
but can be adapted to use in other 
Paint Shop Pro versions.


SUPPLIES NEEDED

Tube of choice: I'm using the awesome work of Barbara Jensen.
Please do not use unless you have a license to do so. 
Get Them HERE

Scrapkit of Choice: I am using PTU LadyHawwk Designs Exclusive 
for Barbara Jensen-Elegance...You can purchase it HERE ...Thank You Cat

Template of choice:I am using Millie PSP Madness Template #794
You can download it HERE...Thanks Millie

Mask of Choice: I am using Insatiable Dreams Mask #211 and 218
You can download it HERE.... Thank You Cat

Filters used:Eye Candy 4000 gradient glow - HERE
Eye Candy 4000- Glass

Font for Name is Copper Black
Copy write is always done in Pixelette  HERE

Dropshadow use through out H-2/V-2/O-60/B-6.85

Please leave a thank you when you downloading for supplies.

my tag is just a guide...please use your imagination 
and make the tag your own you do not have to 
use any of the supplies I used.


     LET'S BEGIN

Open up Template and ShiftD and close original...delete 
copyright layer/close all layers/copy/paste paper of choice
resize to fit canvas/layers/load/save mask/find your mask
and set with these setting/click ok/merge group


copy/paste paper of choice/resize to fit canvas/layers/load
save mask/find your 2nd mask/and set with these setting/click 
ok/merge group


On the following raster layers follow these directions...

activate large rounded square layer/copy/paste paper of choice
resize paper/selections/modify/smooth with these setting/


click 
ok/invert on rounded square layer/delete on paper layer/merge 
down/add drop shadow

activate small rounded rectangle layer/copy/paste paper of choice
resize paper/selections/modify/smooth setting above/click ok
invert on rectangle layer/delete on paper layer/merge down/add
drop shadow

activate long rectangle layer/copy/paste paper of choice/resize
paper/selections/modify/smooth setting above/click ok/invert
on rectangle layer/delete on paper layer/merge down/add drop
shadow

activate large square layer/copy/paste paper of choice/resize
paper/selections/modify/smooth setting above/click ok
invert on rectangle layer/delete on paper layer/merge down/add
drop shadow

activate medium rectangle layer/copy/paste paper of choice/resize
paper/selections/modify smooth setting above/click ok/invert 
on rectangle layer/delete on paper layer/merge down


copy/paste tube of choice/resize if needed/place in middle of tag
add drop Shadow

add any other elements you wish to use/resize if needed/add drop 
shadow to each element/place where they will look best

Recolor large wordart to match the tag/leavewhite word art as is/add 
drop shadow

On name/Effects inner bevel with these settings/click ok


then effects
eye candy/glass with these settings


click ok/add drop shadow

add your watermark and copyright credits/give it a slight gradient 
glow.....now give your tag to a friend.

You're done...thank you for trying my tutorial
please send me a copy so that I can show case it on my blog
send to.... riggsbee53@gmail.com

5/2/16

PTU Foxy's Designz and Jose Cano


Cute but Psycho

This tutorial was written on May 1,2016. 
Any similarities to another tutorial is purely coincidental.
All my tutorial are register with My Free Copyright. 
Please do not claim as your own.
This tutorial writer assumes you have a working 
knowledge of using Paint Shop Pro.
This tutorial was done in Paint Shop Pro9,
but can be adapted to use in other 
Paint Shop Pro versions.


SUPPLIES NEEDED

Tube of choice: I'm using the awesome work of Jose Cano.
Please do not use unless you have a license to do so. 
Get Them HERE. The tube I used is an exclusive

Scrapkit of Choice: I am using PTU Foxy's Designz-Asylum
Pack 86...You can purchase it HERE ...Thank You Ann

Template of choice:I am using Kandi Kisses Template #67
Kandi Kisses no longer has her blog up,please use another template

Mask of Choice: I am using Designz by Staci-Mask 
You can download it HERE.... Thank You Staci

Filters used:Eye Candy 4000 gradient glow - HERE
Blend - Hard Light

Font for Name is Impact
Copy write is always done in Pixelette  HERE

Drop shadow use through out H-2/V-2/O-60/B-6.85

Please leave a thank you when you downloading for supplies.

my tag is just a guide...please use your imagination 
and make the tag your own you do not have to 
use any of the supplies I used.


     LET'S BEGIN

Open up Template and ShiftD and close original...delete 
copyright layer/close all layers/copy/paste paper of choice
resize to fit canvas/layers/load/save mask/find your mask
and set with these setting/click ok


On the following raster layers follow these directions...

activate pink circle layer/copy/paste paper of choice/resize
paper/selections/invert on circle layer/delete on paper layer
merge down/add drop shadow

activate black tab 2 layer/copy/paste paper of choice resize paper
selections/invert on black tab layer/delete on paper layer/merge 
down/add drop shadow

activate black tab 1 layer/copy/paste paper of choice resize paper
selections/invert on black tab 1 layer/delete on paper layer/merge 
down/leave double square layers as is/add drop shadow

activate blue tabs 2 layer/copy/paste paper of choice resize paper
selections/invert on blue tabs 2 layer/delete on paper layer/merge 
down/add drop shadow/leave white circles layer as is/add drop shadow

activate blue tab layer/copy/paste paper of choice resize paper
selections/invert on blue tab layer/delete on paper layer/merge 
down/add drop shadow

activate large pink heart layer/copy/paste paper of choice/resize paper
selections/invert on heart layer/delete on paper layer/merge down
copy/paste tube of choice/place in middle of heart/delete on tube/erase
excess tube from the bottom/add drop shadow

recolor linear heart to black adjust/hue/saturation
hue/saturation/lightness with these setting/click ok


leave all  other layers as is

add any other elements you wish to use/resize if needed/add drop shadow
to each element/place where they will look best

add your watermark and copyright credits/give it a slight gradient 
glow.....now give your tag to a friend.

You're done...thank you for trying my tutorial
please send me a copy so that I can show case it on my blog

4/8/16

CDO Foxy's Designz and Keith Garvey

Bitch Squad

This tutorial was written on April 8,2016. 
Any similarities to another tutorial is purely coincidental.
All my tutorial are register with My Free Copyright. 
Please do not claim as your own.
This tutorial writer assumes you have a working 
knowledge of using Paint Shop Pro.
This tutorial was done in Paint Shop Pro9,
but can be adapted to use in other 
Paint Shop Pro versions.


SUPPLIES NEEDED

Tube of choice: I'm using five awesome tubes of Keith Garvey.
Please do not use unless you have a license to do so. 
Get Them HERE

Scrapkit of Choice: I am using PTU Foxy's Designz - Bitch Squad
Pack 86...You can purchase it HERE ...Thank You Ann

Template of choice:I am using Crazy Cakes Scraps -Bitch Squad
Crazy Cakes Scraps is no longer online,please use another template...Thanks 

Mask of Choice: I am using VixPSP-Mask 3 and 19
You can download it HERE.... Thank You Vix

Filters used:Eye Candy 4000 gradient glow - HERE
DBS Flux-Bubbles - HERE

Font for Name is Opine Heavy
Copy write is always done in Pixelette  HERE

Drop shadow use through out H-2/V-2/O-60/B-6.85

Please leave a thank you when you downloading for supplies.

my tag is just a guide...please use your imagination 
and make the tag your own you do not have to 
use any of the supplies I used.


     LET'S BEGIN

Open up Template and ShiftD and close original...delete 
copyright layer/close all layers/copy/paste paper of choice
resize to fit canvas/layers/load/save mask/find your mask
and set with these setting/click ok


copy/paste paper of choice/resize to fit canvas/layers/load
save mask/find your mask/and set with these setting/click ok


On the following raster layers follow these directions...

activate oval layer/selections/modify/smooth selection/with 
these setting/click ok


copy/paste paper of choice/resize paper
selections/invert on oval layer/delete on paper layer/merge
down/effects/texture effects/texture with these setting/add
drop shadow


activate font oval layer/selections/modify/smooth selection/with 
these setting/click ok/copy/paste paper of choice/resize paper
selections/invert on oval layer/delete on paper layer/merge 
down/add drop shadow

activate bkrectangle layer/copy/paste paper of choice resize paper
selections/invert on rectangle layer/delete on paper layer/merge 
down/add drop shadow

activate left square layer/copy/paste paper of choice resize paper
selections/invert on square layer/delete on paper layer/merge down
copy/paste element 49/place on top of square/copy/paste/element50
place on top of element 49 half way/merge the two layers/duplicate
on original layer/effects/dsb flux/bubbles with these settings


click ok/place this overtop od duplicate layer/on duplicate layer
blend soft light/add drop shadow

activate right square layer/copy/paste paper of choice resize paper
selections/invert on square layer/delete on paper layer/merge 
down/cpoy/paste element of choice/add drop shadow to all

activate another rectangle layer/recolor the middle of this rectangle
a color that matches your tag/add drop shadow/add gradient glow to 
wordart around circle/add drop shadow

Leave all three circles as is/add drop shadow

copy/paste all your tubes/place them in front of the circles/resize
if you need too/see my tag for placement/add drop shadow to each
leave all rectangles as is/make sure the rectangles are covering the
bottom half of the tubes/remove all star layers/recolor starlines
merge them down/ee tag for placement/add drop shadow to all

add any other elements you wish to use/resize if needed/add drop 
shadow to each element/place where they will look best

add your watermark and copyright credits/give it a slight gradient 
glow.....now give your tag to a friend.

You're done...thank you for trying my tutorial
please send me a copy so that I can show case it on my blog