Showing posts with label Fantasy Moments. Show all posts

12/29/12

FTU Fantasy Moments and Elias Chatzoudis

Cold As Ice
This tutorial was written on December 28,2012.
Any similarities to another tutorial is purely coincidental.
All my tutorial are register with My Free Copyright.
Please do not claim as your own.
This tutorial writer assumes you have a working
knowledge of using Paint Shop Pro.
This tutorial was done in Paint Shop Pro9,
but can be adapted to use in other
Paint Shop Pro versions.

SUPPLIES NEEDED
Tube of choice: I'm using the awesome work of Elias Chatzoudis .
Please do not use unless you have a license to do so.
You can get his tubes HERE
Scrapkit of Choice: I am using FTU Fantasy Moments Winter Dreams
You can purchase it HERE ...Sylvie
Template of choice:I am using Toxic Desire Template 158
You can download it HERE...Thank you Kristin
Mask of Choice: I am using Vixpsp Christmas mask #4
You can download it Here...Thanks Vix
Filters used:Eye Candy 4000 gradient glow - HERE
Font for Name is Santas Sleigh Full Bold
Copy write is always done in Pixelette  HERE

Dropshadow use through out H-2/V-2/O-50/B-5.00
Please leave a thank you when you downloading for supplies.

my tag is just a guide...please use your imagination
and make the tag your own you do not have to
use any of the supplies I used.


     LET'S BEGIN
Open up Template and ShiftD and close original...delete
copyright layer/close all layers/copy/paste paper of choice
resize to fit canvas/layers/load/save mask/find your mask
and set with these setting/click ok/delete background
On the following raster layers follow these directions...
activate left rectangle layer/copy/paste paper of choice
resize/selection/invert on left rectangle layer/delete on
paper layer/add drop shadow
activate right rectangle layer/copy/paste paper of choice
resize/selection/invert on right rectangle layer/delete on
paper layer/add drop shadow
activate left circle layer/copy/paste paper of choice
resize/selection/invert on left circle layer/delete on
paper layer/add drop shadow
activate right circle layer/copy/paste paper
of choiceresize/selection/invert on right
circle layer/delete on paper layer/add drop shadow
copy/paste element of choice/resize/place on both circle
layers/add drop shadow
activate rectangle layer/copy/paste paper of choice/resize
selection/invert on rectangle layer/delete on paper layer
add drop shadow/copy paste another element of choice/resize
add drop shadow/duplicate/mirror
activate left circle2 layer/copy/paste paper of choice
resize/selection/invert on left circle2 layer/delete on
paper layer/keep activated/copy/paste tube of choice
you want a close up of the face/selection/invert on circle
delete on tube/duplicate tube/on orignal tube/blend soft

light/on duplicate tube lower opacity to 50%/add drop shadow
to both tubes
activate right circle2 layer/copy/paste paper of choice
resize/selection/invert on right circle2 layer/delete on
paper layer/keep activated/copy/paste tube of choice
you want a close up of the face/selection/invert on circle
delete on tube/duplicate tube/on orignal tube/blend soft
light/on duplicate tube lower opacity to 50%/add drop shadow
to both tubes
activate left square layer/copy/paste paper of choice/resize
selection/invert on left square layer/delete on paper layer
keep activated/copy/paste tube of choice you want a larger
part of the face/selection/invert on square layer/delete on
tube layer/duplicate tube/on orignal tube/blend/screen/on
duplicate tube/lower opacity to 50%/add drop shadow to both

tubes
activate right square layer/copy/paste paper of choice/resize
selection/invert on right square layer/delete on paper layer
keep activated/copy/paste tube of choice you want a larger
part of the face/selection/invert on square layer/delete on
tube layer/duplicate tube/on orignal tube/blend/screen/on
duplicate tube/lower opacity to 50%/add drop shadow to both
tubes/on snowflake layer change to white
activate circle1 layer/color circle to match tag/color glitter
circle layer to match tag/on circle2/color this tag to match
tag also/keep activated/copy/paste element of choice/resize to
fit circle/now copy/paste tube/selection/invert on circle2 layer
delete on tube layer/now place wordart on top/add drop shadow
to element and tube layer
leave thin glitter rectangle layer as is/on thin rectangle layer
change color to match tag/add drop shadow/leave words as is/also
leave snowflakes as is/add main tube/resize if needed/add an
element to the bottom to hide the cut off/add drop shadow
add your watermark and copyright credits/give it a slight gradient
glow ...now give your tag to a friend.
You're done...thank you for trying my tutorial
please send me a copy so that I can show case it on my blog
send to....
riggsbee53@gmail.com


10/24/12

FTU Fantasy Moments and Ralph Macrey

Bewitched


This tutorial was written on October 23,2012.
Any similarities to another tutorial is purely coincidental.
All my tutorial are register with My Free Copyright.
Please do not claim as your own.
This tutorial writer assumes you have a working
knowledge of using Paint Shop Pro.
This tutorial was done in Paint Shop Pro9,
but can be adapted to use in other
Paint Shop Pro versions.


SUPPLIES NEEDED


Tube of choice: I'm using the awesome work of Ralph Macrey .
Please do not use unless you have a license to do so.
You can get his tubes HERE

Scrapkit of Choice: I am using Fantasy Moments FTU Halloween 2010
You can download it HERE ...Sylvie

Template of choice:I am using Amy & Leah Gimptastic Halloween #1
You can download it HERE...Thank you Leah

Mask of Choice: I am using DBV Mask #117
You can download it Here...Thank you Vaybs

Filters used:Eye Candy 4000 gradient glow - HERE

Font for Name is Threadz Needle
Copy write is always done in Pixelette HERE

Dropshadow use through out H-2/V-2/O-50/B-5.00

Please leave a thank you when you downloading for supplies.

my tag is just a guide...please use your imagination
and make the tag your own you do not have to
use any of the supplies I used.


LET'S BEGIN

Open up Template and ShiftD and close original...delete
copyright layer/close all layers/wordart layer as is


On the following raster layers follow these directions...

activate square layer/copy/paste paper of choice/resize
selection/invert on square layer/delete on paper layer
merge down/copy/paste element of choice/resize if needed
add drop shadow

activate rectangle layer/copy/paste paper of choice/resize
selection/invert on rectangle layer/delete on paper layer
merge down/copy/paste element of choice/resize if needed
add drop shadow

activate lower rectangle layer/copy/paste paper of choice
resize/selection/invert on lower rectangle layer/delete
on paper layer/merge down/copy/paste element of choice
resize/add drop shadow

activate upper rectangle layer/copy/paste paper of choice
resize/selection/invert on upper rectangle layer/delete
on paper layer/merge down/copy/paste element of choice
resize/add drop shadow

activate center square layer/copy/paste paper of choice/resize
selection/invert on center square layer/delete on paper layer
merge down/copy/paste element of choice/resize if needed
add drop shadow

activate upper oval layer/copy/paste paper of choice/resize
selection/invert on upper oval layer/delete on paper layer
merge down/copy/paste element of choice/resize/add drop shadow
color oval frame to match oval

activate lower oval layer/copy/paste paper of choice/resize
selection/invert on lower oval layer/delete on paper layer
merge down/copy/paste element of choice/resize/add drop shadow
color oval frame to match oval

activate center oval layer/copy/paste paper of choice/resize
selection/invert on center oval layer/delete on paper layer
merge down/copy/paste element of choice/resize/add drop shadow

copy/paste main tube/resize if needed/place where it will look best
add drop shadow to tube

add any other elements to make your tag your own/add drop shadow on
each element/resize your tag

add your watermark and copyright credits/give it a slight gradient
glow ...now give your tag to a friend.


Forum Tag

Open up template from tag and ShiftD and close original...open new size
raster layer 600x200...this tag is the exact duplicate of the tag only
smaller/resize all layers before you place in this new raster layer

follow the directions above/remember it's just a smaller version of the
tag so resize accordingly

you can add more elements if you like/add drop shadow to everything

 
Avatar

open new raster layer/160x160/choose paper of choice for back ground
add any element you want/copy/paste/resize and place wherever/add
drop shadow

copy/paste tube/resize until the area you want to show is where
you want it to show/add drop shadow

add your watermark and copyright credits to all three tags...

now give your set to a friend.

You're done...thank you for trying my tutorial
please send me a copy so that I can show case it on my blog

9/26/12

FTU Fantasy Moments and Jacqueline Collen-Tarrolly

Tortured Heart
This tutorial was written on August 25,2012.
Any similarities to another tutorial is purely coincidental.
All my tutorial are register with My Free Copyright.
Please do not claim as your own.
This tutorial writer assumes you have a working
knowledge of using Paint Shop Pro.
This tutorial was done in Paint Shop Pro9,
but can be adapted to use in other
Paint Shop Pro versions.


SUPPLIES NEEDED


Tube of choice: I'm using the awesome work of Jacqueline Collen-Tarrolly .
Please do not use unless you have a license to do so.
You can get her tubes HERE

Scrapkit of Choice: I am using Fantasy Moments FTU Tortured Heart
You can download it HERE ...Thank you Sylvie

Template of choice:I am using Essence of Creativity #17
Thank you Yvette...Essence of Creativity is no longer on the net

Mask of Choice: I am using Insatiable Dreams #187
You can download it HERE...Thank you Cat

Filters used:EyeCandy 4000 gradient glow...HERE
Font for Name and wordart is Arial
Copy write is always done in Pixelette HERE

Dropshadow use through out H-2/V-2/O-50/B-5.00
Please leave a thank you when you downloading for supplies.


my tag is just a guide...please use your imagination
and make the tag your own you do not have to
use any of the supplies I used.


LET'S BEGIN

Open up Template and ShiftD and close original...delete
copyright layer/close all layers except bakground layer
layers/load/save mask/load mask from disc/find your mask
load with these setting below/click ok


On the following raster layers follow these directions...
activate heart layer/copy/paste paper of choice/resize
selection/invert on heart layer/delete on paperlayer/merge
down/add drop shadow

activate heart frame1 layer/copy/paste paper of choice/resize
selection/invert on heart frame1 layer/delete on paper layer
merge down/add drop shadow

activate rectangle1 layer/copy/paste paper of choice/resize
selection/invert on rectangle1 layer/delete on paper layer
merge down/effects/add drop shadow

activate frame1 layer/copy/paste paper of choice/resize
selection/invert on frame1 layer/delete on paper layer
merge down/add drop shadow

activate rectangle2 layer/copy/paste paper of choice/resize
selection/invert on rectangle2 layer/delete on paper layer
merge down/add drop shadow

activate frame2 layer/copy/paste paper of choice/resize
selection/invert on frame2 layer/delete on paper layer/merge
down/keep doodle as is

activate heart frame top/copy/paste paper of choice/resize
selection/invert on heart frame top/delete on paper layer
merge down/add drop shadow

add any other elements to make your tag your own/add drop
shadow on each element/resize your tag

add your tube of choice/place where it will look best/resize
add drop shadow

now select font of choice and type out (message in my bottle/
My heart is tortured/ Without you/place within the rectangle2
layer/effect gradient glow on wordart/using the same font type
To My Heart/ and place on the envelope letter

add your watermark and copyright credits/give it a slight gradient
glow ...now give your tag to a friend.

You're done...thank you for trying my tutorial
please send me a copy so that I can show case it on my blog

7/9/12

FTU Fantasy Moments and Ralph Macrey

Warrior Girls

This tutorial was written on July 9,2012.
Any similarities to another tutorial is purely coincidental.
All my tutorial are register with My Free Copyright.
Please do not claim as your own.
This tutorial writer assumes you have a working
knowledge of using Paint Shop Pro.
This tutorial was done in Paint Shop Pro9,
but can be adapted to use in other
Paint Shop Pro versions.


SUPPLIES NEEDED

Tube of choice: I'm using the awesome work of Ralph Macrey.
Please do not use unless you have a license to do so.
You can get his tubes HERE

Scrapkit of Choice: I am using Fantasy Moments FTU Scrap kit
Avalanche...You can download it HERE... Thank you Sylvie

Template of choice:I am using Designz by Ali Template #158
Ali has taken her blog down,please use another template...Thank you Ali

Mask of Choice: I am using Insatiable Dreams Mask #160
You can download it HERE....Thank you Cat

Filters used:Eye Candy 4000 gradient glow - HERE

Font for Name is Positive New45
Copy write is always done in Pixelette
Both HERE


Drop shadow use through out H-2/V-2/O-50/B-5.00

Please leave a thank you when you downloading for supplies.


my tag is just a guide...please use your imagination
and make the tag your own you do not have to
use any of the supplies I used.


     LET'S BEGIN

Open up Template and ShiftD and close original...delete
copyright layer/close all layers/choose paper of choice
copy/paste and put underneath background layer/go to mask
of choice with these setting and click ok/delete background
layer/add drop shadow


On the following raster layers follow these directions...

activate rectangle1 layer/copy/paste paper of choice\go to
rectangle1 layer/ invert/go to paper layer and delete/leave
rectangle1 frame as is/add drop shadow

activate rectangle2 layer/copy/paste paper of choice/go to
rectangle2 layer/invert/go to paper layer and delete/keep
activated/copy/paste your tube of choice/resize your tubes/
because I used two tubes I had to widen the rectangle to
accomandate both tubes/arrange then to suit each other/add
drop shadow to both

resize the rectangle frame2 to fit the background/add drop
shadow

color the dotted rectangle layers to match the color in your
tag/add a drop shadow to this layer/I used different colors

activate rectangle 3 layer/resize it so that it's not blocking
the tubes you just put in place/copy/paste one of your tubes
resize to fit/duplicate/on original/blend/screen/place duplicate
underneath/on orignial lower opacity to 80%/add drop shadow to
both/resize the rectangle frame 3 to fit/add drop shadow

add your other tube/resize and place where it will lokk best/add
drop shadow/take your font of choice and write Warrior Girls with
two colors from your tag/add drop shadow

now add any other element you wish to use to make your tag your
own/add drop shadow on each element/resize your tag

add your watermark and copyright credits/give it a slight gradient
glow ...now give your tag to a friend.

You're done...thank you for trying my tutorial
please send me a copy so that I can show case it on my blog
send to....riggsbee53@gmail.com


6/5/12

FTU Fantasy Moments and DCSMC

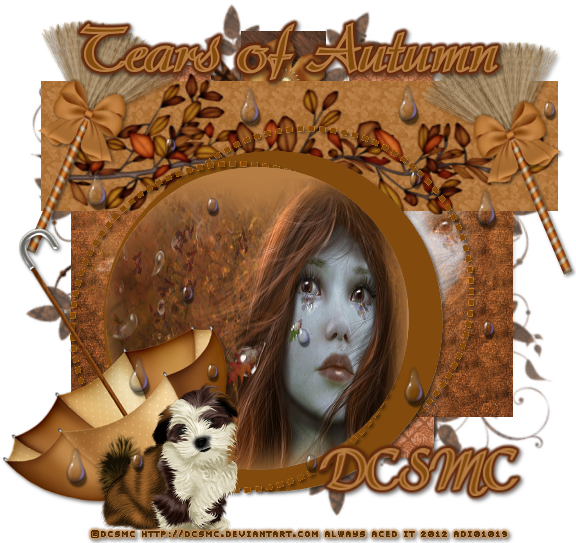
Autumn Tears

This tutorial was written on June 5,2012.
Any similarities to another tutorial is purely coincidental.
All my tutorial are register with My Free Copyright.
Please do not claim as your own.
This tutorial writer assumes you have a working
knowledge of using Paint Shop Pro.
This tutorial was done in Paint Shop Pro9,
but can be adapted to use in other
Paint Shop Pro versions.


SUPPLIES NEEDED

Tube of choice: I'm using the awesome work of DCSMC.
Please do not use unless you have a license to do so.
You can get her tubes HERE

Scrapkit of Choice: I am using Fantasy Moments FTU Scrap kit
from September 2010 blog train...You can download it HERE
Thank you

Template of choice:I am using Denz Designz Template #28
You can download it HERE...Thank you Denny

Mask of Choice: I am using CM Fall Mask #2 by Melissa Creationz
You can download it HERE....Thank you Melissa

Filters used:Eye Candy 4000 gradient glow - HERE

Font for name & word art is Arkona -Medium ...HERE
Copy write is always done in Pixelette ...HERE


Drop shadow use through out H-2/V-2/O-50/B-5.00

Please leave a thank you when you downloading for supplies.


my tag is just a guide...please use your imagination
and make the tag your own you do not have to
use any of the supplies I used.


     LET'S BEGIN

Open up Template and ShiftD and close original...delete
copyright layer/close all layers/choose paper of choice
copy/paste and put underneath background layer/go to mask
of choice with these setting and click ok/delete background
layer/add drop shadow


On the following raster layers follow these directions...

activate vertical rectangle1 layer/copy/paste paper of choice
go to vertical rectangle1 layer/ invert/go to paper layer and
delete/add drop shadow

activate vertical rectangle2 layer/copy/paste paper of choice
go to vertical rectangle2 layer/ invert/go to paper layer and
delete/add drop shadow

activate lg rectangle layer/copy/paste paper of choice/go to
lg rectangle layer/ invert/go to paper layer and delete/add
drop shadow/copy/paste tube/resize to fit/blend/screen

activate horizontal rectangle layer/copy/paste paper of choice
go to horizontal rectangle layer/ invert/go to paper layer and
delete/add drop shadow/copy/paste element of choce/resize to fit
add drop shadow

activate vertical rectangle3 layer/copy/paste paper of choice
go to vertical rectangle3 layer/ invert/go to paper layer and
delete/add drop shadow

activate both circle dots and color to match your tag/add drop
shadow

activate circle layer/copy/paste paper or color of choice
go to circle layer/ invert/go to paper layer and delete/add
drop shadow

activate top circle layer/copy/paste paper or color of choice
go to top circle layer/ invert/go to paper layer and delete/
keep activated/copy/paste your tube/place where you want it/resize
if needed/circle layer/invert/tube layer/delete/add drop shadow

now add any other element you wish to use to make your tag your
own/add drop shadow on each element/resize your tag

I also added some water drops on new raster layer

add your watermark and copyright credits/give it a slight gradient
glow ...now give your tag to a friend.

You're done...thank you for trying my tutorial
please send me a copy so that I can show case it on my blog
send to....riggsbee53@gmail.com

4/23/12

FTU Fantasy Moments and Della Lindsey

Famous

This tutorial was written on April 23,2012.
Any similarities to another tutorial is purely coincidental.
All my tutorial are register with My Free Copyright.
Please do not claim as your own.
This tutorial writer assumes you have a working
knowledge of using Paint Shop Pro.
This tutorial was done in Paint Shop Pro9,
but can be adapted to use in other
Paint Shop Pro versions.

SUPPLIES NEEDED

Tube of choice: I'm using the awesome work of Della Lindsey.
Please do not use unless you have a license to do so.
You can get her tubes HERE

Scrapkit of Choice: I am using Fantasy Moments FTU Scrap kit
Called Dash of Sadness...You can download it HERE...Thank you

Mask of choice:I am using Vix PSP mask #346
You can download it HERE...Thank you Vix

Template of Choice: I am using Blissfully Beth Template #138
You can download it HERE...Thank you Beth

Filters used:Eye Candy 4000 gradient glow - HERE
Xero: Porcelain....HERE

Font for Name is Andantino Script...HERE
Copy write is always done in Pixelette ...HERE

Drop shadow use through out H-2/V-2/O-65/B-6.00

Please leave a thank you when you downloading for supplies.


my tag is just a guide...please use your imagination
and make the tag your own, you do not have to
use any of the supplies I used.


     LET'S BEGIN

Open up Template and ShiftD and close original...delete
copyright layer/close all layers/choose paper of choice
copy/paste and put underneath background layer/go to mask
of choice with these setting 


 click ok/delete background
layer

On the following raster layers follow these directions...

activate black circle layer/copy/paste paper of choice/resize
paper/go to black circle layer/invert/go to paper layer and
delete/merge down/while still activated/copy/paste tube of
choice/place the part of the tube where you want it to show
go to circle layer/selection/invert/go to tube layer/delete
duplicate tube/on original tube/blend/screen/on the duplicate
layer/place that below original tube layer/leave the frame
as is/place drop shadow on tubes and frame

activate blue circle layer/copy/paste paper of choice/resize
paper/go to blue circle layer/invert/go to paper layer and
delete/merge down/keep activated

copy/paste tube/place the part of the tube where you want it
to show/xero/porcelain/with these setting


click ok/add drop shadow

activate blue rectangle layer/copy/paste paper of choice/resize
paper/go to blue rectangle layer/invert/go to paper layer and
delete/merge down/leave the frame and word art as it is

on the vertical and horizontal  dotted lines I alternated the
colors/red/black and gray to match the tag

leave everything else in the template as it is/I moved the rest
of the layers around to suit my tag/your choice to do or not
(see my tag for reference)

now add any other element you wish to use to make your tag your
own/add drop shadow on each element

add your watermark and copyright credits/give it a slight gradient
glow ...now give your tag to a friend.

You're done...thank you for trying my tutorial
please send me a copy so that I can show case it on my blog
send to....riggsbee53@gmail.com


tag for Blissfully Beth

3/31/12

FTU Fantasy Moments and Camilla Drakenborg

This tutorial was written on March 29,2012.
Any similarities to another tutorial is purely coincidental.
All my tutorial are register with My Free Copyright.
Please do not claim as your own.
This tutorial writer assumes you have a working
knowledge of using Paint Shop Pro.
This tutorial was done in Paint Shop Pro9,
but can be adapted to use in other
Paint Shop Pro versions.

SUPPLIES NEEDED

Tube of choice: I'm using the awesome work of Camilla Drakenborg.
Please do not use unless you have a license to do so.
You can get her tubes HERE

Scrapkit of Choice: I am using FTU Fantasy Moments Scrap kit
called Last Autumn...You can purchase it HERE..Thank you Sylvie

Mask of choice:I am using Insatiable Dreams mask #42.You can
download it HERE...Thank you Cat

Template of Choice: I am using Essence of Creativity-Template #30
You can download it HERE....Thank you Yvette

Filters used:Eye Candy 4000 gradient glow - HERE

Font for Name is Pyxidium...HERE
copy write is always done in Pixelette ...HERE


Drop shadow use through out H-2/V-2/O-65/B-6.00
Please leave a thank you when you downloading for supplies.

my tag is just a guide...please use your imagination
and make the tag your own you do not have to
use any of the supplies I used.
This is a simple but elegant tutorial that very easy to do

     LET'S BEGIN

Open up Template and ShiftD and close original...delete
copyright layer/close all layers/choose paper of choice
copy/paste and put underneath background layer/go to mask
of choice with these setting 
 
and click ok delete background layer

On the following raster layers follow these directions...

activate rectangle layer/copy/paste paper of choice/go to rectangle
layer/invert/go to paper layer and delete/merge down/add drop shadow

activate rectangle1 layer/copy/paste paper of choice/go to rectangle1
layer/invert/go to paper layer and delete/merge down/add drop shadow

activate long rectangle1 layer/copy/paste paper of choice/go to long
rectangle1 layer/invert/go to paper layer and delete/merge down
add drop shadow

activate big rectangle layer/copy/paste paper of choice/go to big rectangle
layer/invert/go to paper layer and delete/merge down/add drop shadow

copy/paste your tube/resize to fit/add drop shadow

now add any other element you wish to use to make your tag your own/add drop
shadow on each element/resize your tag if needed

add your watermark and copyright credits/give it a slight gradient glow
...now give your tag to a friend.

You're done...thank you for trying my tutorial
please send me a copy so that I can show case it on my blog
send to riggsbee53@gmail.com

3/21/12

FTU Fantasy Moments and Art Whimsico


This tutorial was written on March 19,2012. 
Any similarities to another tutorial is purely coincidental.
All my tutorial are register with My Free Copyright. 
Please do not claim as your own.
This tutorial writer assumes you have a working
knowledge of using Paint Shop Pro.
This tutorial was done in Paint Shop Pro9,
but can be adapted to use in other
Paint Shop Pro versions.


SUPPLIES NEEDED

Tube of choice: I'm using the awesome work of Art Whimsico.

Please do not use unless you have a license to do so. You can get her tubes HERE

Scrapkit of Choice: I am using Fantasy Moments FTU Scrap kit called Easter

You can purchase it HERE....Thank you

Mask of choice:I am using EDB mask #16.She is under construction
right now, please choose another mask.. Thank you

Template of Choice: I am using Denz's Designs-Template #120

You can download it HERE....Thank you Denny

Two Easter tubes of choice...one of eggs 
and one with eggs in a basket..please Google

Filters used:Eye Candy 4000 gradient glow..HERE
Xero - Mistified..you can get it HERE

Font for word art is Sakkal Majalla...HERE

Font for Name is Johannes...HERE
Copy write is always done in Pixelette ...HERE


Drop shadow use through out H-2/V-2/O-65/B-6.00

Please leave a thank you when you downloading for supplies.


my tag is just a guide...please use your imagination and make the tag your own

you do not have to use any of the supplies I used.
     LET'S BEGIN

Open up Template and ShiftD and close original...delete copyright layer

resize template 600x600 for space to work/we will resize again at the end/
close all layers/choose paper of choice/copy/paste and put underneath
background layer/go to mask of choice with these setting and click ok

delete background layer

On the following raster layers follow these directions...


activate lg circle layer/adjust/hue saturation/hue map with these setting

click ok/add drop shadow/keep activated


copy/paste element 24 on top of lg circle layer/resize/place where you

want what part to show/add drop shadow

activate square layer/copy/paste paper of choice/go to square layer

invert/go to paper layer and delete/merge down/add drop shadow

copy/paste bunny/resize to fit /add drop shadow/now copy/paste yellow frame

resize to fit square/make sure bunny is underneath yellow frame/add drop shadow

activate strip 2 top/choose three colors/go to material properties with

these setting/then gradient editor with these setting/ click ok/
flood fill strip with these colors/add drop shadow

activate strip2 bottom/reverse colors and flood fill bottom strips with

these colors/add drop shadow

leave word art layers as is and bring the heart layers down and place on

word art layer/(see my tag for reference)

on the top and bottom layers where the hearts were/choose font (Sakkal Majalla)

size 14 and type out Happy Easter three times/color-white

activate pink circle layer/copy/paste paper of choice/go to pink circle layer

invert/go to paper layer and delete/merge down/add drop shadow

copy/paste/resize bunny tube/place on top of pink circle layer/
on duplicate/filter xero/mistified effect with these setting/
click ok/add drop shadow to both

activate blue circle layer/copy/paste paper of choice/go to blue circle layer

invert/go to paper layer and delete/merge down/add drop shadow

I put the basket of eggs and eggs in blue circle/duplicate/close duplicated

layer/on original layer/blend/screen/add drop shadow
on duplicated layer lower opacity to 80%/now place both duplicated layers
on to of original layers

now add any  other element you wish to use to make
 your tag your own/add drop
shadow on each element

add your watermark and copyright credits/
give it a slight gradient glow
...now give your tag to a friend.

You're done...thank you for trying my tutorial

please send me a copy so that I can show case it on my blog
send to riggsbee53@gmail.com

3/5/12

FTU Fantasy Moments and Al Rio

Love Angel

This tutorial was written on March 4,2012.
Any similarities to another tutorial is purely coincidental.
All my tutorial are register with My Free Copyright.
Please do not claim as your own.
This tutorial writer assumes you have a working
knowledge of using Paint Shop Pro.
This tutorial was done in Paint Shop Pro9,
but can be adapted to use in other
Paint Shop Pro versions.

SUPPLIES NEEDED

Tube of choice: I'm using the awesome work of Al Rio.
Please do not use unless you have a license to do so.
You can get his tubes HERE

Scrapkit of Choice: I am using Fantasy Moments FTU Scrap kit
called Falling In Love You can download it HERE....Thank you

Mask of choice:I am using Insatiable Dreams  mask #155 
You can download it HERE...
Thank you Cat

Template of Choice: I am using Scrappy Bit of Fun #50
You can download it HERE....Thank you Simone

Filters used: Eye Candy 4000 gradient glow...HERE
Xero -Titanium..you can get it... HERE

Font for name is Andantino Script... HERE
and copy write is always done in Pixelette ...HERE

Drop shadow use through out H-2/V-2/O-65/B-6.00

Please leave a thank you when you downloading for supplies.

my tag is just a guide...please use your imagination and make
the tag your own you do not have to use any of the supplies I used.


     LET'S BEGIN

Open up Template and ShiftD and close original...delete copyright
layer/resize template 600x600 for space to work/we will resize
again at the end/close all layers/choose paper of choice
copy/paste and put underneath note book paper layer
go to mask of choice with these setting 

and click ok

On the following raster layers follow these directions...

Leave note book paper layer as is
activate 3 strip layer/copy/paste paper of choice/go to 3 strip layer
invert/go to paper layer and delete/merge down/add drop shadow


copy/paste flower element #15/resize to fit/place on bottom strip
add drop shadow/copy/paste flower element #18/resize to fit/place
on middle strip/add drop shadow/duplicate flower element #15
place on top strip/add drop shadow/merge down 2x starting from
top flower/add drop shadow to flower layer

activate rectangle layer/copy/paste paper of choice/go to rectangle
layer/invert/go to paper layer and delete/merge down/add drop shadow

activate bracket layer/copy/paste paper of choice/go to bracket layer
invert/go to paper layer and delete/delete original bracket layer/add
drop shadow


activate oval layer/selection/modify smooth with these setting
click ok
keep activated/choose color from tube and flood fill oval layer
keep activated/copy/paste your larger tube on top of oval layer/place at
whatever area you want to show/with main tube activated
xero titanium with these setting
click ok/go to oval layer/invert/tube layer/delete/deactivate
add drop shadow to tube and oval layer

activate bow ribbon layer/choose color from tube/target brush/change target
brush/and color bow ribbon/add drop shadow

copy/paste main tube/resize to fit/duplicate/on duplicated layer/blend screen
lower opacity to 60%/add drop shadow to both

now add any  more elements to make your tag unique/make it your own/remember
to add drop shadow on each element

add your watermark and copyright credits/give it a slight gradient glow
to copyright...now give your tag to a friend.

You're done...thank you for trying my tutorial
please send me a copy so that I can show case it on my blog
riggsbee53@gmail.com