Showing posts with label Attitude. Show all posts

4/29/13

PTU Diva Designz

Attitude Look Good On Me

This tutorial was written on April 29,2013. 
Any similarities to another tutorial is purely coincidental.
All my tutorial are register with My Free Copyright. 
Please do not claim as your own.
This tutorial writer assumes you have a working 
knowledge of using Paint Shop Pro.
This tutorial was done in Paint Shop Pro9,
but can be adapted to use in other 
Paint Shop Pro versions.


SUPPLIES NEEDED

Tube of choice: I'm using the awesome work of Diva Designz
Please do not use unless you have a permission to do so. 
You can get her tubes HERE

Scrapkit of Choice: I am using PTU Diva Designz Black and White Kit
You can purchase it HERE ...Thanks Mandy

Template of choice:I am using AquaRebel315 Dsnz Template #81
You can download HERE........Thanks Aqua

Mask of Choice: I am using Insatiable Dreams mask #2
You can download it Here...Thanks Cat

Filters used:Eye Candy 4000 gradient glow - HERE

Font for Name is Late Night
Copy write is always done in Pixelette  HERE


Dropshadow use through out H-2/V-2/O-50/B-5.00

Please leave a thank you when you downloading for supplies.


my tag is just a guide...please use your imagination 
and make the tag your own you do not have to 
use any of the supplies I used.


     LET'S BEGIN

Open up Template and ShiftD and close original...delete copyright
layer/close all layers/copy/paste paper of choice/resize to fit 
canvas/layers/load/save mask/find your mask and set with these 
setting/click ok/delete background


On the following raster layers follow these directions...

leave glittered square1 and square2 as is/activate square1 layer
copy/paste paper of choice/resize paper/selections/invert on 
square1 layer/delete on paper layer/merge down/add drop shadow

activate square2 layer/copy/paste paper of choice/resize paper
selections/invert on square2 layer/delete on paper layer/merge 
down/add drop shadow/change color on dotted circle1 and circle2 
to white

leave rectangle1 and rectangle2 layer as is/copy/paste element
of choice/resize/place on end of rectangle1/duplicate/flip
mirror/place on end of rectangle2/add drop shadow to both

change glittered circle1 to white/glittered circle2 to black
add drop shadow to white circle/change color on circle layer
to color from one of the elements/add drop shadow

leave square 1.square2 and square3 as is/also leave all three
square frames as is/add drop shadow to frames

copy/paste your tube of choice/resize if needed/place your 
tag where it will look best/add drop shadow

add any other elements you wish to use/resize/add drop shadow
to each/place where they will look best

change color on attitude from wordart to match the tag/add
drop shadow

add your watermark and copyright credits/give it a slight 
gradient glow ...now give your tag to a friend.

You're done...thank you for trying my tutorial
please send me a copy so that I can show case it on my blog
send to.... riggsbee53@gmail.com

1/30/13

PTU Amy Marie and Celinart

Sweet As Candy
This tutorial was written on January 21,2013.
Any similarities to another tutorial is purely coincidental.
All my tutorial are register with My Free Copyright.

Please do not claim as your own.
This tutorial writer assumes you have a working
knowledge of using Paint Shop Pro.
This tutorial was done in Paint Shop Pro9,
but can be adapted to use in other
Paint Shop Pro versions.

SUPPLIES NEEDED
Tube of choice: I'm using the awesome work of Celinart.
Please do not use unless you have a license to do so.
You can get her tubes HERE
Scrapkit of Choice: I am using PTU Amy Marie SexNCandy2
You can purchase it HERE ...thank you Amy
Template of choice:I am using Toxic Desirez Template #172
You can download it HERE...Thanks Kristin
Mask of Choice: I am using Enchanted by Darkness Mask #55
You can download it HERE...Thanks
Wordart of Choice: I am using Blissfully Beth word art Sweet
As Candy....you can download HERE...Thank you Beth
Filters used:Eye Candy 4000 gradient glow - HERE
Font for Name is A&S Snappy Script
Copy write is always done in Pixelette  HERE

Drop shadow use through out H-2/V-2/O-50/B-5.00
Please leave a thank you when you downloading for supplies.

my tag is just a guide...please use your imagination
and make the tag your own you do not have to
use any of the supplies I used.


     LET'S BEGIN
Open up Template and ShiftD and close original...delete
copyright layer/close all layers/copy/paste paper of choice
resize to fit canvas/layers/load/save mask/find your mask
and set with these setting/click ok/delete background
On the following raster layers follow these directions...
activate rectangle top layer/copy/paste paper of choice
resize paper/selection/invert on rectangle layer/delete on
paper layer/merge down/copy/paste element of choice/resize

if needed/add drop shadow to all
activate rectangle bottom layer/copy/paste paper of choice
resize paper/selection/invert on rectangle layer/delete on
paper layer/merge down/copy/paste element of choice/resize
if needed/add drop shadow to all
activate top square layer/copy/paste paper of choice/resize
paper/selection/invert on square layer/delete on paper
layer/merge down/add drop shadow/copy/paste element of choice
resize to fit/add drop shadow to all
activate bottom square layer/copy/paste paper of choice/resize
paper/selection/invert on bottom square layer/delete on paper
layer/merge down add drop shadow/copy/paste element of choice
resize to fit/add drop shadow to all
activate round rectangle top layer/copy/paste paper of choice
resize paper/selection/invert on rectangle layer/delete on paper
layer/merge down/add drop shadow/copy/paste element of choice
resize to fit/add drop shadow to all
activate round rectangle bottom layer/copy/paste paper of choice
resize paper/selection/invert on rectangle layer/delete on paper
layer/merge down/add drop shadow/copy/paste element of choice
resize to fit/add drop shadow to all
activate large round rectangle layer/copy/paste paper of choice
resize paper/selection/invert on rectangle layer/delete on paper
layer/merge down/add drop shadow/copy/paste element of choice
resize to fit/add drop shadow to all

activate circle layer/copy/paste paper of choice/resize paper
selection/invert on circle layer/delete on paper layer/merge
down/keep activated/copy/paste tube of choice/resize to fit
circle/delete on tube layer/blend/screen/add drop shadow to all
add any more elements you wish to use/resize if needed/add drop
shadow to all elements
copy/paste your tube of choice/resize if needed/place your
tag where it will look best/add drop shadow
you can either choose to use word art or not/copy/paste/resize if
needed/add drop shadow
add your watermark and copyright credits/give it a slight
gradient glow ...now give your tag to a friend.
You're done...thank you for trying my tutorial
please send me a copy so that I can show case it on my blog
send to....
riggsbee53@gmail.com

7/26/12

PTU Hungry Hills Scraps and Anna Marine

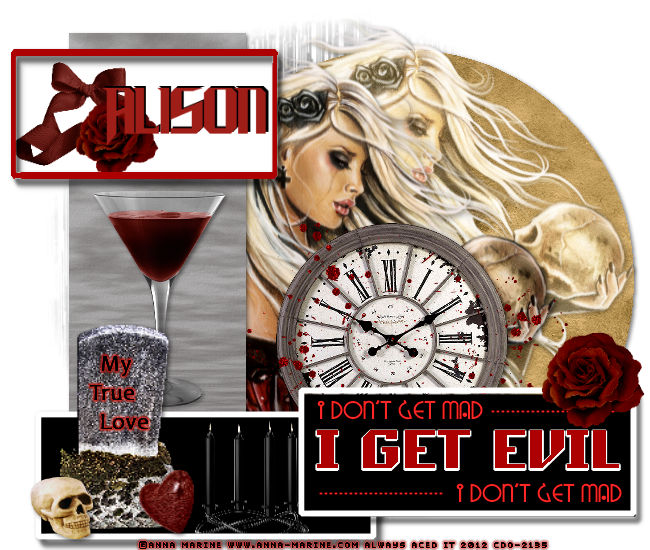
I Get Evil

This tutorial was written on July 25,2012.
Any similarities to another tutorial is purely coincidental.
All my tutorial are register with My Free Copyright.
Please do not claim as your own.
This tutorial writer assumes you have a working
knowledge of using Paint Shop Pro.
This tutorial was done in Paint Shop Pro9,
but can be adapted to use in other
Paint Shop Pro versions.


SUPPLIES NEEDED

Tube of choice: I'm using the awesome work of Anna Marine.
Please do not use unless you have a license to do so.
You can get her tubes HERE

Scrapkit of Choice: I am using Anna Marine PTU Scrap kit/
bundle #31 designed by Hungry Hills. You can download it
HERE ...Thank you Ali

Template of choice:I am using Kandi Kisses Template # 35
You can download it HERE...Thank you Kandi

Mask of Choice: I am using Weescottlass Mask #16
You can download it HERE....Thank you Chelle

Filters used:Eye Candy 4000 gradient glow - HERE

Font for Name is Dare Devil
Copy write is always done in Pixelette  HERE

Drop shadow use through out H-2/V-2/O-50/B-5.00

Please leave a thank you when you downloading for supplies.

my tag is just a guide...please use your imagination
and make the tag your own you do not have to
use any of the supplies I used.


     LET'S BEGIN

Open up Template and ShiftD and close original...delete
copyright layer/close all layers/choose paper of choice
copy/paste and put underneath background layer/go to mask
of choice with these setting and click ok


delete background
layer/change color to match tube/add drop shadow

On the following raster layers follow these directions...

activate black circle layer/copy/paste paper of choice
resize/selection/invert on black circle layer/delete on paper
layer/merge down/move circle to right of canvas/keep activate
copy/paste tube of choice/place to right side of circle/duplicate
on original/blend/screen/place duplicate underneath/lower opacity
to 48%/add drop shadow to both/copy/paste tube again/move slightly
to the left of the circle so that it overlaps the previous tube
add drop shadow

activate lg pink rectangle layer/copy/paste paper of choice/resize
selection/on rectangle layer invert/on paper layer delete/merge
down/add drop show/copy paste element of choice/resize/place in
middle ans add drop shadow

activate top back layer/change color to white/resize so that it's
blocking the second tube/activate the top frame/change color to
red-a01e18/resize so it fits the frame

activate bottom back layer/change color to black/add any elements
you wish to use/resize to fit/add drop shadow to each element/leave
bottom frame white/add drop shadow/move it down to bottom of canvas

I removed sm pink rectangle/on middle rectangle back leave color black
move it down near the bottom rectangle(see my tag)/move all word art
down to fir inside middle rectangle back/change the color of the word
art/add drop shadow to all word art

now add any other element you wish to use to make your tag your
own/add drop shadow on each element/resize your tag

add your watermark and copyright credits/give it a slight gradient
glow ...now give your tag to a friend.

You're done...thank you for trying my tutorial
please send me a copy so that I can show case it on my blog
send to....riggsbee53@gmail.com


7/8/12

PTU Foxy's Designz and Pinuptoons

Sweet and Sassy

This tutorial was written on July 5,2012.
Any similarities to another tutorial is purely coincidental.
All my tutorial are register with My Free Copyright.
Please do not claim as your own.
This tutorial writer assumes you have a working
knowledge of using Paint Shop Pro.
This tutorial was done in Paint Shop Pro9,
but can be adapted to use in other
Paint Shop Pro versions.


SUPPLIES NEEDED

Tube of choice: I'm using the awesome work of Pinuptoons.
Please do not use unless you have a license to do so.
You can get his tubes HERE

Scrapkit of Choice: I am using  PTU Pinuptoons Bundle Scrap
You can purchase it HERE ...Thank you Foxy

Template of choice:I am using Divine Intentionz Template #77
You can download it HERE...Leave a thank you please
Thank you Missy

Mask of Choice: I am using Babes Designz -Mask #24
Unfortunately Babes Designz has
removed her blog
....You can download it HERE
Thank you Babe

Filters used:Eye Candy 4000 gradient glow - HERE

Font for Name is Eraser Dust
Copy write is always done in Pixelette 
Get both HERE


Drop shadow use through out H-2/V-2/O-50/B-5.00
Please leave a thank you when you downloading for supplies.


my tag is just a guide...please use your imagination
and make the tag your own you do not have to
use any of the supplies I used.


     LET'S BEGIN

Open up Template and ShiftD and close original...delete
copyright layer/close all layers/choose paper of choice
copy/paste and put underneath background layer/go to mask
of choice with these setting and click ok/delete background
layer


activate rectangle layer/copy/paste paper of choice/selections
invert on rectangle layer/delete on paper layer/keep activated
copy paste close up tube/resize if needed/selections/invert on
rectangle layer/delete on tube layer/layer/duplicate/Image/mirror
merge down/blend hard light/add drop shadow to tubes and rectangle layer

activate background frame/copy/paste paper of choice/selections/invert
background frame layer/delete on paper layer/merge down/copy/paste/element
of choice/duplicate several time until you fill frame/merge down/add
drop shadow to element

activate frame layer/copy/paste paper of choice/selections/invert on
frame layer/delete on paper layer/merge down/add drop shadow

activate half circle layer/copy/paste paper of choice/selections/invert
on half circle layer/delete on paper layer/merge down/add drop shadow

activate thin rectangle layer/copy/paste paper of choice/selections/invert
on thin rectangle layer/delete on paper layer/merge down/add drop shadow

activate thin rectangle2 layer/copy/paste paper of choice/selections/invert
on thin rectangle2 layer/delete on paper layer/merge down/add drop shadow

add close up tube and place underneath the rectangle layers/add drop shadow

now add any other element you wish to use to make your tag your
own/add drop shadow on each element/resize your tag

add main tube and place where you want it/add drop shadow

add your watermark and copyright credits/give it a slight gradient
glow ...now give your tag to a friend.

You're done...thank you for trying my tutorial
please send me a copy so that I can show case it on my blog
send to....riggsbee53@gmail.com

4/19/12

FTU PSP Plus Scraps and Keith Garvey

Don't Play Me

This tutorial was written on April 19th 2012. 
Any similarities to another tutorial is purely coincidental.
All my tutorial are register with My Free Copyright. 
Please do not claim as your own.
This tutorial writer assumes you have a working
 knowledge of using Paint Shop Pro.
This tutorial was done in Paint Shop Pro9,
but can be adapted to use in other
Paint Shop Pro versions.

SUPPLIES NEEDED

Tube of Choice: I am using the awesome artwork of Keith Garvey.
You can purchase his tubes HERE
Please do not use without a license to do so

Scrapkit or colors of your choice...I'm using PSP Plus Scraps-Poker
thank you for the share

Mask of Choice: I'm using one of Insatiable Dreams #126
You can find it HERE...Put mask in mask folder
Thanks so much for the use of your mask, Cat

Template of Choice: I am using one of Ali from Designz by Ali 
Template #18...Thanks Ali

Word art of choice: I'm using word art by Shappy:
Demented Hallucinationz....thanks Shappy

Font for name is BoogieNightsNF and copy write
 is always done in Pixelette ... Get them HERE


Drop shadow use throughout H-2/V-2/O-50/B-5.00

Please leave a thank you when you downloading for supplies and read TOU


     LET'S BEGIN

Open up Template and ShiftD and close original
delete copyright layer close all layers
resize canvas with the following setting


we'll resize again when we're finish


Choose a paper of choice(I chose paper achtergrond)
copy/paste as new image resize to same size 
as canvas (656x475)copy/paste paper on to canvas at the
bottom/go to layers/Load/save mask/load mask from disk
and find your mask of choice...with these setting/see photo below....


go to layers/merge group/place beneath large circle/resize by 80%


activate large circle/resize by 80%/selection/select all/float
unfloat/modify/expand by 1/choose a paper/paste as new
 image/resize paper by 140%/check all
layers/copy and paste as a new layer on your working 
canvas/click on circle layer and invert/go back to the
 paper layer and click delete/merge down
selection none//add drop shadow


duplicated the long rectangle1/flip the copy/duplicate the
 rectangle2/flip the copy/separate the rectangles out so the 
they are underneath each other but at different angles 
(see my tag)/magic wand/click inside each one/selection
expand by 1/and add paper or color of choice/I chose a 
color from the background paper/add drop shadow to each
 after you color/merge each layer down.

activate photo1 layer/resize by 80%/selection/modify/expand by 1
choose a paper copy and paste as a new layer/click on photo1 
layer and invert/go back to the paper layer and click 
delete/merge down/add your tube of choice/place so what
you want showing is within the marching ants/go to tube 
layer and delete selection/none/(make sure you delete 
excess tube underneath canvas so it won't
show on your tag when you're finish)/add drop shadow to tube


activate photo2 layer/resize by 80%/selection/modify/expand by 1
choose a paper copy and paste as a new layer/click 
on photo2 layer and invert/go back to the paper layer and 
click delete/merge down/add your tube of choice/place so what
you want showing is within the marching ants/go to tube 
layer and delete selection/none/(make sure you 
delete excess tube underneath canvas so it won't
show on your tag when you're finish)/add drop shadow to tube


activate photo3 layer/resize by 80%/selection/modify/expand 
by 1/flood fill with color of choice/add any elements you 
want in background/resize if needed/give each a drop 
shadow/leave all frames just as they are/add drop shadow to
frames

copy/paste your main tube of choice/resize your tube 
and place where you want it add drop shadow

now add any other elements of choice from the
 kit to make it your own/and the word art

Add your copyright and watermark..and give to a friend

You're done!!!
Thanks for trying my tutorial
If you use send me a copy so I can show case it...thanks

3/23/12

PTU Additive Pleasures and Jose Cano

Bite Me

This tutorial was written on March 22,2012.
Any similarities to another tutorial is purely coincidental.
All my tutorial are register with My Free Copyright.
Please do not claim as your own.
This tutorial writer assumes you have a working
knowledge of using Paint Shop Pro.
This tutorial was done in Paint Shop Pro9,
but can be adapted to use in other
Paint Shop Pro versions.

SUPPLIES NEEDED

Tube of choice: I'm using the awesome work of Jose Cano.
Please do not use unless you have a license to do so.
You can get his tubes HERE

Scrapkit of Choice: I am using Additive Pleasures PTU
Scrap kit called Bite Me You can purchase it HERE..Thank you Tammi

Mask of choice:I am using yez mask #067.
You can download it HERE...Thank you Yez

Template of Choice: I am using Additive Pleasures-Template #170
You can download it HERE....Thank you Tammi

Filters used:Eye Candy 4000 gradient glow - HERE
Crescent Moon-cut glass..HERE
Tramages -Tow the Line...HERE

Font for Name is Tabatha Heavy..HERE
Copy write is always done in Pixelette ...HERE

Drop shadow use through out H-2/V-2/O-65/B-6.00
Please leave a thank you when you downloading for supplies.

my tag is just a guide...please use your imagination
and make the tag your own you do not have to
use any of the supplies I used.


     LET'S BEGIN

Open up Template and ShiftD and close original...delete
copyright layer/close all layers/choose paper of choice
copy/paste and put underneath background layer/go to mask
of choice with these setting 
and click ok/delete background layer

On the following raster layers follow these directions...name
each layer as you go along


activate circle layer/copy/paste paper of choice/go to circle layer
invert/go to paper layer and delete/merge down/add drop shadow

copy/paste tickets/duplicate/place one on top of the other/merge
down/add drop shadow

activate rectangle layer/copy/paste paper of choice/go to rectangle
layer/invert/go to paper layer and delete/merge down/add drop shadow

copy/paste label 2/resize to fit/copy/paste brad/resize to fit
duplicate/mirror/add drop shadow

activate circle2 layer/copy/paste paper of choice/go to circle2 layer
invert/go to paper layer and delete/merge down/keep activated


copy/paste bottom close up tube/place on top of 
circle2 layer/delete/effects/crescent moon cut glass
adjust/sharpness/sharpen/with these setting
add drop shadow to both layer and tube

activate rectangle2 layer/copy/paste paper of choice/go to rectangle2
layer/invert/go to paper layer and delete/merge down/add drop shadow

copy/paste heart w/ribbon2/duplicate/place side by side/merge down
add drop shadow

activate rectangle3 layer/copy/paste paper of choice/go to rectangle3
layer/invert/go to paper layer and delete/merge down/add drop shadow

copy/paste ribbon4/duplicate/overlap side by side/merge down/add
drop shadow

activate rectangle4 layer/copy/paste paper of choice/go to rectangle4
layer/invert/go to paper layer and delete/merge down/add drop shadow

copy/paste star/duplicate 2x/overlap each star/merge down2x/duplicate
again/close original layer/on dupe layer/blend/hard light/go back to
original/place underneath the dupe/lower opacity to 60%/add drop
shadow to both

activate circle3 layer/copy/paste paper of choice/go to circle3
layer/invert/go to paper layer and delete/merge down/add drop shadow

copy/paste close up top/duplicate/on dupe tramages/tow the line with
these settings
click ok/click blend/screen/place original underneath
dupe/lower opacity to 90%/add drop shadow to both

activate rectangle5 layer/copy/paste paper of choice/go to rectangle5
layer/invert/go to paper layer and delete/merge down/add drop shadow

copy/paste kiss lips/duplicate/place on either side of the heart
merge down/add light shadow

leave heart and heart back as is/copy/paste your main tube/resize/add
drop shadow/leave word art back and word art as is/add drop shadow
to word art back

now add any other element you wish to use to make your tag your own/add drop
shadow on each element/resize your tag if needed

add your watermark and copyright credits/give it a slight gradient glow
...now give your tag to a friend.

You're done...thank you for trying my tutorial
please send me a copy so that I can show case it on my blog
send to  riggsbee53@gmail.com

6/19/11

PTU Hungry Hills and Legends Art

Warning Crack Shot

This tutorial was written on June 19th 2011.
Any similarities to another tutorial is purely coincidental.
All my tutorial are register with My Free Copyright. Please do not claim as your own.
This tutorial writer assumes you have a working knowledge of using
Paint Shop Pro.
This tutorial was done in Paint Shop Pro9,but can be adapted to use in other
Paint Shop Pro versions.


SUPPLIES NEEDED


Tube of Choice: I am using the awesome artwork of Legends Art..
You can purchase her tubes HERE
Please do not use without a license to do so

Scrapkit or colors of your choice...I'm using Sarah Hungry Hills PTU Crack Pot
you can get it here   (digifoxstudios) or
here  (wilmer4ever)...thank you Sarah

Mask of Choice: I'm using one of zuzzanaz mask07...You can find it HERE
Put mask in mask folder..Thanks so much for the use of your mask

Template of Choice: I am using one of Melissaz Creationz 30-Template148..
you can get it HERE...Thanks Melissa

Filters used Xero Radiance and Porcelain..get them HERE

Font for name is Edge and copy write is always done in Pixelette ...
Get them HERE

Drop shadow use throughout H-2/V-2/O-50/B-5.00
Please leave a thank you when you downloading for supplies.


LET'S BEGIN


Open up Template and ShiftD and close original...delete copyright layer
close all layers except the background layer...the one we'll be working on

Choose a paper of choice/copy/paste...now go to layers/Load/save mask/
load mask from disk/ and find your mask of choice...with these setting
see photo below....go to layers/merge group


add element wire on top of mask layer/duplicate and mirror/resize if you
want/merge down and add drop shadow

activate oval layer/selection/modify/expand by 1 choose a paper/
copy and paste as a new layer/resize/click on oval layer and invert...then
go back to the paper layer and click delete...merge down

Open up your layer1...activate all edges and add color of choice from scrap kit
now activate the square on layer1 and add paper of choice/resize
invert square layer and then delete paper layer...add drop shadow to layer1

go to wordart layer and separate the top wordart from the bottom wordart
you should have two wordart layers now...activate the top wordart that
says "warning" and add a color of choice...add drop shadow
leave bottom wordart layer as is and add a drop shadow

activate the right square/copy and paste the part of your tube that you
want showing/resize until the part fit in the square...now go to the
right square layer and invert/on tube layer delete/merge down
activate right square frame layer and add color of choice/add drop shadow

repeat the same process with center square and frame and left square
and frame.
on the right and left tube add porcelain with these setting


after creating the center square...add radiance with these setting


add what elements you want from the kit and make your tag special...
don't forget to add drop shadow to each element/now add your main tube
where you want it and add a drop shadow

Add your copyright and watermark..and give to a friend
You're done!!!

Thanks for trying my tutorial

If you use send me a copy so I can show case it...thanks