Showing posts with label PTU Scrapkit/Tube Bundle. Show all posts

3/9/15

CDO Foxy Designz and Pinuptoons - Gawn N Stalk

Gawn N Stalk

This tutorial was written on March 10,2015. 
Any similarities to another tutorial is purely coincidental.
All my tutorial are register with My Free Copyright. 
Please do not claim as your own.
This tutorial writer assumes you have a working 
knowledge of using Paint Shop Pro.
This tutorial was done in Paint Shop Pro9,
but can be adapted to use in other 
Paint Shop Pro versions.


SUPPLIES NEEDED

Tube of choice: I'm using the awesome work of Pinuptoons.
Please do not use unless you have a license to do so. 
Get Them HERE

Scrapkit of Choice: I am using CDO Foxy's Designz Bundle Pinuptoons #215
You can purchase it HERE ...Thank You Ann

Template of choice:I am using Dee'Signs Depot Template # 25
You can download it HERE...Thanks Dee

Mask of Choice: I am using Moonbeans and Spiderwebs Mask # 37
You can download it HERE.... Thank You Stacie

Filters used:Eye Candy 4000 gradient glow - HERE

Font for Name is Kingthings Exeter
Copy write is always done in Pixelette  HERE

Drop shadow use through out H-2/V-2/O-60/B-6.85

Please leave a thank you when you downloading for supplies.

my tag is just a guide...please use your imagination 
and make the tag your own you do not have to 
use any of the supplies I used.


     LET'S BEGIN

Open up Template and ShiftD and close original...delete 
copyright layer/close all layers/copy/paste paper of choice
resize to fit canvas/layers/load/save mask/find your mask
and set with these setting/click ok


On the following raster layers follow these directions...

activate right rust circle/copy/paste paper of choice/resize paper/selections
invert on circle layer/delete on paper layer/merge down/add drop shadow

activate left rust circle/copy/paste paper of choice/resize paper/selections
invert on circle layer/delete on paper layer/merge down/add drop shadow

leave white left circle border and white right circle border as is/add drop
shadow

activate main shape blue/copy/paste paper of choice resize paper selections
invert on main shape layer/delete on paper layer/merge down/add drop shadow
leave main shape outline as is/add drop shadow

activate rust rectangle layer/copy/paste paper of choice resize paper/selections
invert on rectangle layer/delete on paper layer/merge down/add drop shadow

activate creme rectangle layer/copy/paste paper of choice resize paper/selections
invert on rectangle layer/delete on paper layer/merge down/add drop shadow

leave left white circle and right white circle as is/add drop shadow to each
choose a color from the tube/recolor left brown circle and right brown circle
copy/paste element #19/resize by 70%/place on each of the brown circles/add
drop shadow

activate blue strip layer/copy/paste paper of choice/resize paper/selections
invert on blue strip layer/delete on paper layer/merge down

choose another color from the tube/recolor brown circle/activate/copy/paste
close up tube/resize by 80%/invert oncircle layer/delete on tube layer/add
drop shadow/leave large dotted circle as is/recolor word art and bring up to
place on blue strip layer

copy/paste tube of choice/resize by 90%/place on left side of tag/add drop 
shadow

add any other elements you wish to use/resize if needed/add drop shadow to each 
element/place where they will look best

add your watermark and copyright credits/give it a slight gradient glow.....now 
give your tag to a friend.

You're done...thank you for trying my tutorial
please send me a copy so that I can show case it on my blog

4/29/14

CDO Foxy Designz and Marika - Let Me Blow Your Horn

Let Me Blow Your Horn

This tutorial was written on April 30,2014. 
Any similarities to another tutorial is purely coincidental.
All my tutorial are register with My Free Copyright. 
Please do not claim as your own.
This tutorial writer assumes you have a working 
knowledge of using Paint Shop Pro.
This tutorial was done in Paint Shop Pro9,
but can be adapted to use in other 
Paint Shop Pro versions.


SUPPLIES NEEDED

Tube of choice: I'm using the awesome work of Marika.
Please do not use unless you have a license to do so. 
Get Them HERE

Scrapkit of Choice: I am using PTU Foxy Designz Marika Bundle 30
You can purchase it HERE ...Thanks Foxy

Template of choice:I am using Dees'Sign Depot/Kandee Kisses New Year's Template #2
You can download it HERE...Thanks Dee/Kandee

Mask of Choice: I am using VixPsp Big Mask #19
You can download it HERE.... Thank You Vix

Filters used:Eye Candy 4000 gradient glow - HERE

Font for Name is Arizona
Copy write is always done in Pixelette  HERE

Drop shadow use through out H-2/V-2/O-60/B-6.85

Please leave a thank you when you downloading for supplies.

my tag is just a guide...please use your imagination 
and make the tag your own you do not have to 
use any of the supplies I used.

     LET'S BEGIN

Open up Template and Shift D and close original...delete 
copyright layer/close all layers/copy/paste paper of choice
resize to fit canvas/layers/load/save mask/find your mask
and set with these setting/click ok


On the following raster layers follow these directions...

Leave the following layers as is/glass/bottle/white frame
and glittered rectangle frame/add drop shadow

Recolor the following layers to match the tag/I used color
#e79daf/top layer of Baby word art/top glittered word art/
top layer of let me word art/confetti/hearts/red glittered frame
red circle/red rectangle/square/pixel words and black frames
add drop shadow to each

activate pink circle layer/copy/paste close up tube/resize/invert
on circle layer/delete on tube layer/duplicate tube/on original
tube/blend/multiply/place duplicate tube underneath the original
lower opacity on original tube to 50%/add drop shadow to tubes

activate left top square layer/copy/paste paper of choice
resize paper/selections/invert on square layer/delete on paper 
layer/merge down/add drop shadow

activate right top square layer/copy/paste paper of choice
resize paper/selections/invert on square layer/delete on paper 
layer/merge down/add drop shadow

activate black rectangle layer/copy/paste paper of choice
resize paper/selections/invert on rectangle layer/delete on 
paper layer/merge down/add drop shadow

add any other elements you wish to use/resize if needed/add drop 
shadow to each element/place where they will look best

copy/paste tube of choice/resize if needed/place on left side of 
tag/add drop  shadow

add your watermark and copyright credits/give it a slight gradient 
glow.....now give your tag to a friend.

You're done...thank you for trying my tutorial
please send me a copy so that I can show case it on my blog

CDO Markia Bundle30 Foxy Designz and Marika - Happy New Year

Happy New Year

This tutorial was written on April 29,2014. 
Any similarities to another tutorial is purely coincidental.
All my tutorial are register with My Free Copyright. 
Please do not claim as your own.
This tutorial writer assumes you have a working 
knowledge of using Paint Shop Pro.
This tutorial was done in Paint Shop Pro9,
but can be adapted to use in other 
Paint Shop Pro versions.


SUPPLIES NEEDED

Tube of choice: I'm using the awesome work of Marika.
Please do not use unless you have a license to do so. 
Get Them HERE

Scrapkit of Choice: I am using PTU Foxy Designz Marika IB-30
You can purchase it HERE ...Thanks Foxy

Template of choice:I am using Additive pleasures New Year Template #4
You can download it HERE...Thanks Tamie

Mask of Choice: I am using Moonbeams and Spiderwebs Mask #53
You can download it HERE.... Thank You Staci

Filters used:Eye Candy 4000 gradient glow - HERE

Font for Name is Andantino Script
Copy write is always done in Pixelette  HERE

Drop shadow use through out H-2/V-2/O-60/B-6.85

Please leave a thank you when you downloading for supplies.

my tag is just a guide...please use your imagination 
and make the tag your own you do not have to 
use any of the supplies I used.

     LET'S BEGIN

Open up Template and Shift D and close original...delete 
copyright layer/close all layers/copy/paste paper of choice
resize to fit canvas/layers/load/save mask/find your mask
and set with these setting/click ok/place mask layer on top 
of your mask


On the following raster layers follow these directions...

leave glittered rectangle as is/activate rectangle layer/copy
paste paper of choice/resize paper/selections/invert on 
rectangle layer/delete on paper layer/merge down/add drop shadow

leave glittered circle as is/activate large circle layer/copy
paste paper of choice/resize paper/selections/invert on circle 
layer/delete on paper layer/merge down/keep activated/copy/paste
close up of choice/delete on tube/duplicate/on original/blend
overlay/place duplicate underneath original/change opacity to
54 on original/add drop shadow to bottom tube

activate half circle layer/copy/paste paper of choice/resize paper
selections/invert on circle layer/delete on paper/layer/merge 
down/add drop shadow/leave small text as is

leave small glittered circle as is/activate small circle layer
recolor circle to match tag add drop shadow

leave small glittered circle2 as is/activate small circle layer
recolor circle2 to match tag/add drop shadow/leave dotted lines
as is/leave glittered word art as is/recolor word art to match 
tag/add drop shadow/leave star layer as is/recolor black stars 
to blue stars

add any other elements you wish to use/resize if needed/add drop 
shadow to each element/place where they will look best

copy/paste main tube of choice/resize if needed/place where it
will look best/add drop shadow

add your watermark and copyright credits/give it a slight gradient 
glow.....now give your tag to a friend.

You're done...thank you for trying my tutorial
please send me a copy so that I can show case it on my blog

CDO Foxy Designz and Marika - Cold Az Ice

Cold Az Ice

This tutorial was written on April 29,2014. 
Any similarities to another tutorial is purely coincidental.
All my tutorial are register with My Free Copyright. 
Please do not claim as your own.
This tutorial writer assumes you have a working 
knowledge of using Paint Shop Pro.
This tutorial was done in Paint Shop Pro9,
but can be adapted to use in other 
Paint Shop Pro versions.


SUPPLIES NEEDED

Tube of choice: I'm using the awesome work of Marika.
Please do not use unless you have a license to do so. 
Get Them HERE

Scrapkit of Choice: I am using PTU Foxy Designz Marika Bundle-30
You can purchase it HERE ...Thanks Foxy

Template of choice:I am using Toxic Desire Template #158
You can download it HERE...Thanks Kristin

Mask of Choice: I am using Moonbeams and Spiderwebs Mask #47
You can download it HERE.... Thank You Staci

Filters used:Eye Candy 4000 gradient glow - HERE

Font for Name is Bailey
Copy write is always done in Pixelette  HERE

Drop shadow use through out H-2/V-2/O-60/B-6.85

Please leave a thank you when you downloading for supplies.

my tag is just a guide...please use your imagination 
and make the tag your own you do not have to 
use any of the supplies I used.


     LET'S BEGIN

Open up Template and Shift D and close original...delete 
copyright layer/close all layers/copy/paste paper of choice
resize to fit canvas/layers/load/save mask/find your mask
and set with these setting/click ok


On the following raster layers follow these directions...

leave left and right rectangle as is/activate left circle 1 
layer/copy/paste paper of choice/resize paper/selections/invert 
on circle layer/delete on paper layer/merge down/add drop shadow

activate right circle 1 layer/copy/paste paper of choice/resize 
paper/selections/invert on circle layer/delete on paper layer
merge down/add drop shadow/

leave the following layers as is/large rectangle/left circle 2
right circle 2/right square/left square/circle 1/all snowflake
layer/glitter circle/

activate circle 2/copy/paste close up tube/resize if needed/invert
on circlelayer/delete on tube layer/keep activated/duplicate tube
on original tube/blend/overlay/place duplicate tube underneath
lower opacity to 70%/place underneath original/add drop shadow to
bottom tube

leave pixel words/thin glittered layer/and words as is/activate
thin rectangle layer/copy/paste paper of choice/resize paper if
needed/delete on paper layer/add drop shadow

add any other elements you wish to use/resize if needed/add drop 
shadow to each element/place where they will look best

copy/paste main tube of choice/resize if needed/place where it
will look best/add drop shadow

add your watermark and copyright credits/give it a slight gradient 
glow.....now give your tag to a friend.

You're done...thank you for trying my tutorial
please send me a copy so that I can show case it on my blog

8/28/13

PTU LadyHawwk Designs and Pinuptoons

I Love The Eighty

This tutorial was written on August 27,2013. 
Any similarities to another tutorial is purely coincidental.
All my tutorial are register with My Free Copyright. 
Please do not claim as your own.
This tutorial writer assumes you have a working 
knowledge of using Paint Shop Pro.
This tutorial was done in Paint Shop Pro9,
but can be adapted to use in other 
Paint Shop Pro versions.


SUPPLIES NEEDED

Tube of choice: I'm using the awesome work of Pinuptoons.
Please do not use unless you have a license to do so. 
Get Them HERE

Scrapkit of Choice: I am using PTU LadyHawwk Designs Pinuptoons
Package 172 ... You can purchase it HERE ...Thanks Cat

Template of choice:I am using Leah Template #42
You can download it HERE...Thanks Leah

Mask of Choice: I am using Weescotlass Creations Mask # 1
You can download it HERE.... Thank You Chell

Filters used:Eye Candy 4000 gradient glow - HERE

Font for Name is Huxtable
Copy write is always done in Pixelette  HERE

Dropshadow use through out H-2/V-2/O-50/B-5.00

Please leave a thank you when you downloading for supplies.

my tag is just a guide...please use your imagination 
and make the tag your own you do not have to 
use any of the supplies I used.


     LET'S BEGIN

Open up Template and ShiftD and close original...delete 
copyright layer/close all layers/copy/paste paper of choice
resize to fit canvas/layers/load/save mask/find your mask
and set with these setting/click ok


On the following raster layers follow these directions...


activate circle layer 4/copy/paste paper of choice/resize paper
selections/invert on circle layer 4/delete on paper layer/merge 
down/add drop shadow

activate  circle layer 3/copy/paste paper of choice/resize paper
selections/invert on circle layer 3/delete on paper layer/merge 
down/add drop shadow/copy paste tube of choice/resize by 140%
place on top of circle/erase all excess tube from the bottom
add drop shadow

activate rect layer 5/copy/paste paper of choice/resize paper
selections/invert on rect layer 5/delete on paper layer/merge 
down/add drop shadow/recolor frame to match tag/add drop shadow

activate rect layer 4/copy/paste paper of choice/resize paper
selections/invert on rect layer 4/delete on paper layer/merge 
down/add drop shadow

activae rect layer 3/copy/paste paper of choice/resize paper
selections/invert on rect layer 3/delete on paper layer/merge 
down/add drop shadow

activae rect layer 1/copy/paste paper of choice/resize paper
selections/invert on rect layer 1/delete on paper layer/merge 
down/add drop shadow/copy/paste tube of choice/place on top of 
rectangle/add drop shadow

activate circle layer 2/copy/paste paper of choice/resize paper
selections/invert on circle layer 2/delete on paper layer/merge 
down/add drop shadow

activate circle layer 1/copy/paste paper of choice/resize paper
selections/invert on circle layer 1/delete on paper layer/merge 
down/add drop shadow

change color on splat back-plain spat-glittered spat - and word
art layers to match your tag/add drop shadow to each

add any other elements you wish to use/resize/add drop shadow 
to each element/place where they will look best

add your watermark and copyright credits/give it a slight 
gradient glow.....now give your tag to a friend.

You're done...thank you for trying my tutorial
please send me a copy so that I can show case it on my blog


PTU LadyHawwk Designs and Pinuptoons

Precious

This tutorial was written on August 27,2013. 
Any similarities to another tutorial is purely coincidental.
All my tutorial are register with My Free Copyright. 
Please do not claim as your own.
This tutorial writer assumes you have a working 
knowledge of using Paint Shop Pro.
This tutorial was done in Paint Shop Pro9,
but can be adapted to use in other 
Paint Shop Pro versions.


SUPPLIES NEEDED

Tube of choice: I'm using the awesome work of Pinuptoons.
Please do not use unless you have a license to do so. 
Get Them HERE

Scrapkit of Choice: I am using PTU LadyHawwk Designs Pinuptoons
Package 172 ... You can purchase it HERE ...Thanks Cat

Template of choice:I am using MilliePSPMadness Template #138
You can download it HERE...Thanks Millie

Mask of Choice: I am using Vix Mask #GBS0902
You can download it HERE.... Thank You Vix

Filters used:Eye Candy 4000 gradient glow - HERE

Font for Name is Precious
Copy write is always done in Pixelette  HERE

Drop shadow use through out H-2/V-2/O-50/B-5.00

Please leave a thank you when you downloading for supplies.

my tag is just a guide...please use your imagination 
and make the tag your own you do not have to 
use any of the supplies I used.


     LET'S BEGIN

Open up Template and ShiftD and close original...delete 
copyright layer/close all layers/copy/paste paper of choice
resize to fit canvas/layers/load/save mask/find your mask
and set with these setting/click ok


On the following raster layers follow these directions...

leave the following layers as is/1-2-5-6-12 and 13/add drop shadow
to each layer

on layer1/copy/paste tube of choice/resize if needed/place on left
hand side/add drop shadow

activate layer 3/copy/paste paper of choice/resize paper/selections
invert on layer 3/delete on paper layer/merge down/add drop shadow

activate layer 4/copy/paste paper of choice/resize paper/selections
invert on layer 4/delete on paper layer/merge down/add drop shadow

on layer 5/copy/paste tube ofchoice/resize by 120%/place on right
hand side/add drop shadow

activate layer 7/copy/paste paper of choice/resize paper/selections
invert on layer 7/delete on paper layer/merge down/add drop shadow

activate layer 8/copy/paste paper of choice/resize paper/selections
invert on layer 8/delete on paper layer/merge down/add drop shadow

remove layer 9 and replace with word art from kit/add drop shadow
add a gradient glow to layer 10/2x/add drop shadow

activae layer 11/copy/paste paper of choice/resize paper/selections
invert on layer 11/delete on paper layer/merge down/add drop shadow

activate layers 14 and 15/add gradient glow to both layers/add drop
shadow to both

add any other elements you wish to use/resize/add drop shadow 
to each element/place where they will look best

add your watermark and copyright credits/give it a slight 
gradient glow.....now give your tag to a friend.

You're done...thank you for trying my tutorial
please send me a copy so that I can show case it on my blog


12/3/12

PTU Hungry Hills Scraps and Dirk Richter

Joy
This tutorial was written on December 2,2012.
Any similarities to another tutorial is purely coincidental.
All my tutorial are register with My Free Copyright.
Please do not claim as your own.
This tutorial writer assumes you have a working
knowledge of using Paint Shop Pro.
This tutorial was done in Paint Shop Pro9,
but can be adapted to use in other
Paint Shop Pro versions.

SUPPLIES NEEDED

Tube of choice: I'm using the awesome work of Dirk Richter .
Please do not use unless you have a license to do so.
You can get her tubes HERE

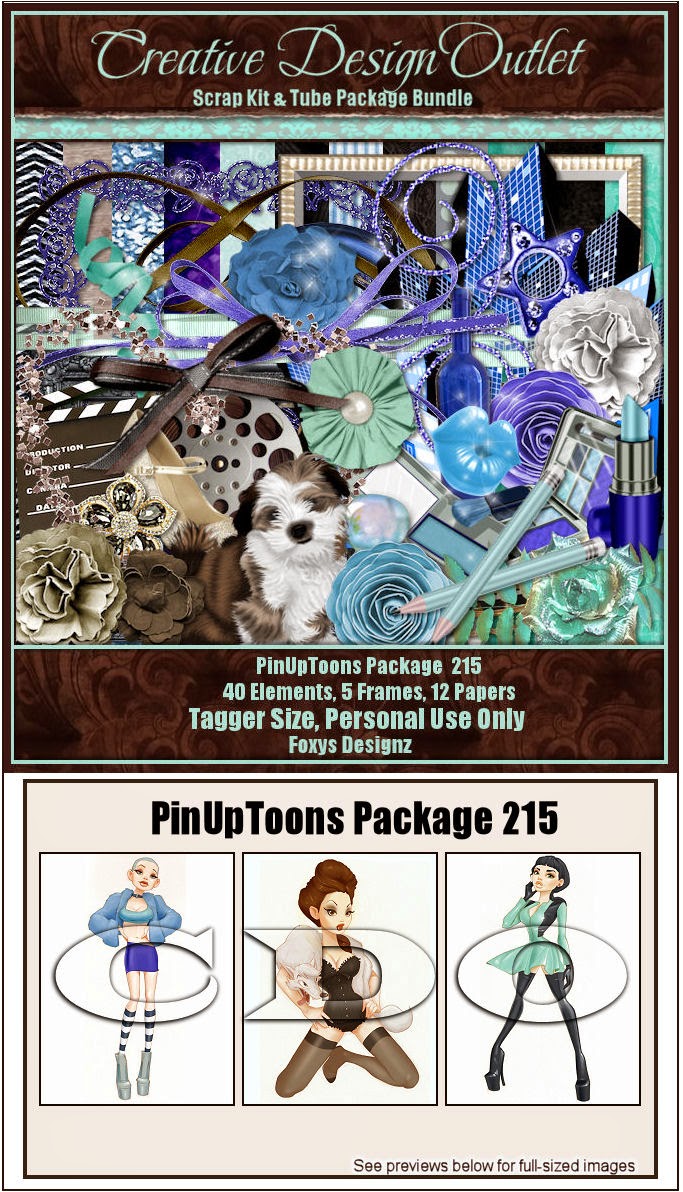
Scrapkit of Choice: I am using Dirk Richter Tube/Bundle 7-2
This isno longer at CDO, please use another scrap kit

Template of choice:I am using Toxic Desirez #168
You can download it HERE...Thank you Kristin

Mask of Choice: I am using mask Vix #331
You can download it Here...Thank you Vix

Filters used:Eye Candy 4000 gradient glow - HERE

Font for Name is Biondi
Copy write is always done in Pixelette HERE

Dropshadow use through out H-2/V-2/O-50/B-5.00
Please leave a thank you when you downloading for supplies.

my tag is just a guide...please use your imagination
and make the tag your own you do not have to
use any of the supplies I used.


LET'S BEGIN

Open up Template and ShiftD and close original...copy/paste
paper of choice/resize to fit/layer/load/save mask/find your
mask/select/using these setting/click ok/merge group


On the following raster layers follow these directions...

activate left square layer/copy/paste paper of choice/resize
selection/invert on left square layer/delete on paper layer
add drop shadow

activate right square layer/copy/paste paper of choice/resize
selection/invert on right square layer/delete on paper layer
add drop shadow

copy/paste element of choice/resize if needed/add drop shadow

activate pink top layer/copy/paste paper of choice/resize/invert
on pink top layer/delete on paper layer/keep activated/copy
paste element of choice/resize to fit/deactivate/add drop shadow

activate pink bottom layer/copy/paste paper of choice/resize
invert on pink bottomlayer/delete on paper layer/keep activated
copy/paste element of choice/resize to fit/deactivate/add drop
shadow

activate blue top rectangle layer/copy/paste paper of choice/resize
invert on blue top rectangle layer/delete on paper layer/add
drop shadow

activate blue bottom rectangle layer/copy/paste paper of choice
resize/invert on blue bottom rectangle layer/delete on paper layer
add drop shadow

activate rounded rectangle/keep as is/copy/paste element of choice
resize if needed/add drop shadow

activate circle layer/change color to match your tag/copy/paste
round word art/ resize to fit/adjust/sharpen/lower opacity to 30%
keep activiated/copy/paste closeup tube/resize/selection/invert
on circle layer/delete on tube layer/add drop shadow

copy/paste main tube/mirror/resize/place where you want it/add
drop shadow

now add any other elements you wish to use/resize if needed/remember
to add drop shadow to each element

add your watermark and copyright credits/give it a slight gradient
glow ...now give your tag to a friend.

You're done...thank you for trying my tutorial
please send me a copy so that I can show case it on my blog


11/27/12

PTU LadyHawwk Designs and Marika

Practice Safe Hex


This tutorial was written on October 31st 2012.
Any similarities to another tutorial is purely coincidental.
All my tutorial are register with My Free Copyright.
Please do not claim as your own.
This tutorial writer assumes you have a working
 knowledge of using Paint Shop Pro.
This tutorial was done in Paint Shop Pro9,
but can be adapted to use in other
Paint Shop Pro versions.

SUPPLIES NEEDED

Tube of Choice: I am using the amazing artwork of
Marika.You can purchase her tubes HERE
Please do not use without a license to use

Scrapkit of Choice: I am using LadyHawwk_Marika-Package 10
You can purchase it HERE....Thank you Cat

 
Template for forum tag: I am using amyleahgimptastictuts #161
You can download it HERE....Thank you Leah
resize template for forum portion

Filters used: AAA Frame - HERE
 Eye Candy 4000 gradient glow - HERE

 
Font for name is Santa's Sleigh
copy write is always done in Pixelette ...
Get them HERE

Drop shadow use through out H-2/V-2/O-65/B-6.00
Please leave a thank you when you downloading for supplies.

my tag is just a guide...please use your imagination
 and make the tag your own
you do not have to use any of the supplies I used.
With a three piece set,the avatar,forum tag and sig tag looks alike.
please do not take the sig tag and try to stecth or shirk it.
You must make each tag separate.
LET'S BEGIN


Sig Tag
Open up Template and ShiftD and close original
delete copyright layer

close all layers/choose paper of choice/copy/paste
and put underneath rectangle layer
effects/AAA frame/foto frame with these setting


activate rectangle1 layer/copy/paste paper of choice
resize/selection/invert on rectangle1 layer
delete on paper layer/merge down/add drop

shadow/copy/paste element of choice/resize if
 needed/place where you want/add drop shadow

activate rectangle2 layer/copy/paste paper of choice
resize/selection/invert on rectangle2 layer
delete on paper layer/merge down/add drop

shadow/copy/paste element of choice/resize if
 needed/place where you want/add drop shadow

activate medium rectangle layer/copy/paste
 paper of choice/resize selection/invert on
medium rectangle layer/delete on paper layer
merge down/add drop shadow

activate square layer/copy/paste paper of choice
resize/selection/invert on square layer/delete on
paper layer/merge down/add drop

shadow/copy/paste element of choice/resize
if needed/place in center of square/add drop shadow

activate circle1 layer/copy/paste paper of choice
resize/selection/invert on circle1 layer/delete on
 paper layer/merge down/add drop

shadow/leave activated/copy/paste tube of choice
resize so that her head fits the circle1/invert on
circle layer/delete on tube layer adjust
sharpen/add drop shadow/duplicate tube
 and close this layer

activate large rectangle1 layer/copy/paste paper of
choice/resize selection/invert on large rectangle1 layer
delete on paper layer/merge down/add drop shadow
copy/paste element of choice/resize
if needed/place where you want/add drop shadow

activate circle2 layer/copy/paste paper of choice
resize/selection/invert on circle2 layer/delete on
 paper layer/merge down/add drop

shadow/leave activated/open duplicated tube
move to circle2 layer/mirror so that it's
 facing the opposit direction

activate large rectangle2 layer/copy/paste
paper of choice/resize/selection/invert on large
rectangle2 layer/delete on paper layer

merge down/add drop shadow/copy/paste
element of choice/resize if needed
place where you want/add drop shadow

activate small circle1 layer/copy/paste
paper of choice/resize/selection/invert on
 small circle1 layer/delete on paper layer
merge down/add drop shadow

activate small circle2 layer/copy/paste paper
 of choice/resize/selection/invert on small
circle2 layer/delete on paper layer
merge down/add drop shadow

invert on large circle layer/delete on paper
layer/merge down/add drop shadow
leave activated/copy/paste closeup tube of
choice/resize so that her head fits the
 circle/invert on circle layer/delete on tube
 layer/adjust/sharpen/add drop shadow

copy/paste umbella/resize/place underneath tube
add drop shadow

activate/circle ring/copy/paste paper of choice
resize/selection/invert on circle ring layer
delete on paper layer/add drop shadow

now go back and duplicate umbella/place on top
of circle ring/take eraser tool and erase
the handle of the umbella

copy/paste your main tube/resize if needed/place
on left side of  tag/add drop shadow/on word
art layer/color word art to match the color
of the tag/add drop shadow

now add the rest of your elements where you
 want them/make the tag your own/Have
fun with it/make sure you add a drop shadow
 to each element.


Forum Tag

Using same template/ShiftD and close original
delete copyright layer/Open up a new raster 600x200.
using model for template above/resize each layer
of the template to match the forum tag/copy
and place each layer one by one into the new
raster/follow directions above for signature tag when
making forum tag


Avatar

open new raster layer/170x170/copy/paste
 same paper as used in both tags
effects/AAA frame/foto frame with these setting


copy/paste an element of choice/resize to fit
place on right side of tag/add drop shadow
copy/paste tube/resize to fit/place
where you want it/add drop shadow


add your watermark and copyright credits
to all three tags...give your forum set to afriend

You're done...thank you for trying my tutorial
please send me a copy so that I can show case it on my blog

7/26/12

PTU Hungry Hills Scraps and Anna Marine

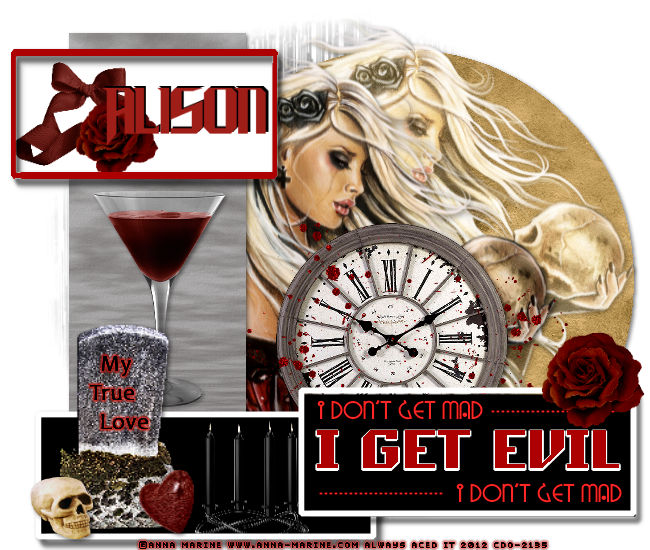
I Get Evil

This tutorial was written on July 25,2012.
Any similarities to another tutorial is purely coincidental.
All my tutorial are register with My Free Copyright.
Please do not claim as your own.
This tutorial writer assumes you have a working
knowledge of using Paint Shop Pro.
This tutorial was done in Paint Shop Pro9,
but can be adapted to use in other
Paint Shop Pro versions.


SUPPLIES NEEDED

Tube of choice: I'm using the awesome work of Anna Marine.
Please do not use unless you have a license to do so.
You can get her tubes HERE

Scrapkit of Choice: I am using Anna Marine PTU Scrap kit/
bundle #31 designed by Hungry Hills. You can download it
HERE ...Thank you Ali

Template of choice:I am using Kandi Kisses Template # 35
You can download it HERE...Thank you Kandi

Mask of Choice: I am using Weescottlass Mask #16
You can download it HERE....Thank you Chelle

Filters used:Eye Candy 4000 gradient glow - HERE

Font for Name is Dare Devil
Copy write is always done in Pixelette  HERE

Drop shadow use through out H-2/V-2/O-50/B-5.00

Please leave a thank you when you downloading for supplies.

my tag is just a guide...please use your imagination
and make the tag your own you do not have to
use any of the supplies I used.


     LET'S BEGIN

Open up Template and ShiftD and close original...delete
copyright layer/close all layers/choose paper of choice
copy/paste and put underneath background layer/go to mask
of choice with these setting and click ok


delete background
layer/change color to match tube/add drop shadow

On the following raster layers follow these directions...

activate black circle layer/copy/paste paper of choice
resize/selection/invert on black circle layer/delete on paper
layer/merge down/move circle to right of canvas/keep activate
copy/paste tube of choice/place to right side of circle/duplicate
on original/blend/screen/place duplicate underneath/lower opacity
to 48%/add drop shadow to both/copy/paste tube again/move slightly
to the left of the circle so that it overlaps the previous tube
add drop shadow

activate lg pink rectangle layer/copy/paste paper of choice/resize
selection/on rectangle layer invert/on paper layer delete/merge
down/add drop show/copy paste element of choice/resize/place in
middle ans add drop shadow

activate top back layer/change color to white/resize so that it's
blocking the second tube/activate the top frame/change color to
red-a01e18/resize so it fits the frame

activate bottom back layer/change color to black/add any elements
you wish to use/resize to fit/add drop shadow to each element/leave
bottom frame white/add drop shadow/move it down to bottom of canvas

I removed sm pink rectangle/on middle rectangle back leave color black
move it down near the bottom rectangle(see my tag)/move all word art
down to fir inside middle rectangle back/change the color of the word
art/add drop shadow to all word art

now add any other element you wish to use to make your tag your
own/add drop shadow on each element/resize your tag

add your watermark and copyright credits/give it a slight gradient
glow ...now give your tag to a friend.

You're done...thank you for trying my tutorial
please send me a copy so that I can show case it on my blog
send to....riggsbee53@gmail.com