Showing posts with label Pinuptoons. Show all posts

2/2/16

CDO Rebel Dezigns and PinUpToons

Let The Good Times Roll

This tutorial was written on February 2,2016. 
Any similarities to another tutorial is purely coincidental.
All my tutorial are register with My Free Copyright. 
Please do not claim as your own.
This tutorial writer assumes you have a working 
knowledge of using Paint Shop Pro.
This tutorial was done in Paint Shop Pro9,
but can be adapted to use in other 
Paint Shop Pro versions.


SUPPLIES NEEDED

Tube of choice: I'm using the awesome work of PinUpToons.
Please do not use unless you have a license to do so. 
Get Them HERE

Scrapkit of Choice: I am using CDO Rebel Dezigns Mini Beads,Beads,Beads
You can purchase it HERE ...Thank You Gizzy

Template of choice:I am using Gimptastic Scraps Template #9
You can download it HERE...Thanks Leah

Mask of Choice: I am using elements within scrapkit
.... Thank You Gizzy

Filters used:Eye Candy 4000 gradient glow - HERE

Font for Name is Kingthings Exeter
Copy write is always done in Pixelette  HERE

Drop shadow use through out H-2/V-2/O-60/B-6.85

Please leave a thank you when you downloading for supplies.

my tag is just a guide...please use your imagination 
and make the tag your own you do not have to 
use any of the supplies I used.


     LET'S BEGIN

Open up Template and ShiftD and close original...delete 
copyright layer/close all layers/copy/paste paper of choice
resize to fit canvas/layers/load/save mask/find your mask
and set with these setting/click ok

On the following raster layers follow these directions...

activate large pink oval layer/copy/paste paper of choice/resize
paper/selections/invert on oval layer/delete on paper layer
merge down/add drop shadow

leave white heart layer as is/activate center heart layer/copy/paste 
paper of choice resize paper/selections/invert on heart layer/delete 
on paper layer/merge down/add drop shadow

activate red small circle layer/copy/paste paper of choice resize paper
selections/invert on circle layer/delete on paper layer/merge down
leave white ring layer as is/add drop shadow to both

activate top pink rectangle layer/copy/paste paper of choice resize paper
selections/invert on rectangle layer/delete on paper layer/merge 
down/leave dotted rectangle as is/add drop shadow 

leave white glittered heart as is/activate right red heart layer/copy/paste
paper of choice resize paper/selections/invert on heart layer/delete on 
paper layer/merge down/leave heart criss cross shadow and heart criss cross 
as is/copy/paste close up tube of choice/place within heart/erase excess
tube underneath/add drop shadow

leave white circle as is/activate circle layer/copy/paste tube of choice
resize tube so head is within the circle/invert on circle layer/delete 
on tube layer/erase excess tube/duplicate tube/on original/blend/overlay
place duplicate underneath original/leave red ring as is/add drop shadow 
to both tubes

activate bottom pink rectangle layer/copy/paste paper of choice resize paper
selections/invert on rectangle layer/delete on paper layer/merge down/leave
dotted rectangle as is/add drop shadow 

leave all layers of wordart as is/leave both layers of little hearts as is
add drop shadow to hearts

copy/paste main tube of choice/resize if needed/place on left side of tag
add drop Shadow

add any other elements you wish to use/resize if needed/add drop shadow
to each element/place where they will look best

add your watermark and copyright credits/give it a slight gradient 
glow.....now give your tag to a friend.

You're done...thank you for trying my tutorial
please send me a copy so that I can show case it on my blog
send to.... riggsbee53@gmail.com

CDO Gimptastic Scraps and PinUpToons

I Love You

This tutorial was written on February 2,2016. 
Any similarities to another tutorial is purely coincidental.
All my tutorial are register with My Free Copyright. 
Please do not claim as your own.
This tutorial writer assumes you have a working 
knowledge of using Paint Shop Pro.
This tutorial was done in Paint Shop Pro9,
but can be adapted to use in other 
Paint Shop Pro versions.


SUPPLIES NEEDED

Tube of choice: I'm using the awesome work of PinUpToons.
Please do not use unless you have a license to do so. 
Get Them HERE

Scrapkit of Choice: I am using CDO Gimptastic Scraps IB PinUpToons 140-1 
You can purchase it HERE ...Thank You Amy

Template of choice:I am using Dees'Sign Depot Valentine Template #7
You can download it HERE...Thanks Dee

Mask of Choice: I am using Tonya Temptations Mask #1
You can download it HERE.... Thank You Tonya

Filters used:Eye Candy 4000 gradient glow - HERE
Blend - Overlay

Font for Name is Love Letters
Copy write is always done in Pixelette  HERE

Drop shadow use through out H-2/V-2/O-60/B-6.85

Please leave a thank you when you downloading for supplies.

my tag is just a guide...please use your imagination 
and make the tag your own you do not have to 
use any of the supplies I used.


     LET'S BEGIN

Open up Template and ShiftD and close original...delete 
copyright layer/close all layers/copy/paste paper of choice
resize to fit canvas/layers/load/save mask/find your mask
and set with these setting/click ok


On the following raster layers follow these directions...

activate large pink oval layer/copy/paste paper of choice/resize
paper/selections/invert on oval layer/delete on paper layer
merge down/add drop shadow

leave white heart layer as is/activate center heart layer/copy/paste 
paper of choice resize paper/selections/invert on heart layer/delete 
on paper layer/merge down/add drop shadow

activate red small circle layer/copy/paste paper of choice resize paper
selections/invert on circle layer/delete on paper layer/merge down
leave white ring layer as is/add drop shadow to both

activate top pink rectangle layer/copy/paste paper of choice resize paper
selections/invert on rectangle layer/delete on paper layer/merge 
down/leave dotted rectangle as is/add drop shadow 

leave white glittered heart as is/activate right red heart layer/copy/paste
paper of choice resize paper/selections/invert on heart layer/delete on 
paper layer/merge down/leave heart criss cross shadow and heart criss cross 
as is/copy/paste close up tube of choice/place within heart/erase excess
tube underneath/add drop shadow

leave white circle as is/activate circle layer/copy/paste tube of choice
resize tube so head is within the circle/invert on circle layer/delete 
on tube layer/erase excess tube/duplicate tube/on original/blend/overlay
place duplicate underneath original/leave red ring as is/add drop shadow 
to both tubes

activate bottom pink rectangle layer/copy/paste paper of choice resize paper
selections/invert on rectangle layer/delete on paper layer/merge down/leave
dotted rectangle as is/add drop shadow 

leave all layers of wordart as is/leave both layers of little hearts as is
add drop shadow to hearts

copy/paste main tube of choice/resize if needed/place on left side of tag
add drop Shadow

add any other elements you wish to use/resize if needed/add drop shadow
to each element/place where they will look best

add your watermark and copyright credits/give it a slight gradient 
glow.....now give your tag to a friend.

You're done...thank you for trying my tutorial
please send me a copy so that I can show case it on my blog

1/25/16

CDO Hungry Hills and PinUpToons

Kinky Valentine

This tutorial was written on January 24,2015. 
Any similarities to another tutorial is purely coincidental.
All my tutorial are register with My Free Copyright. 
Please do not claim as your own.
This tutorial writer assumes you have a working 
knowledge of using Paint Shop Pro.
This tutorial was done in Paint Shop Pro9,
but can be adapted to use in other 
Paint Shop Pro versions.


SUPPLIES NEEDED

Tube of choice: I'm using the awesome work of PinUpToons.
Please do not use unless you have a license to do so. 
Get Them HERE

Scrapkit of Choice: I am using PTU Hungry Hills - It's Only Love
You can purchase it HERE ...Thank You Alison

Template of choice:I am using Divine Intentionz Template #316
You can download it HERE...Thanks Missy

Mask of Choice: I am using Insatiable Dreams Mask #59
You can download it HERE.... Thank You Cat

Filters used:Eye Candy 4000 gradient glow - HERE
Blend Soft Light
Effects Penta.com - Color Dots - HERE

Font for Name is Impact
Copy write is always done in Pixelette  HERE

Drop shadow use through out H-2/V-2/O-60/B-6.85

Please leave a thank you when you downloading for supplies.

my tag is just a guide...please use your imagination 
and make the tag your own you do not have to 
use any of the supplies I used.


     LET'S BEGIN

Open up Template and ShiftD and close original...delete 
copyright layer/close all layers/copy/paste paper of choice
resize to fit canvas/layers/load/save mask/find your mask
and set with these setting/click ok


On the following raster layers follow these directions...

recolor glittered rectangle layer to a red color from one of the 
papers in the kit/add drop shadow

activate rectangle layer/copy/paste paper of choice resize paper
selections/invert on rectangle layer/delete on paper layer/merge 
down/leave pixel word  art as is/leave glittered circle layer as
is/add drop shadow

activate circle layer/copy/paste paper of choice resize paper
selections/invert on circle layer/delete on paper layer/merge 
down/add drop shadow

activate rectangle 2 layer/copy/paste paper of choice/resize paper
selections/invert on rectangle layer/delete on paper layer/merge 
down/add drop shadow

activate circle2 layer/recolor a dark red from one of the papers in
the kit/keep activated/copy/paste closeup tube of choice/resize if 
needed so the whole tube is in the circle/duplicate tube/close/ on 
original tube/invert on circle/delete on tube/open duplicate tube
erase bottom part of tube/selection none/on original tube/effects 
penta.com./color dot with these setting/click ok/on duplicate tube
blend/soft light/add drop shadow to both tubes


recolor small glittered circle red/leave small circle as is/add drop
shadow

copy/paste main tube of choice/resize if needed/place on left side of 
tag/over top of small circle/resize as needed/make sure bottom part
is underneath thin rectangle layer/add drop Shadow

recolor thin rectangle layer/leave word art as is/add drop shadow on
rectangle layer/recolor hearts layer red and add drop shadow

recolor small glittered circle to red/also recolor circle layer/activate
copy/paste tube of choice/resize so the head is within the circle
invert on circle layer/delete on tube layer/add drop shadow to all
three layers

add any other elements you wish to use/resize if needed/add drop 
shadow to each element/place where they will look best/recolor word art 
to match tag

add your watermark and copyright credits/give it a slight gradient 
glow.....now give your tag to a friend.

Once you do name/activate/effects/penta.com/color dot with these
settings/click ok/add fat gradient glow and drop shadow


You're done...thank you for trying my tutorial
please send me a copy so that I can show case it on my blog

11/1/15

Mellie Beans and Pinuptoons

My Gothic Heart

This tutorial was written on November 1,2015. 
Any similarities to another tutorial is purely coincidental.
All my tutorial are register with My Free Copyright. 
Please do not claim as your own.
This tutorial writer assumes you have a working 
knowledge of using Paint Shop Pro.
This tutorial was done in Paint Shop Pro9,
but can be adapted to use in other 
Paint Shop Pro versions.


SUPPLIES NEEDED

Tube of choice: I'm using the awesome work of PinupToons.
Please do not use unless you have a license to do so. 
You can get her tubes HERE

Scrapkit of Choice: I am using PTU Mellie Beans PinupToons IB 224-1
You can purchase it HERE ...Thank you Melissa

Mask of Choice: element 16 within kit

Filters used:Eye Candy 4000 gradient glow - HERE
Mura Meister - copies - HERE

Font for Name is Cambria
Copy write is always done in Pixelette  HERE

Drop shadow use through out H-3/V-3/O-60/B-8.76

Please leave a thank you when you downloading for supplies.


my tag is just a guide...please use your imagination 
and make the tag your own you do not have to 
use any of the supplies I used.


     LET'S BEGIN

Open up new raster layer 800 x 800/copy/paste frame #1/resize by 70%
twice/close/copy/paste element #18/resize by 70% twice and 90% once
effects/mura meister/copies/with these setting/click ok/now you're
going to delete the stem of the flower in the middle (see pic)


open frame #1 and place on top of flower frame/click inside flower 
frame/modify/expand with these setting/click ok


keep activated/copy paste closeup tube of choice
add drop shadow to both frames and tube

copy/paste element #16/duplicate/mirror/place below frame

now comes the time when you can let your creativity flow/add any 
other elements you wish to use/resize if needed/add drop shadow
to each element

Copy/paste your main tube/resize if needed/place where you would
think it will look best/add drop shadow/resize tag if needed

add word art from the kit/add black gradient glow/on the name place
inner bevel with these setting/click ok 


add your watermark and copyright credits/give it a fat gradient  
glow ...now give your tag to a friend.

You're done...thank you for trying my tutorial
please send me a copy so that I can show case it on my blog
send to.... riggsbee53@gmail.com

10/29/15

Creative Crazy Scraps and PinupToons

Trick or Treat

This tutorial was written on October 29,2015. 
Any similarities to another tutorial is purely coincidental.
All my tutorial are register with My Free Copyright. 
Please do not claim as your own.
This tutorial writer assumes you have a working 
knowledge of using Paint Shop Pro.
This tutorial was done in Paint Shop Pro9,
but can be adapted to use in other 
Paint Shop Pro versions.


SUPPLIES NEEDED


Tube of choice: I'm using the awesome work of PinupToons.
Please do not use unless you have a license to do so. 
Get Them HERE

Scrapkit of Choice: I am using PTU Creative Crazy Scraps Trick or Treat
You can purchase it HERE ...Thank You Stu

Template of choice:I am using Toxic Desire Mask 295
You can download it HERE...Thanks Kristin

Filters used:Eye Candy 4000 gradient glow - HERE

Font for Name is O Whoa DNA
Copy write is always done in Pixelette  HERE

Drop shadow use through out H-2/V-2/O-60/B-6.85

Please leave a thank you when you downloading for supplies.

my tag is just a guide...please use your imagination 
and make the tag your own you do not have to 
use any of the supplies I used.


     LET'S BEGIN

On the following raster layers follow these directions...

activate raster #12/copy/paste paper of choice/resize paper/selections
invert on rectangle layer/delete on paper layer/merge down/add drop shadow

activate copy of raster #12/copy/paste paper of choice resize paper/selections
invert on rectangle layer/delete on paper layer/merge down/add drop shadow

activate raster layer #11/copy/paste paper of choice/resize paper/selections
invert on rectangle layer/delete on paper layer/merge down/add drop shadow

activate copy of raster #11/copy/paste paper of choice/resize paper/selections
invert on rectangle layer/delete on paper layer/merge down/add drop shadow

activate raster layer #10/copy/paste paper of choice/resize paper/selections
invert on rectangle layer/delete on paper layer/merge down/add drop shadow

activate copy of raster #10/copy/paste paper of choice/resize paper/selections
invert on rectangle layer/delete on paper layer/merge down/add drop shadow

activate raster layer #2/copy/paste paper of choice/resize paper/selections
invert on square layer/delete on paper layer/merge down/add drop shadow

activate copy of raster #2/copy/paste paper of choice/resize paper/selections
invert on square layer/delete on paper layer/merge down/add drop shadow

activate raster layer #9/copy/paste paper of choice/resize paper/selections
invert on circle layer/delete on paper layer/merge down/add drop shadow

activate copy of raster #9/copy/paste paper of choice/resize paper/selections
invert on circle layer/delete on paper layer/merge down/add drop shadow

leave pumpkin layer #8 and copy of pumpkin layer #8 as is/add drop shadow

activate raster layer #6/copy/paste paper of choice/resize paper/selections
invert on long rectangle layer/delete on paper layer/merge down/add drop shadow

leave copy of circle layer #4 as is/activate circle layer #4/copy/paste paper of 
choice/resize paper/selections/invert on circle layer/delete on paper layer/merge 
down/add drop shadow

activate circle layer #14/choose two colors from kit/for gradient color using these 
setting/click ok


add drop shadow/on raster #16 add noise with these setting/click ok


add drop shadow/on raster #15 and raster #5 leave as is/add drop shadow

activate copy of raster layer #4/Copy/paste tube of choice/invert on layer #4/delete
on tube layer/add drop shadow

Copy/paste main tube/resize if needed/place on right side of tag (see image)add
drop shadow

add any other elements you wish to use/resize if needed/add drop 
shadow to each element/place where they will look best

add your watermark and copyright credits/give it a slight gradient 
glow.....now give your tag to a friend.

You're done...thank you for trying my tutorial
please send me a copy so that I can show case it on my blog

3/9/15

CDO Foxy Designz and Pinuptoons - Gawn N Stalk

Gawn N Stalk

This tutorial was written on March 10,2015. 
Any similarities to another tutorial is purely coincidental.
All my tutorial are register with My Free Copyright. 
Please do not claim as your own.
This tutorial writer assumes you have a working 
knowledge of using Paint Shop Pro.
This tutorial was done in Paint Shop Pro9,
but can be adapted to use in other 
Paint Shop Pro versions.


SUPPLIES NEEDED

Tube of choice: I'm using the awesome work of Pinuptoons.
Please do not use unless you have a license to do so. 
Get Them HERE

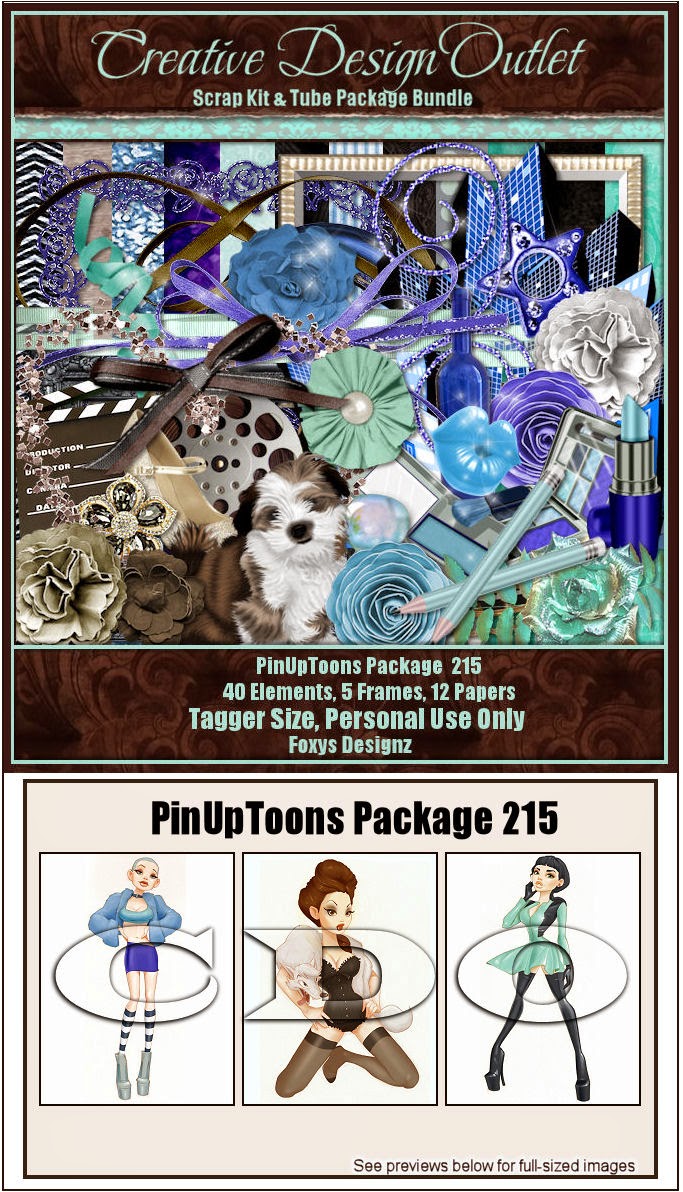
Scrapkit of Choice: I am using CDO Foxy's Designz Bundle Pinuptoons #215
You can purchase it HERE ...Thank You Ann

Template of choice:I am using Dee'Signs Depot Template # 25
You can download it HERE...Thanks Dee

Mask of Choice: I am using Moonbeans and Spiderwebs Mask # 37
You can download it HERE.... Thank You Stacie

Filters used:Eye Candy 4000 gradient glow - HERE

Font for Name is Kingthings Exeter
Copy write is always done in Pixelette  HERE

Drop shadow use through out H-2/V-2/O-60/B-6.85

Please leave a thank you when you downloading for supplies.

my tag is just a guide...please use your imagination 
and make the tag your own you do not have to 
use any of the supplies I used.


     LET'S BEGIN

Open up Template and ShiftD and close original...delete 
copyright layer/close all layers/copy/paste paper of choice
resize to fit canvas/layers/load/save mask/find your mask
and set with these setting/click ok


On the following raster layers follow these directions...

activate right rust circle/copy/paste paper of choice/resize paper/selections
invert on circle layer/delete on paper layer/merge down/add drop shadow

activate left rust circle/copy/paste paper of choice/resize paper/selections
invert on circle layer/delete on paper layer/merge down/add drop shadow

leave white left circle border and white right circle border as is/add drop
shadow

activate main shape blue/copy/paste paper of choice resize paper selections
invert on main shape layer/delete on paper layer/merge down/add drop shadow
leave main shape outline as is/add drop shadow

activate rust rectangle layer/copy/paste paper of choice resize paper/selections
invert on rectangle layer/delete on paper layer/merge down/add drop shadow

activate creme rectangle layer/copy/paste paper of choice resize paper/selections
invert on rectangle layer/delete on paper layer/merge down/add drop shadow

leave left white circle and right white circle as is/add drop shadow to each
choose a color from the tube/recolor left brown circle and right brown circle
copy/paste element #19/resize by 70%/place on each of the brown circles/add
drop shadow

activate blue strip layer/copy/paste paper of choice/resize paper/selections
invert on blue strip layer/delete on paper layer/merge down

choose another color from the tube/recolor brown circle/activate/copy/paste
close up tube/resize by 80%/invert oncircle layer/delete on tube layer/add
drop shadow/leave large dotted circle as is/recolor word art and bring up to
place on blue strip layer

copy/paste tube of choice/resize by 90%/place on left side of tag/add drop 
shadow

add any other elements you wish to use/resize if needed/add drop shadow to each 
element/place where they will look best

add your watermark and copyright credits/give it a slight gradient glow.....now 
give your tag to a friend.

You're done...thank you for trying my tutorial
please send me a copy so that I can show case it on my blog

CDO Foxy Designz and Pinuptoons - Superstar

Superstar

This tutorial was written on March 10,2015. 
Any similarities to another tutorial is purely coincidental.
All my tutorial are register with My Free Copyright. 
Please do not claim as your own.
This tutorial writer assumes you have a working 
knowledge of using Paint Shop Pro.
This tutorial was done in Paint Shop Pro9,
but can be adapted to use in other 
Paint Shop Pro versions.


SUPPLIES NEEDED

Tube of choice: I'm using the awesome work of Pinuptoons.
Please do not use unless you have a license to do so. 
Get Them HERE

Scrapkit of Choice: I am using CDO Foxy's Designz Bundle Pinuptoons #215
You can purchase it HERE ...Thank You Ann

Template of choice:I am using MilliesPSPMadness Template #100
You can download it HERE...Thanks Millie

Mask of Choice: I am using Moonbeams and Spiderwebs Mask #22
You can download it HERE.... Thank You Stacie

Filters used:Eye Candy 4000 gradient glow - HERE

Font for Name is Impact
Copy write is always done in Pixelette  HERE

Drop shadow use through out H-2/V-2/O-60/B-6.85

Please leave a thank you when you downloading for supplies.

my tag is just a guide...please use your imagination 
and make the tag your own you do not have to 
use any of the supplies I used.


     LET'S BEGIN

Open up Template and ShiftD and close original...delete 
copyright layer/close all layers/copy/paste paper of choice
resize to fit canvas/layers/load/save mask/find your mask
and set with these setting/click ok

On the following raster layers follow these directions...

activate large blue circle layer/copy/paste paper of choice/resize
paper/selections/invert on circle layer/delete on paper layer
merge down/add drop shadow/copy/paste element 22 on circle layer
resize by 70%/place so you can see the top of the city/add drop
shadow

activate large yellow rectangle layer/copy/paste paper of choice/resize
paper/selections/invert on yellow rectangle layer/delete on paper layer
merge down/keep activated/copy/paste closeup tube/duplicate tube/close
on original tube/delete/open top tube and erase bottom portion of this
tube/add drop shadow to both

activate long purple rectangle layer/copy/paste paper of choice resize 
paper/selections/invert on purple rectangle layer/delete on paperlayer
merge down/add drop shadow

activate right top purple square layer/copy/paste paper of choice resize 
paper/selections/invert on purple square layer/delete on paper layer/merge 
down/add drop shadow

activate left top purple layer/copy/paste paper of choice resize paper
selections/invert on left square layer/delete on paper layer/merge 
down/add drop shadow

activate rounded rectangle layer/copy/paste paper of choice resize 
paper/selections/invert on rounded rectangle layer/delete on paper layer
merge down/add drop shadow

activate 2nd rounded rectangle layer/copy/paste paper of choice resize 
paper/selections/invert on rounded rectangle layer/delete on paper layer
merge down/add drop shadow

activate pink rounded rectangle layer/copy/paste paper of choice resize paper
selections/invert on rectangle layer/delete on paper layer/merge down

copy/paste tube of choice/resize if needed/place on left side of tag/add drop 
shadow

recolor word art to match tag/add gradient glow and drop shadow

add any other elements you wish to use/resize if needed/add drop shadow to each 
element/place where they will look best

add your watermark and copyright credits/give it a slight gradient glow.....now 
give your tag to a friend.

You're done...thank you for trying my tutorial
please send me a copy so that I can show case it on my blog


CDO Foxy's Designz and Pinuptoons - Call My Name

Foxy's Designz has made a awesome kit
at CDO using Pinuptoons bundle pack 215
you can purchase the tubes and scrapkit HERE


Call My Name

This tutorial was written on May 23,2014. 
Any similarities to another tutorial is purely coincidental.
All my tutorial are register with My Free Copyright. 
Please do not claim as your own.
This tutorial writer assumes you have a working 
knowledge of using Paint Shop Pro.
This tutorial was done in Paint Shop Pro9,
but can be adapted to use in other 
Paint Shop Pro versions.


SUPPLIES NEEDED

Tube of choice: I'm using the awesome work of Pinuptoons.
Please do not use unless you have a license to do so. 
Get Them HERE

Scrapkit of Choice: I am using CDO Foxy's Designz Bundle Pinuptoons #215
You can purchase it HERE ...Thank You Ann

Template of choice:I am using Toxic Desirez Template # 251
You can download it HERE...Thanks Kristin

Mask of Choice: I am using Tonya's Temptations Mask # 40
You can download it HERE.... Thank You Tonya

Filters used:Eye Candy 4000 gradient glow - HERE
Penta.com-Jeans - HERE
Text PSP Art by JuLuvsDogs ... HERE 

Font for Name is Aparajita
Copy write is always done in Pixelette  HERE

Drop shadow use through out H-2/V-2/O-60/B-6.85

Please leave a thank you when you downloading for supplies.

my tag is just a guide...please use your imagination 
and make the tag your own you do not have to 
use any of the supplies I used.


     LET'S BEGIN

Open up Template and ShiftD and close original...delete 
copyright layer/close all layers/copy/paste paper of choice
resize to fit canvas/layers/load/save mask/find your mask
and set with these setting/click ok


On the following raster layers follow these directions...

activate left long rectangle layer 8/copy/paste paper of choice/resize
paper/selections/invert on rectangle layer/delete on paper layer
merge down/add drop shadow

activate right long rectangle layer 8/copy/paste paper of choice/resize
paper/selections/invert on rectangle layer/delete on paper layer
merge down/add drop shadow

activate bottom rectangle layer 7/copy/paste paper of choice resize paper
selections/invert on rectangle layer/delete on paper layer/merge 
down/add drop shadow

activate top rectangle layer 7/copy/paste paper of choice resize paper
selections/invert on rectangle layer/delete on paper layer/merge 
down/add drop shadow

activate left square layer 6/copy/paste paper of choice resize paper
selections/invert on left square layer/delete on paper layer/merge 
down/add drop shadow

activate right square layer 6/copy/paste paper of choice resize paper
selections/invert on right square layer/delete on paper layer/merge 
down/add drop shadow

activate large circle layer 3/recolor to match tag/add drop shadow

activate left medium circle layer 4/copy/paste paper of choice resize paper
selections/invert on circle layer/delete on paper layer/merge down/keep 
activated/copy/paste closeup tube/resize if needed/effect/penta.com/jeans 
with these setting/add drop shadow/merge down


activate right medium circle layer 4/copy/paste paper of choice resize paper
selections/invert on circle layer/delete on paper layer/merge down/keep 
activated/copy/paste closeup tube/resize if needed/effect/penta.com/jeans 
with these setting/add drop shadow/merge down


activate large circle/copy/paste paper of choice resize paper/selections invert 
on circle layer/delete on paper layer/merge down/copy/paste close up tube/resize 
to fit/duplicate/close duplicated layer on original layer/blend/screen/lower 
opacity to 32%/add drop shadow to both

copy/paste tube of choice/resize if needed/place on right side of tag/add drop 
shadow

add any other elements you wish to use/resize if needed/add drop shadow to each 
element/place where they will look best

add your watermark and copyright credits/give it a slight gradient glow.....now 
give your tag to a friend.

You're done...thank you for trying my tutorial
please send me a copy so that I can show case it on my blog


6/11/14

CDO Hungry Hills Scraps and Pinuptoons - I Love You

I Love You

This tutorial was written on June 11,2014.
Any similarities to another tutorial is purely coincidental.
All my tutorial are register with My Free Copyright.
Please do not claim as your own.
This tutorial writer assumes you have a working
knowledge of using Paint Shop Pro.
This tutorial was done in Paint Shop Pro9,
but can be adapted to use in other
Paint Shop Pro versions.


SUPPLIES NEEDED

Tube of choice: I'm using the awesome work of Pinuptoons.
Please do not use unless you have a license to do so.
Get Them HERE

Scrapkit of Choice: I am using PTU Hungry Hills Scraps Brainstorm
Bundle Pack 30....You can purchase it HERE ...Thanks Alison

Mask of Choice: no mask

Filters used:Eye Candy 4000 gradient glow - HERE

Font for Name is Moonbeams
Copy write is always done in Pixelette
Google for them

Drop shadow use through out H-2/V-2/O-60/B-6.85

Please leave a thank you when you downloading for supplies.

my tag is just a guide...please use your imagination
and make the tag your own you do not have to
use any of the supplies I used.

     LET'S BEGIN

Open up new raster layer 800x800

copy/paste door/resize if needed/place in middle of canvas/add
a slight drop shadow

copy/paste fence/resize if needed/place in front of door element
add a slight drop shadow

copy/paste potted palm on canvas/resize/duplicate/place the palm
on each side of the fence/merge down/add drop shadow/copy/paste the
lantern on canvas/resize to fit the door frame/duplicate and place on
both sides of the door/merge down/add drop shadow

copy/paste the table/chair and candle/create a seating area on left side
of canvas/resize to fit/add drop shadow to each element

copy/paste main tube/resize/place on one of the chairs/ add drop shadow

add any other elements you wish to use/resize if needed/add drop
shadow to each element/place where they will look best

add wordart if you wish/add fat gradient glow/add drop shadow

add your watermark and copyright credits/give it a slight gradient
glow.....now give your tag to a friend.

You're done...thank you for trying my tutorial
please send me a copy so that I can show case it on my blog
send to.... riggsbee53@gmail.com