2/26/14

CDO BabyCakes Scraps and Marika - Things I Love About You

Things I Love About You

This tutorial was written on February 26,2013. 
Any similarities to another tutorial is purely coincidental.
All my tutorial are register with My Free Copyright. 
Please do not claim as your own.
This tutorial writer assumes you have a working 
knowledge of using Paint Shop Pro.
This tutorial was done in Paint Shop Pro9,
but can be adapted to use in other 
Paint Shop Pro versions.


SUPPLIES NEEDED

Animation Shop HERE

Tube of choice: I'm using the awesome work of Marika.
Please do not use unless you have a license to do so. 
Get Them HERE

Scrapkit of Choice: I am using PTU BabyCakes Scraps Marika IB 20-2
You can purchase it HERE ...Thanks Lynne

Animation of Choice: I am using Scrappy Bit of Fun Animation #6
You can download HERE.......Thanks Simone

Filters used:Eye Candy 4000 gradient glow - HERE

Font for Name is Ribbon of Hope HERE
Copy write is always done in Pixelette  HERE

Drop shadow use through out H-2/V-2/O-60/B-6.85

Please leave a thank you when you downloading for supplies.

my tag is just a guide...please use your imagination 
and make the tag your own you do not have to 
use any of the supplies I used.


     LET'S BEGIN

Open up new raster layer 582 x 589/copy/paste paper of choice
resize to fit canvas/effects/AAA Frame/Foto Frame with these
settings/click ok


Copy/paste black ribbon frame/resize by 12%/click inside frame
copy/paste paper of choice/resize/selections/invert on frame
delete on paper/keep activated/copy/paste tube of choice/resize
if needed/position tube so that her head is at the top of the 
frame/duplicate tube/place over top of frame and close/delete
on original tube/open duplicate tube/erase any excess tube at
the bottom/add drop shadow to bottom tube and frame

copy/paste tube of choice/position on left side of frame layer
resize if needed/add drop shadow

add any other elements you wish to use/resize if needed/add drop 
shadow to each element/place where they will look best

add your watermark and copyright credits/give it a slight gradient 
glow.....

To animate

close all layers except background
copy/paste background into animation shop
duplicate layer for until you have 25 frames/edit/select all
open animation/edit/select all/copy 2x into selected frame

go back to psp and close background and open all other frames
copy/merge/paste into animated shop/edit/duplicate for 25 frames
edit select all/copy into selected frame/place on top on animated
frame/view animation/if satisfied/save as gif

now give your tag to a friend.

You're done...thank you for trying my tutorial
please send me a copy so that I can show case it on my blog


CDO ChiChi Designz and Monte Moore - Welcome To My World

Welcome To My World

This tutorial was written on Febuary 26,2013. 
Any similarities to another tutorial is purely coincidental.
All my tutorial are register with My Free Copyright. 
Please do not claim as your own.
This tutorial writer assumes you have a working 
knowledge of using Paint Shop Pro.
This tutorial was done in Paint Shop Pro9,
but can be adapted to use in other 
Paint Shop Pro versions.


SUPPLIES NEEDED

Tube of choice: I'm using the awesome work of Monte Moore.
Please do not use unless you have a license to do so. 
Get Them HERE

Scrapkit of Choice: I am using PTU Chi Chi Designz -  Fairy World
You can purchase it HERE ...Thanks Cindy

Template of choice:I am using MilliePsP Templates #504
You can download it HERE...Thanks Millie

Filters used:Eye Candy 4000 gradient glow - HERE

Font for Name is Precious
Copy write is always done in Pixelette  HERE

Drop shadow use through out H-2/V-2/O-60/B-6.85

Please leave a thank you when you downloading for supplies.

my tag is just a guide...please use your imagination 
and make the tag your own you do not have to 
use any of the supplies I used.


     LET'S BEGIN

Open up Template and Shift D and close original...delete 
copyright layer

On the following raster layers follow these directions...

activate small rounded square 1 layer/copy/paste paper of 
choice/resize paper/selections/invert on rounded square layer
delete on paper layer/merge down/add drop shadow

activate small rounded square 2 layer/copy/paste paper of 
choice/resize paper/selections/invert on rounded square layer
delete on paper layer/merge down/add drop shadow

activated long rounded rectangle layer/copy/paste paper of choice
resize paper/selections/invert on rectangle layer/delete on paper 
layer/merge down/add drop shadow to rectangle layer

activate large rounded square layer/copy/paste paper of choice
resize paper/selections/invert on rounded square layer/delete
on paper layer/merge down/add drop shadow

activated long thin rounded rectangle layer/copy/paste paper of 
choice/resize paper/selections/invert on rectangle layer/delete 
on paper layer/merge down/add drop shadow to rectangle layer

activated large oval layer/copy/paste paper of choice/resize paper
selections/invert on rectangle layer/delete on paper layer/merge 
down/add drop shadow to oval layer

copy/paste tube of choice/position in middle of oval layer/resize
if needed/add drop shadow

add any other elements you wish to use/resize if needed/add drop 
shadow to each element/place where they will look best

copy/paste word art that is in the kit/resize by 60%/effects/eye 
candy 4000/gradient glow/with these settings/add drop shadow 

add your watermark and copyright credits/give it a slight gradient 
glow.....now give your tag to a friend.

You're done...thank you for trying my tutorial
please send me a copy so that I can show case it on my blog


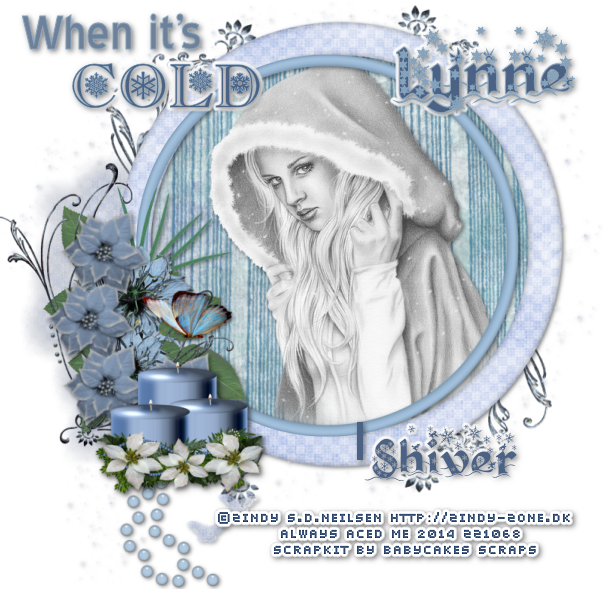
PTU BabyCakes Scraps and Zindy Nielsen - When It's Cold, I Shiver

When It's Cold, I Shiver

This tutorial was written on Febuary 26,2014. 
Any similarities to another tutorial is purely coincidental.
All my tutorial are register with My Free Copyright. 
Please do not claim as your own.
This tutorial writer assumes you have a working 
knowledge of using Paint Shop Pro.
This tutorial was done in Paint Shop Pro9,
but can be adapted to use in other 
Paint Shop Pro versions.


SUPPLIES NEEDED

Tube of choice: I'm using the awesome work of Zindy Nielsen.
Please do not use unless you have a license to do so. 
You can get her tubes HERE

Scrapkit of Choice: I am using PTU BabyCakes Scraps - Shiver
You can purchase it HERE ...Thank you Lynne

Mask of Choice: using doodle within kit

Filters used:Eye Candy 4000 gradient glow - HERE

Font for Name is Kingthings Christmas
Copy write is always done in Pixelette  HERE

Word art by Always Creations HERE
please do not claim as your own
please do not share

Drop shadow use through out H-3/V-3/O-60/B-8.76

Please leave a thank you when you downloading for supplies.

my tag is just a guide...please use your imagination 
and make the tag your own you do not have to 
use any of the supplies I used.

     LET'S BEGIN

Open up a frame/D-shift/close original frame/resize by 70%/click 
inside frame/selections/modify by 20/invert/copy/paste paper of 
choice/delete on paper layer/keep activated/copy/paste tube of 
choice tube/place under frame/add drop shadow to tube and frame

copy/paste doodle element/resize by 70%/place behind frame/duplicate
mirror/flip/merge down/add drop shadow

now comes the time when you can let your creativity flow/add any 
other elements you wish to use/resize if needed/add drop shaow
to each element

copy/paste word art/resize if needed/place where you would like it
gradient glow/fat white glow/add drop shadow

add your watermark and copyright credits/give it a fat gradient  
glow ...now give your tag to a friend.

You're done...thank you for trying my tutorial
please send me a copy so that I can show case it on my blog


2/24/14

CDO Hungry Hills and The Vintage Angel - You Are So Beautiful

You Are So Beautiful

This tutorial was written on February 23,2014. 
Any similarities to another tutorial is purely coincidental.
All my tutorial are register with My Free Copyright. 
Please do not claim as your own.
This tutorial writer assumes you have a working 
knowledge of using Paint Shop Pro.
This tutorial was done in Paint Shop Pro9,
but can be adapted to use in other 
Paint Shop Pro versions.


SUPPLIES NEEDED

Tube of choice: I'm using the awesome work of The Vintage Angel.
Please do not use unless you have a license to do so. 
You can get her tubes HERE

Scrapkit of Choice: I am using PTU Hungry Hills Scraps - Beautiful
You can purchase it HERE ...Thank you Alison

Mask of Choice: using music sheet with in kit

Filters used:Eye Candy 4000 gradient glow - HERE

Font for Name is Marketing Script
Copy write is always done in Pixelette  HERE

Drop shadow use through out H-3/V-3/O-60/B-8.76

Please leave a thank you when you downloading for supplies.


my tag is just a guide...please use your imagination 
and make the tag your own you do not have to 
use any of the supplies I used.


     LET'S BEGIN

Open up new raster layer 800x 800/copy/paste frame #4/mirror
flip/recolor to match tag/resize by 70%/click inside frame
selections/modify by 20/invert/copy/paste paper of choice/delete
on paper layer/keep activated/copy/paste tube of choice tube/resize 
if needed/place under frame/duplicate tube/close duplicated tube
on original tube/delete/on duplicated tube/eraser tool/erase any 
excess tube from the bottom/add drop shadow to bottom tube and 
frame

copy/paste sheet music element/resize by 70%/blend/screen/lower 
opacity to 40%/place below frame/turn slightly to the right

now comes the time when you can let your creativity flow/add any 
other elements you wish to use/resize if needed/add drop shadow
to each element

copy/paste word art of choice from the kit/resize by 70%/add fat 
gradient glow/add drop shadow

I used Marketing script for name/write name/adjust/ad/remove noise
add noise with these setting


add drop shadow

add your watermark and copyright credits/give it a fat gradient  
glow ...now give your tag to a friend.

You're done...thank you for trying my tutorial
please send me a copy so that I can show case it on my blog

2/23/14

CDO Hungry Hills and Jessica Dougherty - A Green Desire

A Green Desire

This tutorial was written on February 23,2014. 
Any similarities to another tutorial is purely coincidental.
All my tutorial are register with My Free Copyright. 
Please do not claim as your own.
This tutorial writer assumes you have a working 
knowledge of using Paint Shop Pro.
This tutorial was done in Paint Shop Pro9,
but can be adapted to use in other 
Paint Shop Pro versions.


SUPPLIES NEEDED

Tube of choice: I'm using the awesome work of Jessica Dougherty.
Please do not use unless you have a license to do so. 
You can get her tubes HERE

Scrapkit of Choice: I am using PTU Hungry Hills Scraps - A Green Desire
You can purchase it HERE ...Thank you Alison

Filters used:Eye Candy 4000 gradient glow - HERE
AAA Frame - Foto Frame - HERE

Font for Name is Stereofidelic
Copy write is always done in Pixelette  HERE

Drop shadow use through out H-3/V-3/O-60/B-8.76

Please leave a thank you when you downloading for supplies.


my tag is just a guide...please use your imagination 
and make the tag your own you do not have to 
use any of the supplies I used.

     LET'S BEGIN

Open up new raster layer 800x 800/copy/paste paper of choice
resize to fit canvas/effects/AAA Frame/Foto Frame/with these
setting/click ok


copy/paste frame #4/resize by 70%/place toward 
left side of canvas/add drop shadow

copy/paste balcony element/resize by 70%/place in front of frame
add drop shadow

copy/paste plinth element/resize by 70%/place on right size of
balcony/duplicate/mirror/so you have one on left side also/add
drop shadow to both

copy/paste moss/resize by 70% and then 80% twice/place at the bottom
of the balcony/duplicate twice and overlay each one/merge down each
one/add drop shadow

copy/paste rose #1/resize by 50% twice/duplicate eight times/space
them apart(see tag)/once they are spaced/merge visible rose layers
only/add drop shadow

copy/paste harp/resize by 70%/place on right side behind balcony
see tag/add drop shadow

Copy/paste candelabra/resize by 70%/place on top of plinth/duplicate
mirror/place on other plinth/add drop shadow

Copy/paste pink butterfly/resize by 70% twice/add drop shadow

copy/paste tube of choice/resize by 70%/place tube behind balcony/in 
front of frame/add drop shadow

copy/paste word art of choice from the kit/resize by 70%/add fat 
gradient glow/add drop shadow

add your watermark and copyright credits/give it a fat gradient  
glow ...now give your tag to a friend.

You're done...thank you for trying my tutorial
please send me a copy so that I can show case it on my blog

2/21/14

PTU Chi Chi Designz and Jennifer Janesko

Beautiful

This tutorial was written on February 21,2014. 
Any similarities to another tutorial is purely coincidental.
All my tutorial are register with My Free Copyright. 
Please do not claim as your own.
This tutorial writer assumes you have a working 
knowledge of using Paint Shop Pro.
This tutorial was done in Paint Shop Pro9,
but can be adapted to use in other 
Paint Shop Pro versions.


SUPPLIES NEEDED

Tube of choice: I'm using the awesome work of Jennifer Janesko.
Please do not use unless you have a license to do so. 
You can get her tubes HERE

Scrapkit of Choice: I am using PTU Chi Chi Designz IB - Jennifer Janesko 
71-3... You can purchase it HERE ...Thank you Cindy

Mask of Choice: I am using the mask that's within the kit

Filters used:Eye Candy 4000 gradient glow - HERE

Font for Name is Biondi
Copy write is always done in Pixelette  HERE

Drop shadow use through out H-3/V-3/O-60/B-8.76

Please leave a thank you when you downloading for supplies.


my tag is just a guide...please use your imagination 
and make the tag your own you do not have to 
use any of the supplies I used.

     LET'S BEGIN

Open up new raster layer 800x 800/copy/paste frame #1/copy
paste frame #2/resize 2nd frame to sit on top of first frame
magic wand/click inside frame/selections/modify/expand by 10/copy
paste paper of choice/resize/selections/invert on frame
delete on paper/place paper underneath frame/selections/none
copy/paste frame #3/resize by 70% 2x/raster deformed tool/slightly
angle this frame/place frame into lower left side of the first 
frame/copy/paste paper of choice/resize/selections/invert on 
frame/delete on paper/place paper underneath frame/selections
none/add drop shadow to each frame

copy/paste mask from kit/resize and angle/place underneath frames
copy/paste element lace 2/resize and place underneath mask/add
drop shadow to both

copy/paste tube of choice/resize to fit frame #3/place underneath
frame/drop shadow

copy/paste tube of choice again/place on left hand side of rectangle
frame/resize to fit left side (see my tag)blend/screen on tube
add drop shadow

now comes the time when you can let your creativity flow/add any 
other elements you wish to use/resize if needed/add drop shadow
to each element

copy/paste a word art from the kit/resize/add gradient glow and
drop shadow

add your watermark and copyright credits/give it a slight 
gradient glow ...now give your tag to a friend.

You're done...thank you for trying my tutorial
please send me a copy so that I can show case it on my blog

2/20/14

PTU Rebel Scraps and KennyK

Punkette

This tutorial was written on December 19,2013. 
Any similarities to another tutorial is purely coincidental.
All my tutorial are register with My Free Copyright. 
Please do not claim as your own.
This tutorial writer assumes you have a working 
knowledge of using Paint Shop Pro.
This tutorial was done in Paint Shop Pro9,
but can be adapted to use in other 
Paint Shop Pro versions.


SUPPLIES NEEDED

Tube of choice: I'm using the awesome work of Kenny K and Myka Jelina.
Please do not use unless you have a license to do so. 
Get Them HERE and HERE

Scrapkit of Choice: I am using PTU Rebel Dezigns Punkette
You can purchase it HERE ...Thanks Gizzy

Template of choice:I am using Addictive Pleasures Template #182
You can download it HERE...Thanks Tamie

Mask of Choice: I am using Enchanted By Darkness Mask 53
You can download it HERE.... Thank You 

Filters used:Eye Candy 4000 gradient glow - HERE

Font for Name is Alex Brush  HERE
Copy write is always done in Pixelette  HERE

Drop shadow use through out H-2/V-2/O-60/B-6.85

Please leave a thank you when you downloading for supplies.

my tag is just a guide...please use your imagination 
and make the tag your own you do not have to 
use any of the supplies I used.

     LET'S BEGIN

Open up Template and Shift D and close original...delete 
copyright layer/close all layers/copy/paste paper of choice
resize to fit canvas/layers/load/save mask/find your mask
and set with these setting/click ok


On the following raster layers follow these directions...

activate long rectangle 1 layer/copy/paste paper of choice/resize 
paper/selections/invert on long rectangle layer/delete on paper 
layer/merge down/add drop shadow

activate slanted left square layer/selections/float/modify
smooth with these setting/click ok


flood fill tool/add color
from one of the papers/add drop shadow to square layer

activate large circle layer/copy/paste paper of choice/resize 
paper/selections/invert on circle layer/delete on paper layer
merge down/keep activate/copy/paste tube of choice/resize by 
120%/place tube toward left side of circle/add drop shadow
to circle layer and tube

activate slanted right square layer/selections/float/modify
smooth with same setting above /click ok/flood fill tool/add color
from one of the papers/add drop shadow to square layer

activate large white circle layer/selections/float/modify
smooth with same setting above/click ok/flood fill tool/add color
from one of the papers/add drop shadow to circle layer

activate long rectangle 2 layer/copy/paste paper of choice/resize 
paper/selections/invert on long rectangle layer/delete on paper 
layer/merge down/add drop shadow

activate long rectangle 3 layer/copy/paste paper of choice/resize 
paper/selections/invert on long rectangle layer/delete on paper 
layer/merge down/add drop shadow

activate verticle rectangle 1 layer/selections/float/modify/smooth
with same setting above/click ok/flood fill tool/add another color
from one of the papers/add drop shadow to square layer

activate long rectangle 4 layer/copy/paste paper of choice/resize 
paper/selections/invert on long rectangle layer/delete on paper 
layer/merge down/add drop shadow

activate vertical rectangle 2 layer/selections/float/modify/smooth
with same setting above/click ok/flood fill tool/add another color from
one of the papers/add drop shadow to square layer

activate small square frame back 1 layer/copy/paste paper of choice
resize paper/selections/invert on square frame back layer/delete on 
paper layer/merge down/add drop shadow

activate small square frame back 2 layer/copy/paste paper of choice
resize paper/selections/invert on square frame back layer/delete on 
paper layer/merge down/add drop shadow/recolor both frames to match 
tag/add drop shadow

Copy/paste main tube of choice/resize if needed/place on right side
of tag/resize if needed/add drop shadow

add any other elements you wish to use/resize if needed/add drop 
shadow to each element/place where they will look best

copy/paste word art that is in the kit/resize by 60%/effects/eye 
candy 4000/gradient glow/with these settings/add drop shadow
resize tag before you add water mark 

add your watermark and copyright credits/give it a slight gradient 
glow.....now give your tag to a friend.

You're done...thank you for trying my tutorial
please send me a copy so that I can show case it on my blog

2/19/14

PTU Honored Scraps and Michael Calandra

Crying

This tutorial was written on February 19,2014. 
Any similarities to another tutorial is purely coincidental.
All my tutorial are register with My Free Copyright. 
Please do not claim as your own.
This tutorial writer assumes you have a working 
knowledge of using Paint Shop Pro.
This tutorial was done in Paint Shop Pro9,
but can be adapted to use in other 
Paint Shop Pro versions.


SUPPLIES NEEDED

Tube of choice: I'm using the awesome work of Michael Calandra.
Please do not use unless you have a license to do so. 
Get Them HERE

Scrapkit of Choice: I am using PTU Honor Scraps Michael Calandra 
Bundle Pack 30....You can purchase it HERE ...Thanks Patty

Filters used:Eye Candy 4000 gradient glow - HERE

Font for Name is Organic Elements
Copy write is always done in Pixelette  HERE

Drop shadow use through out H-2/V-2/O-60/B-6.85

Please leave a thank you when you downloading for supplies.

my tag is just a guide...please use your imagination 
and make the tag your own you do not have to 
use any of the supplies I used.

     LET'S BEGIN

Open up new raster layer 800x800/copy/paste paper of choice
resize to fit canvas/layers/load/save mask/find your mask
and set with these setting/click ok

copy/paste rectangle frame #3/resize frame by 150%/copy/paste 
paper of choice/resize to fit canvas/click inside frame/selections
modified/expand by 15/selections/invert/delete on paper layer
place underneath frame/keep activated/copy/paste tube of choice
delete on tube/add drop shadow to frame and tube

copy/paste main tube of choice/place on left hand side of tag/ad
drop shadow

add any other elements you wish to use/resize if needed/add drop 
shadow to each element/place where they will look best

add word art if you wish/add fat gradient glow/add drop shadow

add your watermark and copyright credits/give it a slight gradient 
glow.....now give your tag to a friend.

You're done...thank you for trying my tutorial
please send me a copy so that I can show case it on my blog

2/18/14

PTU Honored Scraps and Michael Calandra

Waiting For You

This tutorial was written on February 18,2014. 
Any similarities to another tutorial is purely coincidental.
All my tutorial are register with My Free Copyright. 
Please do not claim as your own.
This tutorial writer assumes you have a working 
knowledge of using Paint Shop Pro.
This tutorial was done in Paint Shop Pro9,
but can be adapted to use in other 
Paint Shop Pro versions.


SUPPLIES NEEDED

Animation Shop. HERE

Tube of choice: I'm using the awesome work of Michael Calandra.
Please do not use unless you have a license to do so. 
Get Them HERE

Scrapkit of Choice: I am using PTU Honor Scraps Michael Calandra 
Bundle Pack 30....You can purchase it HERE ...Thanks Patty

Animation of Choice: I am using animation by Scrappy Bit of Fun
Animation #468  ......You can download HERE.....Thank you Simone

Filters used:Eye Candy 4000 gradient glow - HERE
AAA Frame - Foto Frame - HERE

Font for Name is Ribbon of Hope HERE
Copy write is always done in Pixelette  HERE

Drop shadow use through out H-2/V-2/O-60/B-6.85

Please leave a thank you when you downloading for supplies.

my tag is just a guide...please use your imagination 
and make the tag your own you do not have to 
use any of the supplies I used.


     LET'S BEGIN

Open up new raster layer 800x800/copy/paste paper of choice
resize to fit canvas/layers/load/save mask/find your mask
and set with these setting/click ok/copy paste paper of choice
resize to fit canvas/filter/AAA Frame/Foto Frame with these
setting/click ok

copy/paste round frame #6/resize if needed/copy/paste paper of
choice/resize to fit canvas/click inside frame/selections
modify/expand by 15/selections/invert/delete on paper layer
place underneath frame/add drop shadow

copy/paste rectangle frame #5/resize if needed/copy/paste paper 
of choice/resize to fit canvas/click inside frame/selections
modify/expand by 15/selections/invert/delete on paper layer
place underneath frame/make sure this frame is on top of the
rectangle frame/add drop shadow 

Copy/paste tube of choice/place underneath frame/duplicate tube
place on top of frame/add drop shadow to bottom tube

add any other elements you wish to use/resize if needed/add drop 
shadow to each element/place where they will look best

add word art if you wish/add fat gradient glow/add drop shadow

add your watermark and copyright credits/give it a slight gradient 
glow.....now give your tag to a friend.

You're done...thank you for trying my tutorial
please send me a copy so that I can show case it on my blog

2/17/14

PTU Honored Scraps and Michael Calandra

Quitting

This tutorial was written on Feburary 17,2014. 
Any similarities to another tutorial is purely coincidental.
All my tutorial are register with My Free Copyright. 
Please do not claim as your own.
This tutorial writer assumes you have a working 
knowledge of using Paint Shop Pro.
This tutorial was done in Paint Shop Pro9,
but can be adapted to use in other 
Paint Shop Pro versions.


SUPPLIES NEEDED

Tube of choice: I'm using the awesome work of Michael Calandra.
Please do not use unless you have a license to do so. 
Get Them HERE

Scrapkit of Choice: I am using PTU Honor Scraps Michael Calandra 
Bundle Pack 30....You can purchase it HERE ...Thanks Patty

Mask of Choice: I am using Design by Vaybs Mask # 050806
You can download it HERE.... Thank You Vaybs

Filters used:Eye Candy 4000 gradient glow - HERE

Font for Name is Coneria Script Demo
Copy write is always done in Pixelette  HERE

Drop shadow use through out H-2/V-2/O-60/B-6.85

Please leave a thank you when you downloading for supplies.

my tag is just a guide...please use your imagination 
and make the tag your own you do not have to 
use any of the supplies I used.


     LET'S BEGIN

Open up new raster layer 800x800/copy/paste paper of choice
resize to fit canvas/layers/load/save mask/find your mask
and set with these setting/click ok


copy/paste round frame #2/resize if needed/copy/paste paper of
choice/resize to fit canvas/click in size frame/selections
modify/expand by 15/selections/invert/delete on paper layer
place underneath frame/keep activate/copy/paste tube with
eclipse/resize by 70%/delete on tube/add drop shadow

copy/paste rectangle frame #1/resize if needed/copy/paste paper 
of choice/resize to fit canvas/click inside frame/selections
modify/expand by 15/selections/invert/delete on paper layer
place underneath frame/make sure this frame is underneath the
round frame/choose elements of choice/resize/decorate the corner 
of the round frame (see my tag) add drop shadow to frame and
elements

Click inside rectangle frame/selections/float/defloat/modify
by 15%/selections invert/copy/paste second tube/pace underneath
frame/position so that head is pass the top of the frame/duplicate
tube and close/delete on first tube/open second tube and place over
top of frame/eraser tool/erase any excess tube on top of frame at
the bottom of the frame/add drop shadow to bottom tube and frame

add any other elements you wish to use/resize if needed/add drop 
shadow to each element/place where they will look best

add word art if you wish/add fat gradient glow/add drop shadow

add your watermark and copyright credits/give it a slight gradient 
glow.....now give your tag to a friend.

You're done...thank you for trying my tutorial
please send me a copy so that I can show case it on my blog

PTU LadyHawwk Designs and Pinuptoons

Love One Another

This tutorial was written on December 19,2013. 
Any similarities to another tutorial is purely coincidental.
All my tutorial are register with My Free Copyright. 
Please do not claim as your own.
This tutorial writer assumes you have a working 
knowledge of using Paint Shop Pro.
This tutorial was done in Paint Shop Pro9,
but can be adapted to use in other 
Paint Shop Pro versions.


SUPPLIES NEEDED

Tube of choice: I'm using the awesome work of Pinuptoons.
Please do not use unless you have a license to do so. 
Get Them HERE

Scrapkit of Choice: I am using PTU LadyHawwk Designs IB Pinuptoons 187-1
You can purchase it HERE ...Thanks Cat

Template of choice:I am using Divine Intentionz Template #430
You can download it HERE...Thanks Missy

Mask of Choice: I am using Designs by Vaybs Mask #01
You can download it HERE.... Thank You Cat

Filters used:Eye Candy 4000 gradient glow - HERE

Font for Name is Porcelain
Copy write is always done in Pixelette  HERE

Drop shadow use through out H-2/V-2/O-60/B-6.85

Please leave a thank you when you downloading for supplies.

my tag is just a guide...please use your imagination 
and make the tag your own you do not have to 
use any of the supplies I used.


     LET'S BEGIN

Open up Template and Shift D and close original...delete 
copyright layer/close all layers/copy/paste paper of choice
resize to fit canvas/layers/load/save mask/find your mask
and set with these setting/click ok


On the following raster layers follow these directions...

activate rectangle layer/copy/paste paper of choice/resize 
paper/selections/invert on rectangle layer/delete on paper 
layer/merge down/add drop shadow

activate rounded edge rectangle 1 layer/copy/paste paper of 
choice/resize paper/selections/invert on rectangle layer
delete on paper layer/merge down/add drop shadow to rectangle 
layer

activate  rounded edge rectangle 2 layer/copy/paste paper of 
choice/resize paper/selections/invert on rectangle layer
delete on paper layer/merge down/add drop shadow to rectangle 
layer/leave glittered circle as is/add drop shadow

activate circle layer/copy/paste paper of choice/resize paper
selections/invert on circle layer/delete on paper layer/merge 
down/add drop  shadow

activate small square frame 1 layer/copy/paste paper of choice
resize paper/selections/invert on purple circle layer/delete 
on paper layer/merge down/add drop shadow

activate small square frame 2 layer/copy/paste paper of choice
resize paper/selections/invert on purple circle layer/delete 
on paper layer/merge down/add drop shadow/leave glittered circle
as is/add drop shadow

activate circle layer/copy/paste paper of choice/resize paper
selections/invert on circle layer/delete on paper layer/merge 
down/add drop shadow

activate  rounded edge rectangle 3 layer/copy/paste paper of 
choice/resize paper/selections/invert on rectangle layer
delete on paper layer/merge down/add drop shadow to rectangle 
layer

activate  rounded edge rectangle 4 layer/copy/paste paper of 
choice/resize paper/selections/invert on rectangle layer
delete on paper layer/merge down/add drop shadow to rectangle 
layer

activate frame back 2 layer/copy/paste paper of choice/resize 
paper/selections/invert on frame back 2 layer/delete on paper 
layer/merge down/add drop shadow

activate frame back 2 layer/copy/paste paper of choice/resize 
paper/selections/invert on frame back 2 layer/delete on paper 
layer/merge down/add drop shadow

activate copy of frame back 2 layer/copy/paste paper of choice
resize paper/selections/invert on copy frame back 2 layer/delete 
on paper layer/merge down/keep activated/copy/paste tube close 
up of choice/delete on tube layer/add drop shadow to tube and
frame/leave both frames as is

Copy/paste frame #3/resize and place in the middle of the two
frame backs/ add drop shadow

Copy/paste main tube of choice/resize if needed/place on left
side of tag/add drop shadow

add any other elements you wish to use/resize if needed/add drop 
shadow to each element/place where they will look best

copy/paste word art that is in the kit/resize by 60%/effects/eye 
candy 4000/gradient glow/with these settings/add drop shadow 

add your watermark and copyright credits/give it a slight gradient 
glow.....now give your tag to a friend.

You're done...thank you for trying my tutorial
please send me a copy so that I can show case it on my blog