9/30/15

Monti Scraps and Garrett Blair

Can You Feel The Madness

This tutorial was written on September 30,2015. 
Any similarities to another tutorial is purely coincidental.
All my tutorial are register with My Free Copyright. 
Please do not claim as your own.
This tutorial writer assumes you have a working 
knowledge of using Paint Shop Pro.
This tutorial was done in Paint Shop Pro9,
but can be adapted to use in other 
Paint Shop Pro versions.


SUPPLIES NEEDED

Tube of choice: I'm using the awesome work of Garrett Blair.
Please do not use unless you have a license to do so. 
Get Them HERE

Scrapkit of Choice: I am using CDO Monti Scraps - Can You Feel The Madness
You can purchase it HERE ...Thank You Monti

Template of choice:I am using Additive Pleasures Template #98
You can download it HERE...Thanks Tamie

Mask of Choice: I am using Whips Mask # 
You have to be a member of CM to download
You can download it HERE.... Thank You Whip

Filters used:Eye Candy 4000 gradient glow - HERE
Xero- Fritillary - HERE
DC Special - Brix - HERE
DBS Flux -Blast -  HERE

Font for Name is Decaying
Copy write is always done in Pixelette  HERE

Drop shadow use through out H-2/V-2/O-60/B-6.85

Please leave a thank you when you downloading for supplies.

my tag is just a guide...please use your imagination 
and make the tag your own you do not have to 
use any of the supplies I used.


     LET'S BEGIN

Open up Template and ShiftD and close original...delete 
copyright layer/close all layers/copy/paste paper of choice
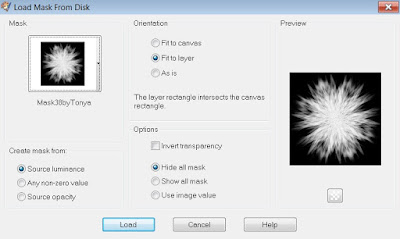
resize to fit canvas/layers/load/save mask/find your mask
and set with these setting/click ok


On the following raster layers follow these directions...

activate right angel rectangle layer 6/copy/paste paper of choice/resize
paper by 70% twice/selections/invert on rectangle layer/delete on paper 
layer/merge down/effects/dc special/brix with these settings/click ok
add drop shadow


activate top long rectangle layer 10/copy/paste paper of choice/resize
paper by 70%/selections/invert on rectangle layer/delete on paper layer
merge down/add drop shadow

activate pink circle layer 5/copy/paste paper of choice/resize paper by
70% twice/selections/invert on circle layer/delete on paper layer/merge 
down/add drop shadow

activate large pink circle layer 4/copy/paste paper of choice/resize paper
by 70%/selections/invert on circle layer/delete on paper layer/merge down
add drop shadow

activate long rectangle layer 11/copy/paste paper of choice/resize paper
by 70%/selections/invert on long rectangle layer/delete on paper layer/merge
down/effects/xero/fritillry with these setting/click ok/add drop shadow


activate pink square layer 7/choose color from tube/flood fill with that
color/leave frame as is/add drop shadow

activate fat pink rectangle layer 2/copy/paste paper of choice/resize paper
by 70%/selections/invert on fat pink rectangle layer/delete on paper layer
merge down/add drop shadow

copy/paste tube of choice/resize by 120%/place in center of tag/duplicate/on
duplicate layer/effects/dsb flux/blast with these setting/click ok

duplicate tube again/on duplicate layer/
effects/dsb flux/blast with these setting/click ok


add drop shadow to main tube

add word art from kit/I alternated the color on word art/add drop shadow

when doing name for tag choose a color from tube/effects/inner bevel with these
settings/click ok/then alternate the color like the word art/add drop shadow


add your watermark and copyright credits/give it a slight gradient glow.....now 
give your tag to a friend.

You're done...thank you for trying my tutorial
please send me a copy so that I can show case it on my blog


9/29/15

LadyHawwk Designs and Exclusive Elias Chatzoudis IB-1A

Elias

This tutorial was written on September 29,2015. 
Any similarities to another tutorial is purely coincidental.
All my tutorial are register with My Free Copyright. 
Please do not claim as your own.
This tutorial writer assumes you have a working 
knowledge of using Paint Shop Pro.
This tutorial was done in Paint Shop Pro9,
but can be adapted to use in other 
Paint Shop Pro versions.


SUPPLIES NEEDED

Animation Shop: You can get it HERE

Tube of choice: I'm using the awesome work of Elias Chatzoudis.
Please do not use unless you have a license to do so. 
Get Them HERE

Scrapkit of Choice: I am using CDO Exclusive IB Elias Chatzoudis 1A
You can purchase it HERE ...Thanks LadyHawwk

Mask of Choice: I am using GM exclusive Mask 1
You can download it HERE.... Thanks Creative Misfits

Animation of Choice: I'm using Scrappy Bit of Fun animation #419
You can download it HERE .... Thank you Simone

Filters used:Eye Candy 4000 gradient glow - HERE

Font for Name is Connie - HERE
Copy write is always done in Pixelette  HERE

Drop shadow use through out H-4/V--4/O-50/B-7.00

Please leave a thank you when you downloading for supplies.

my tag is just a guide...please use your imagination 
and make the tag your own you do not have to 
use any of the supplies I used.


     LET'S BEGIN

Open up new raster layer 800x800/copy/paste paper of choice
resize to fit canvas/layers/load/save mask/find your mask
and set with these setting/click ok


copy/paste element 23/place on center of canvas/add drop shadow

copy/paste element 19/resize by 50%/then 70%/place on left side 
of canvas/add drop shadow

copy/paste element 14/ resize by 70%/place in front of element 23
and on top of element 19/add drop shadow
add drop shadow

copy/paste element 9/resize by 50% three times/place on top of 
element 14/duplicate and moved down/overlapping the first flower
duplicate and redo overlapping/do this 2 more times/you should have 
four flowers/merge each layer down until you have one layer/add
drop shadow

copy/paste element 26/resize by 50% twice and then 70%/place on top 
of element 9/add drop shadow

copy/paste element 13/resize by 50% twice/place at the bottom of
each end of element 14/add drop shadow

copy/paste element 9/resize by 50% twice/place on top of element 13
add drop shadow

copy/paste element 10/resize by 50% twice/place on right side of 
flowers/add drop shadow

copy/paste tube of choice/resize by 70%/place in center of tag/add 
drop shadow

add your watermark and copyright credits/give it a slight gradient 
glow.....

Animation

close tube, name and copy right layer
Copy/merge all other layers/take to animation shop
find your animation and open/edit/select all
duplicate
your tag 5 times/then click on first frame and duplicate 3x
edit/select all
copy/paste animation into selected frame
go to psp/close all layers except tube, name and copy right
duplicate 5 times/click on first frame and duplicate three times
edit/select all/copy/paste into selected frame
view animation/if satisfied saved as listed below


click next until end
now give your tag to a friend.

You're done...thank you for trying my tutorial
please send me a copy so that I can show case it on my blog
send to.... riggsbee53@gmail.com

9/28/15

LadyHawwk Designs and Robert Alvarado

Dream

This tutorial was written on September 27,2015. 
Any similarities to another tutorial is purely coincidental.
All my tutorial are register with My Free Copyright. 
Please do not claim as your own.
This tutorial writer assumes you have a working 
knowledge of using Paint Shop Pro.
This tutorial was done in Paint Shop Pro9,
but can be adapted to use in other 
Paint Shop Pro versions.


SUPPLIES NEEDED

Tube of choice: I'm using the awesome work of Robert Alvarado.
Please do not use unless you have a license to do so. 
Get Them HERE

Scrapkit of Choice: I am using CDO LadyHawwk Designs IB Robert Alvarado 10-3
You can purchase it HERE ...Thanks Cat

Mask of Choice: I am using Vix Big Mask 005
You can download it HERE.... Thank You Vix

Filters used:Eye Candy 4000 gradient glow - HERE

Font for Name is 
Copy write is always done in Pixelette  HERE

Drop shadow use through out H-2/V-2/O-60/B-6.85

Please leave a thank you when you downloading for supplies.

my tag is just a guide...please use your imagination 
and make the tag your own you do not have to 
use any of the supplies I used.


     LET'S BEGIN

Open up new raster layer 800x800/copy/paste paper of choice
resize to fit canvas/layers/load/save mask/find your mask
and set with these setting/click ok


copy/paste round frame #2/resize by 80% twice/copy/paste paper of
choice/resize to fit canvas/click inside frame/selections
modify/expand by 15/selections/invert/delete on paper layer
place underneath frame/keep activate/copy/paste tube of choice
resize by 80% twice/delete on tube/place tube on top of frame/add 
drop shadow

copy/paste element #31 blue flower/resize by 80% twice/place under
neath tube/ add drop shadow

copy/paste element #32 pink flower/resize by 80% twice/place on top
of blue flower/ add drop shadow

copy/paste element #9 white flower/resize by 80% twice/place on top
of pink flower to the right/ add drop shadow

copy/paste element #30 purple drink/resize by 80% twice/place on top
of white flower/ add drop shadow

copy/paste element #3 coconut/resize by 80% twice/place on the left
side of the white flower/add drop shadow

copy/paste element #3 diamonds/resize by 80% twice/underneath tube
tube/add drop shadow

copy/paste element #2 pink shades/resize by 80% twice/place on top
tube at the bottom right side/ add drop shadow

copy/paste element #13 pink shoe/resize by 80% twice/place on top
of tube on left side/ add drop shadow

add any other elements if you wish/resize if needed/add drop shadow
to each element/place where they will look best

add wordart if you wish/add fat gradient glow/place upper right side
underneath the tube/add drop shadow

add your watermark and copyright credits/give it a slight gradient 
glow.....now give your tag to a friend.

You're done...thank you for trying my tutorial
please send me a copy so that I can show case it on my blog

9/27/15

Hungry Hill and Anna Liwanag

Berries 4 Sale

This tutorial was written on September 27,2015. 
Any similarities to another tutorial is purely coincidental.
All my tutorial are register with My Free Copyright. 
Please do not claim as your own.
This tutorial writer assumes you have a working 
knowledge of using Paint Shop Pro.
This tutorial was done in Paint Shop Pro9,
but can be adapted to use in other 
Paint Shop Pro versions.


SUPPLIES NEEDED

Tube of choice: I'm using the awesome work of Anna Liwanag.
Please do not use unless you have a license to do so. 
Get Them HERE

Scrapkit of Choice: I am using CDO Hungry Hill Berries For Breakfast 
No longer available ...Thanks Alison

Mask of Choice: I am using Tonya's Mask #9 and #38
You can download it HERE.... Thank You Tonya

Filters used:Eye Candy 4000 gradient glow - HERE

Font for Name is Connie
Copy write is always done in Pixelette  HERE

Drop shadow use through out H-2/V-2/O-60/B-6.85

Please leave a thank you when you downloading for supplies.

my tag is just a guide...please use your imagination 
and make the tag your own you do not have to 
use any of the supplies I used.


     LET'S BEGIN

Open up new raster layer 800x800/copy/paste paper of choice
resize to fit canvas/layers/load/save mask/find your mask
and set with these setting/click ok


copy/paste paper of choice/resize to fit canvas/layers/load
save mask/find your mask/and set with these setting/click ok


copy/paste  frame #2/resize by 70%/click inside frame/selection
modify/expand by 15/invert on frame/copy/paste paper of choice
resize paper to fit canvas/delete on paper/place paper underneath
frame/merge down/place frame at an angle/add drop shadow

copy/paste  frame #3/resize by 70%/click inside frame/selection
modify/expand by 15/invert on frame/copy/paste paper of choice
resize paper to fit canvas/delete on paper/place paper underneath
frame/merge down/place frame at an angle/add drop shadow

copy/paste tube of choice/resize if needed/place tube in front of
frames/add drop shadow

copy/paste table/resize by 70%/place in front of tube/add drop shadow

copy/paste sign/resize by 70% twice /place on left side of table/add 
drop shadow

copy/paste berry-basket/resize so that the basket fits on the table
add drop shadow

copy/paste Strawberries/you will need 5 large set of strawberries/and 
one small set for the basket/resize first set of strawberries several  
times to make it small enough to fit within the basket/resize the next
5 sets of strawberries by 70% twicw for the table/in front of the table
and on top of the bowls/add drop shadow ( see tag for placement)

copy/paste set of bowls/resize by 70%/place on right side of tale/add
drop shadow/put set of berries in top bowl

Copy/paste strawberry circle/resize by 70%/place on left side/in front 
of table/behind strawberries/ add drop shadow

copy/paste flowers/resize by 50% twice/placeon right side of strawberries
duplicate/mirror flowers/adddrop shadow

copy/paste ladybug/resize by 50% twice/place on leftside below sign/add
drop shadow
copy/paste vine/resize by 70% twice/duplicate three times/spread the vine
out below the strawberries/merging each layer down/add drop shadow (see
tag for placement)

copy/paste clock/resize by 70% twice/place on upper right side of frame
add drop shadow

add your watermark and copyright credits/give it a slight gradient 
glow.....now give your tag to a friend.

You're done...thank you for trying my tutorial
please send me a copy so that I can show case it on my blog


9/25/15

CDO Monti Scraps and Dirk Richter

Asian Dreams

This tutorial was written on September 24,2015. 
Any similarities to another tutorial is purely coincidental.
All my tutorial are register with My Free Copyright. 
Please do not claim as your own.
This tutorial writer assumes you have a working 
knowledge of using Paint Shop Pro.
This tutorial was done in Paint Shop Pro9,
but can be adapted to use in other 
Paint Shop Pro versions.


SUPPLIES NEEDED

Tube of choice: I'm using the awesome work of Dirk Richter.
Please do not use unless you have a license to do so. 
Get Them HERE

Scrapkit of Choice: I am using CDO Monti Scraps-Asian Dreams/previously M 22-1
You can purchase it HERE ...Thanks Monti

Mask of Choice: I am using Vix Big Mask 019 and 020
You can download it HERE.... Thanks Vix

Filters used:Eye Candy 4000 gradient glow - HERE
Eye Candy 4000 Bevel Boss - HERE
Penta.com - Dot and Cross - HERE
Xero - Porcelain _ HERE

Font for Name is Bonzai - HERE
Copy write is always done in Pixelette  HERE

Drop shadow use through out H-4/V--4/O-50/B-7.00

Please leave a thank you when you downloading for supplies.

my tag is just a guide...please use your imagination 
and make the tag your own you do not have to 
use any of the supplies I used.


     LET'S BEGIN

Open up new raster layer 800x800/copy/paste paper of choice
resize to fit canvas/layers/load/save mask/find your mask
and set with these setting/click ok


copy/paste paper of choice/resize to fit canvas/layers/load
save mask/find your mask/and set with these setting/click ok


copy/paste element 8/resize by 70%/place on center of canvas
add drop shadow

copy/paste element 7/resize by 50% twice/place on left side of
screen/effects/penta.com/dot and cross with these settings/click
ok/add drop shadow


copy/paste element 22/ resize by 70%/place on right side of screen
add drop shadow

copy/paste element 1/resize by 65%/place in center of canvas/add
drop shadow

copy/paste element 3/resize by 50% twice and 70% once/place at the
bottom of element 22/add drop shadow

copy/paste tube of choice/resize by 70%/ place in center of canvas
effects/xero/porcelain with these settings/click ok/add drop shadow


copy/paste element 11/ resize by 70%/place on left side of screen
add drop shadow

copy/paste element 5/ resize by 70%/place on right side of screen
add drop shadow

copy/paste element 17/ resize by 70%/place on right side of screen
add drop shadow

copy/paste element 18/ resize by 70%/place on right side of screen
add drop shadow

add any other elements you wish to use/resize if needed/add drop 
shadow to each element/place where they will look best

add word art if you wish/add fat gradient glow with these setting/add 
drop shadow


add your watermark and copyright credits/give it a slight gradient 
glow.....now give your tag to a friend/when doing the name use
these setting for gradient glow/click ok


You're done...thank you for trying my tutorial
please send me a copy so that I can show case it on my blog

9/24/15

CDO Hungry Hill and Jennifer Janesko

Summer End

This tutorial was written on September 24,2015. 
Any similarities to another tutorial is purely coincidental.
All my tutorial are register with My Free Copyright. 
Please do not claim as your own.
This tutorial writer assumes you have a working 
knowledge of using Paint Shop Pro.
This tutorial was done in Paint Shop Pro9,
but can be adapted to use in other 
Paint Shop Pro versions.


SUPPLIES NEEDED

Tube of choice: I'm using the awesome work of Jennifer Janesko.
Please do not use unless you have a license to do so. 
Get Them HERE

Scrapkit of Choice: I am using CDO Hungry Hill Scraps - Summer Ends 
No longer available ...Thanks Alison

Mask of Choice: I am using Moonbeans ans Spiderweb Mask34
You can download it HERE.... Thank You Staci

Filters used:Eye Candy 4000 gradient glow - HERE

Font for Name is Alex Brush
Copy write is always done in Pixelette  HERE

Drop shadow use through out H-2/V-2/O-60/B-6.85

Please leave a thank you when you downloading for supplies.

my tag is just a guide...please use your imagination 
and make the tag your own you do not have to 
use any of the supplies I used.

     LET'S BEGIN

Open up new raster layer 800x800/copy/paste paper of choice
resize to fit canvas/layers/load/save mask/find your mask
and set with these setting/click ok


copy/paste button-circle frame/resize by 70%/copy/paste paper of
choice/resize to fit canvas/click insize frame/selections modifiy
expand by 15/selections/invert/delete on paper layer/place underneath 
frame/keep activate/copy/paste tube with elispe/resize by 70%/delete 
on tube/add drop shadow

copy/paste leaves element/resize by 50% then resize by 70% place on 
left hand side of frame/add drop shadow

copy/paste flower-1/resize by 50% then resize by 70% twice place in
the middle of the leaves/add drop shadow

copy/paste fabric-flower-1/resize by 50% then resize by 70% twice
place at the top of the first flower/add drop shadow

copy/paste berries-1 element/resize by 50% then resize by 70%/place at
the top of the first flower and underneath the second flower/add drop
shadow

copy/paste rhododend/resize by 70% twice/place at behind the second 
flower and underneath berries/add drop shadow

copy/paste tree/resize by 70%/place at behind the frame/add drop shadow

copy/paste fabric-leaf-1/resize by 70% twice/place at behind the first 
leaves/add drop shadow

copy/paste ribbon-1/resize by 70% twice/place in front of leaves/add 
drop shadow

copy/paste ribbon-cluster/resize by 70% twice/place on top of first ribbon
 add drop shadow

copy/paste apple /resize by 50% twice/place on top of berries/add drop 
shadow

copy/paste pumpkin-2/resize by 50% then resize by 70%/place on top of both 
ribbons/add drop shadow

add wordart if you wish/add fat gradient glow/add drop shadow

add your watermark and copyright credits/give it a slight gradient 
glow.....now give your tag to a friend.

You're done...thank you for trying my tutorial
please send me a copy so that I can show case it on my blog

9/18/15

CDO LadyHawwk Designs and Jennifer Janesko

Autumn
This tutorial was written on September 18,2015. 
Any similarities to another tutorial is purely coincidental.
All my tutorial are register with My Free Copyright. 
Please do not claim as your own.
This tutorial writer assumes you have a working 
knowledge of using Paint Shop Pro.
This tutorial was done in Paint Shop Pro9,
but can be adapted to use in other 
Paint Shop Pro versions.


SUPPLIES NEEDED

Tube of choice: I'm using the awesome work of Jennifer Janesko.
Please do not use unless you have a license to do so. 
Get Them HERE

Scrapkit of Choice: I am using CDO LadyHawwk Designs - Subtle Hues 
You can purchase it HERE ...Thanks Cat

Mask of Choice: I am using Staci Designz mask #23 - HERE
and Gabee mask #16 - HERE.... Thank You Staci and Gabee

Word art of Choice: I am using word art by Deadly Desire Creations
You can download HERE - Thank you

Filters used:Eye Candy 4000 gradient glow - HERE
Xero - Radiance - HERE / Penta.com - Jeans - HERE

Fonts used Cambridge and Mool boran
Copy write is always done in Pixelette  HERE

Drop shadow use through out H-2/V-2/O-60/B-6.85

Please leave a thank you when you downloading for supplies.

my tag is just a guide...please use your imagination 
and make the tag your own you do not have to 
use any of the supplies I used.


     LET'S BEGIN

Open up new raster layer 800x800/copy/paste paper of choice
resize to fit canvas/layers/load/save mask/find your mask
and set with these setting/click ok


copy/paste another paper of choice/resize to fit canvas/layers
load/save mask/find your second mask/and set with these setting
click ok


copy/paste tube of choice/resize by 70%/place in middle of canvas
duplicate tube/close main tube/on duplicate tube/effect xero
radiance with these setting/click ok/open main tube/place duplicate 
tube underneath main tube/on main tube lower opacity to 58%/ add 
drop shadow to both tubes


now to place elements/refer to tag for placement

copy/paste element #30- fan/resize by 70%/place behind tube on your
right side/effects/penta.com/jeans with these setting/click ok/add drop shadow


copy/paste element #8-leaf/resize by 70%/place on lower left side
on top of tube and fan/add drop shadow
copy/paste element #60-pink flowers/resize by 70%/place on left side 
of tag next to tube/duplicate element/add drop shadow to both/close
duplicate layer
copy/paste element #7-white flowers/resize by 70%/place on left side
of tag near bottom of tube/but on top of first two elements/add drop
shadow/open duplicate pink flowers and place on top of the white flower
copy/paste element #74- pink flower/resize by 70%/ place on top of 
element #60/add drop shadow
copy/paste element #39-pink flower/resize by 70%/place near element 74%
add drop shadow
copy/paste element #13-brown ribbon/resize by 70%/place on top of element
39/add drop shadow
copy/paste element #20-yellow flower/resize by 70%/place on top of ribbon
and pink flower/add drop shadow
copy/paste element #54-jewelry pin/resize by 70%/place on top of yellow
flower toward the right side of the tag
copy/paste element #63-heart tag/resize by 70%/place on top of pink flower
on left side of tag/add drop shadow
copy/paste element #36-brown flower/place on top of jewelry/resize by 70%
add drop shadow

add word art if you wish/recolor if you wish/add fat gradient glow/add drop 
shadow

add your watermark and copyright credits/give it a slight gradient 
glow.....now give your tag to a friend.

You're done...thank you for trying my tutorial
please send me a copy so that I can show case it on my blog


Marika IB-10-1 - Under The Witches Moon

BabyCakes Scraps has a new Halloween kit
released today CDO IB Marika 10-1.

Under The Witches Moon

This tutorial was written on September 18,2015. 
Any similarities to another tutorial is purely coincidental.
All my tutorial are register with My Free Copyright. 
Please do not claim as your own.
This tutorial writer assumes you have a working 
knowledge of using Paint Shop Pro.
This tutorial was done in Paint Shop Pro9,
but can be adapted to use in other 
Paint Shop Pro versions.


SUPPLIES NEEDED

Tube of choice: I'm using the awesome work of Marika.
Please do not use unless you have a license to do so. 
Get Them HERE

Scrapkit of Choice: I am using PTU BabyCakes Scraps IB Marika 10-1
May2014-bt....You can purchase it HERE ...Thank You Lynne

Template of choice:I am using Kandee Halloween Collab 2012 
Under The Witches Moon-You can download it HERE...Thanks Dee/Kandi Kisses

Mask of Choice: I am using mask from Laurie Scraps and Designs -IR Mask 102
Her site is HERE, but her masks are not posted, so please use another mask.... Thank You Laurie

Filters used:Eye Candy 4000 gradient glow - HERE
Penta.com - Jeans and Dot and Cross- HERE


Font for Name is Ignacious
Copy write is always done in Pixelette  HERE

Drop shadow use through out H-2/V-2/O-60/B-6.85

Please leave a thank you when you downloading for supplies.

my tag is just a guide...please use your imagination 
and make the tag your own you do not have to 
use any of the supplies I used.


     LET'S BEGIN

Open up Template and ShiftD and close original...delete 
copyright layer/close all layers/copy/paste paper of choice
resize to fit canvas/layers/load/save mask/find your mask
and set with these setting/click ok


On the following raster layers follow these directions...

leave dotted circles as is 
activate orange squarelayer/copy/paste paper of choice/resize paper
selections/invert on square layer/delete on paper layer/merge down/select 
none/add drop shadow

activate large purple circle layer/copy/paste paper of choice/resize paper
selections/invert on circle layer/delete on paper layer/merge down/select 
none/add drop shadow

activate left green circle/choose a color from your tube or paper/fill circle
with that color/effects/penta.com/dot and cross with these settings/click ok
select none/add drop shadow


activate right green circle/choose a color from your tube or paper/fill circle
with that color/effects/penta.com/dot and cross with these settings/click ok
select none/add drop shadow


activate blue oval/copy/paste paper of choice/resize paper/selections/invert 
on oval layer/delete on paper layer/merge down/select none/add drop shadow

activate orange rectangle layer /copy/paste paper of choice/resize/selections
invert on rectangle layer/delete on paper layer/merge down/select none/leave 
rectangle frame as is/add drop shadow

activate green square layer/copy/paste paper of choice/resize/selections
invert on square layer/delete on paper layer/merge down/keep this layer
activated/copy/paste close up tube/resize to fit square/delete on tube
effects/penta.com /jeans with these settings/select none/add drop shadow 
to tube and square


activate small circle/fill with color from tube or paper/add drop shadow

copy/paste main tube/place where it will look the best/add drop shadow

add any other elements you wish to use/resize if needed/add drop shadow 
to each element/place where they will look best

place word art and witch where it would look best on the tag/ Change color of 
word art if you wish/or leave as is/add drop shadow

add your watermark and copyright credits/give it a slight gradient glow
...now give your tag to a friend.

You're done...thank you for trying my tutorial
please send me a copy so that I can show case it on my blog