Showing posts with label Enamorte. Show all posts

12/8/15

CDO Chichi Designz and Enamorte

Dove Wings

This tutorial was written on December 09,2015. 
Any similarities to another tutorial is purely coincidental.
All my tutorial are register with My Free Copyright. 
Please do not claim as your own.
This tutorial writer assumes you have a working 
knowledge of using Paint Shop Pro.
This tutorial was done in Paint Shop Pro9,
but can be adapted to use in other 
Paint Shop Pro versions.

 photo Enamorte-Dove Wings-Cindy.gif


SUPPLIES NEEDED
Animation Shop 3 ....HERE

Animation of Choice: I am using Scrappy Bit of Fun Animation 
you can download HERE .... Thank you Simone

Tube of choice: I'm using the awesome work of Enamorte.
Please do not use unless you have a license to do so. 
Get Them HERE

Scrapkit of Choice: I am using PTU Chichi Designz Enamorte IB 33-1
You can purchase it HERE ...Thank You Cindy

Template of choice:I am using Leah Template #6.Amy&Leah Gimptastic Tuts
You can download it HERE...Thanks Leah

Mask of Choice: I am using Insatiable Dreams-Mask 37
You can download it HERE.... Thank You Cat

Filters used:Eye Candy 4000 gradient glow - HERE
Penta.com- Dot and Cross - HERE

Font for Name is Arizonia
Copy write is always done in Pixelette  HERE

Dropshadow use through out H-2/V-2/O-60/B-6.85

Please leave a thank you when you downloading for supplies.

my tag is just a guide...please use your imagination 
and make the tag your own you do not have to 
use any of the supplies I used.


     LET'S BEGIN

Open up Template and ShiftD and close original...delete 
copyright layer/close all layers/copy/paste paper of choice
resize to fit canvas/layers/load/save mask/find your mask
and set with these setting/click ok

On the following raster layers follow these directions...

activate small circle 2 back/copy/flood fill with white-#ffffff
add drop shadow

activate small circle layer/copy/paste paper of choice resize paper
selections/invert on circle layer/delete on paper layer/merge 
down/add drop shadow

activate small circle 1 back/copy/flood fill with white-#ffffff
add drop shadow

activate small circle layer/copy/paste paper of choice resize paper
selections/invert on circle layer/delete on paper layer/merge 
down/add drop shadow

Leave large circle  back layer as is/add drop shadow
activate large circle/taking a color from the paper #2 and flood fill
the large circle

activate rectangle 3 back layer/copy/flood fill with white-#ffffff
add drop shadow

activate rectangle 3 layer/copy/paste paper of choice resize paper
selections/invert on rectangle layer/delete on paper layer/merge 
down/keep activated/copy/paste closeup tube/delete on tube layer
effects/penta.com-dot and cross/with these setting/click ok/add 
drop shadow to tube and rectangle

activate rectangle 2 back layer/copy/flood fill with white-#ffffff
add drop shadow

activate rectangle 2 layer/copy/paste paper of choice resize paper
selections/invert on rectangle layer/delete on paper layer/merge 
down/keep activated/copy/paste closeup tube/delete on tube layer
effects/penta.com-dot and cross/with these setting/click ok/add 
drop shadow to tube and rectangle

activate rectangle 1 back layer/copy/flood fill with white-#ffffff
add drop shadow

activate rectangle 1 layer/copy/paste paper of choice resize paper
selections/invert on rectangle layer/delete on paper layer/merge 
down/keep activated/copy/paste main tube/add drop shadow to tube 
and rectangle

add any other elements you wish to use/resize if needed/add drop 
shadow to each element/place where they will look best

add your watermark and copyright credits/give it a slight gradient 
glow.....

To animated

close name,white angle and flower
copy/merge tag and take to animation shop
edit/duplicate 5 times/click on top frame and duplicate 3 times
edit/select all
open your animation of choice/edit select all/paste into selected
frame/place on both sides of smaller frame/see my tag for placement
go back to psp and close layers and open the three that were closed.
copy/merge and take to animation shop
edit/duplicate 5 times/click on top frame and duplicate 3 times
edit/select all/paste into selected frame on top of animated frame
view animation/if satisfied/save as gif
You're done...thank you for trying my tutorial
now give your tag to a friend.

please send me a copy so that I can show case it on my blog
send to.... riggsbee53@gmail.com

Here's another tag I made with this kit


11/7/15

Schnegge Scraps and Enamorte

So Beautiful and Dangerous

This tutorial was written on November 7, 2015. 
Any similarities to another tutorial is purely coincidental.
All my tutorial are register with My Free Copyright. 
Please do not claim as your own.
This tutorial writer assumes you have a working 
knowledge of using Paint Shop Pro.
This tutorial was done in Paint Shop Pro9,
but can be adapted to use in other 
Paint Shop Pro versions.
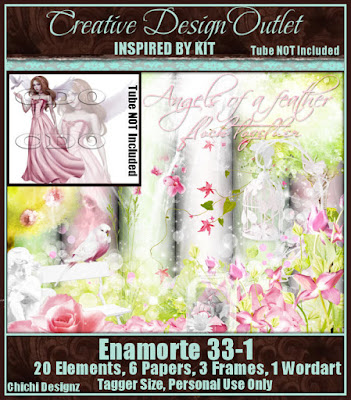


SUPPLIES NEEDED

Tube of choice: I'm using the awesome work of Enamorte.
Please do not use unless you have a license to do so. 
Get Them HERE

Scrapkit of Choice: I am using PTU Schnegge Scraps Enamorte IB
June 2014 BT....You can purchase it HERE ...Thanks Angela

Mask of Choice: I am using Tonya Mask # 9 and MB and SW #22
You can download it HERE and HERE.... Thank You Staci and Tonya

Filters used:Eye Candy 4000 gradient glow - HERE
Blend of Choice

Font for Name is Malgun Gothic
Copy write is always done in Pixelette  HERE

Drop shadow use through out H-2/V-2/O-60/B-6.85

Please leave a thank you when you downloading for supplies.

my tag is just a guide...please use your imagination 
and make the tag your own you do not have to 
use any of the supplies I used.

     LET'S BEGIN

Open up new raster layer 800 x 800/copy/paste paper of choice
resize to fit canvas/layers/load/save mask/find your mask
and set with these setting/click ok


copy/paste paper of choice/resize to fit canvas/layers/load
save 2nd mask/find your mask/and set with these setting
click ok


copy/paste frame #1/resize if needed/copy/paste paper of choice
resize to fit canvas/click inside frame/selections/modify/expand 
by 15/selections/invert/delete on paper layer/place underneath frame
keep activate/copy/paste tube of choice/you want to resize so that
most of the face is within the frame/delete on tube

duplicate tube/adjust/hue-saturation/colorize/with these setting on
duplicated tube/click ok


(this small tutorial is from Kiya Designz)

eraser tool with these settings shape-circle/size 4 or lower/hardness
100/step-25/density-100/thickness-100/rotation-0/opacity-100/erase
around the following areas/lips/nails /eye and flowers in hair/see tag 
below for areas


once finish/duplicate top layer and close/merge duplicate and 
original tube/now go to blend overlay with these setting/click ok


 you can use any blend mode you wish to use/it's up to you/open saved
 layer and place underneath merge layer/merge down
drop shadow of H-3/V-3/O-80/B-5.00


now it's time to have some fun/add any other elements you wish to use
resize if needed/add drop shadow to each element/place where they will 
look best

add word art if you wish/add fat gradient glow/add drop shadow

add your watermark and copyright credits/give it a slight gradient 
glow.....now give your tag to a friend.
For name use this inner bevel with these settings/gradient glow/thin 
setting/twice add drop shadow

You're done...thank you for trying my tutorial
please send me a copy so that I can show case it on my blog

5/28/14

CDO BabyCakes Scraps and Enamorte - Impossibilities

Impossibilities

This tutorial was written on May 28,2014. 
Any similarities to another tutorial is purely coincidental.
All my tutorial are register with My Free Copyright. 
Please do not claim as your own.
This tutorial writer assumes you have a working 
knowledge of using Paint Shop Pro.
This tutorial was done in Paint Shop Pro9,
but can be adapted to use in other 
Paint Shop Pro versions.


SUPPLIES NEEDED

Animation Shop - HERE

Animation of choice: I am using Scrappy Bit of fun Animation #419
you can get it HERE ... Thank you Simone

Tube of choice: I'm using the awesome work of Enamorte.
Please do not use unless you have a license to do so. 
Get Them HERE

Scrapkit of Choice: I am using PTU BabyCakes Scraps Enamorte IB 1-3
You can purchase it HERE ...Thanks Lynne

Mask of Choice: I am using Weescotslass Mask #12
You can download it HERE .... Thank You Chell

Filters used:Eye Candy 4000 gradient glow - HERE
AAA Frame - Foto Frame - HERE

Font for Name is Lighthouse Personal Use
Copy write is always done in Pixelette  HERE

Drop shadow use through out H-2/V-2/O-60/B-6.85

Please leave a thank you when you downloading for supplies.

my tag is just a guide...please use your imagination 
and make the tag your own you do not have to 
use any of the supplies I used.


     LET'S BEGIN

Open up new raster layer 800x800/copy/paste paper of choice
resize to fit canvas/layers/load/save mask/find your mask
and set with these setting/click ok


copy/paste element #28/resize if needed/add drop shadow/place
in center of mask

copy/paste flower element #22/resize if needed/add drop shadow
place on top of first element

copy/paste flower element #6/resize if needed/add drop shadow
place in front of first element/duplicate and place next to 
first flower/add drop shadow to both

copy/paste flower element #20/resize if needed/add drop shadow
duplicate and place next to first flower/add drop shadow to both

copy/paste element #27/resize if needed/add drop shadow/place
next to element 28/add drop shadow 

copy/paste butterfly element #4/resize if needed/add drop shadow
place on top of element #28 tto the right

copy/paste tube of choice/resize if needed/ place tube in front of 
flowers in the center

add any other elements you wish to use/resize if needed/add drop 
shadow to each element/place where they will look best

add wordart if you wish/add fat gradient glow/add drop shadow

add your watermark and copyright credits/give it a slight gradient 
glow.....you may animate or not

To Animate

new raster layer/copy/paste paper of choice/resize paper to fit canvas
effect/AAA Frame foto frame with these setting/click ok


closed the following layers
name
copyright
word art
grapes
mask
lantern
candle
orange flowers
tube

copy/merge remaining layers and paste into animation shop as a new animation
open up animation #419/on new animation/edit/duplicate tag for 21 frames/edit
select all/go to animation frame/edit/select all/paste into selected frame twice
in two different areas

go back to psp and close layers that are open/open layers that are closed/copy
merge layers/paste into animation shop as a new animation/edit/duplicate selected 
for 21 frame/edit select all/paste into selected frame/make sure you position
tag so it's align properly/view animation/if satisfied/save as gif

now give your tag to a friend.

You're done...thank you for trying my tutorial
please send me a copy so that I can show case it on my blog

Here's the tag without animation