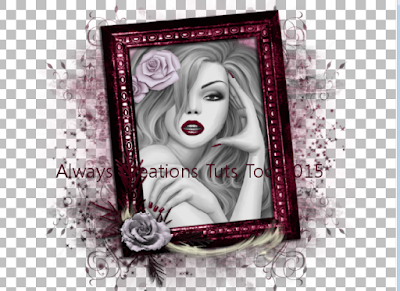
So Beautiful and Dangerous
This tutorial was written on November 7, 2015.
Any similarities to another tutorial is purely coincidental.
All my tutorial are register with My Free Copyright.
Please do not claim as your own.
This tutorial writer assumes you have a working
knowledge of using Paint Shop Pro.
This tutorial was done in Paint Shop Pro9,
but can be adapted to use in other
Paint Shop Pro versions.
SUPPLIES NEEDED
Tube of choice: I'm using the awesome work of Enamorte.
Please do not use unless you have a license to do so.
Get Them HERE
Scrapkit of Choice: I am using PTU Schnegge Scraps Enamorte IB
June 2014 BT....You can purchase it HERE ...Thanks Angela
Mask of Choice: I am using Tonya Mask # 9 and MB and SW #22
Filters used:Eye Candy 4000 gradient glow - HERE
Blend of Choice
Font for Name is Malgun Gothic
Copy write is always done in Pixelette HERE
Drop shadow use through out H-2/V-2/O-60/B-6.85
Please leave a thank you when you downloading for supplies.
my tag is just a guide...please use your imagination
and make the tag your own you do not have to
use any of the supplies I used.
LET'S BEGIN
Open up new raster layer 800 x 800/copy/paste paper of choice
resize to fit canvas/layers/load/save mask/find your mask
and set with these setting/click ok
copy/paste paper of choice/resize to fit canvas/layers/load
save 2nd mask/find your mask/and set with these setting
click ok
copy/paste frame #1/resize if needed/copy/paste paper of choice
resize to fit canvas/click inside frame/selections/modify/expand
by 15/selections/invert/delete on paper layer/place underneath frame
keep activate/copy/paste tube of choice/you want to resize so that
most of the face is within the frame/delete on tube
duplicate tube/adjust/hue-saturation/colorize/with these setting on
duplicated tube/click ok
(this small tutorial is from Kiya Designz)
eraser tool with these settings shape-circle/size 4 or lower/hardness
100/step-25/density-100/thickness-100/rotation-0/opacity-100/erase
around the following areas/lips/nails /eye and flowers in hair/see tag
below for areas
once finish/duplicate top layer and close/merge duplicate and
original tube/now go to blend overlay with these setting/click ok
you can use any blend mode you wish to use/it's up to you/open saved
layer and place underneath merge layer/merge down
drop shadow of H-3/V-3/O-80/B-5.00
now it's time to have some fun/add any other elements you wish to use
resize if needed/add drop shadow to each element/place where they will
look best
add word art if you wish/add fat gradient glow/add drop shadow
add your watermark and copyright credits/give it a slight gradient
glow.....now give your tag to a friend.
For name use this inner bevel with these settings/gradient glow/thin
setting/twice add drop shadow
You're done...thank you for trying my tutorial
please send me a copy so that I can show case it on my blog
send to.... riggsbee53@gmail.com


No comments:
Post a Comment