Showing posts with label SATC. Show all posts

7/17/13

PTU Amy Marie and Very Many

Devilish Demi

This tutorial was written on July 17,2013. 
Any similarities to another tutorial is purely coincidental.
All my tutorial are register with My Free Copyright. 
Please do not claim as your own.
This tutorial writer assumes you have a working 
knowledge of using Paint Shop Pro.
This tutorial was done in Paint Shop Pro9,
but can be adapted to use in other 
Paint Shop Pro versions.


SUPPLIES NEEDED

Tube of choice: I'm using the awesome work of Very Many.
Please do not use unless you have a license to do so. 
Get Them HERE

Scrapkit of Choice: I am using PTU Amy Marie - Devilish Demi
You can purchase it HERE ...Thanks Amy

Template of choice:I am using Amy&Leah GimptasticTuts Template #95
You can download it HERE...Thanks Leah
                             
Mask of Choice: I am using Weescotslass Creations Mask # 216
You can download it HERE.....Thanks Chell

Filters used:Eye Candy 4000 gradient glow - HERE

Font for Name is Vanden Velde Script
Copy write is always done in Pixelette  HERE


Drop shadow use through out H-2/V-2/O-50/B-5.00

Please leave a thank you when you downloading for supplies.


my tag is just a guide...please use your imagination 
and make the tag your own you do not have to 
use any of the supplies I used.


     LET'S BEGIN

Open up Template and ShiftD and close original...delete 
copyright layer/close all layers/copy/paste paper of choice
resize to fit canvas/layers/load/save mask/find your mask
and set with these setting/click ok


On the following raster layers follow these directions...

activate rectangle 3 layer/copy/paste paper of choice
resize paper/selections/invert on rectangle 3 layer/delete
on paper layer/merge down/add drop shadow

activate rectangle 2 layer/copy/paste paper of choice
resize paper/selections/invert on rectangle 2 layer/delete
on paper layer/merge down/add drop shadow

activate rectangle layer/copy/paste paper of choice/resize paper
selections/invert on rectangle layer/delete on paper layer/merge 
down/add drop shadow

activate circle 2 layer/copy/paste paper of choice/resize paper
selections/invert on circle 2 layer/delete on paper layer/merge 
down/add drop shadow

activate circle 1 layer/copy/paste paper of choice/resize paper
selections/invert on circle 1 layer/delete on paper layer/merge 
down/keep activated/copy/paste closeup tube/resize to fit
duplicate/on original layer/blend/hard light/add drop shadow to 
bottom tube

activate square 3 layer/copy/paste paper of choice/resize
paper/selections/invert on square 3 layer/delete on paper 
layer/merge down/add  drop shadow

activate square 2 layer/copy/paste paper of choice/resize
paper/selections/invert on square 2 layer/delete on paper 
layer/merge down/add  drop shadow

activate square 1 layer/copy/paste paper of choice/resize
paper/selections/invert on square 1 layer/delete on paper 
layer/merge down/add  drop shadow

copy/paste your tube of choice/resize if needed/place on your 
tag where it will look best/add drop shadow

add any other elements you wish to use/resize/add drop shadow 
to each element/place where they will look best

add your watermark and copyright credits/give it a slight 
gradient glow.....now give your tag to a friend.

You're done...thank you for trying my tutorial
please send me a copy so that I can show case it on my blog

6/6/13

PTU Amy Marie and Ninaste

Sailor Girl

This tutorial was written on June 2,2013. 
Any similarities to another tutorial is purely coincidental.
All my tutorial are register with My Free Copyright. 
Please do not claim as your own.
This tutorial writer assumes you have a working 
knowledge of using Paint Shop Pro.
This tutorial was done in Paint Shop Pro9,
but can be adapted to use in other 
Paint Shop Pro versions.


SUPPLIES NEEDED

Tube of choice: I'm using the awesome work of Ninaste.
Please do not use unless you have a license to do so. 
You can get her tubes HERE

Scrapkit of Choice: I am using PTU Amy Marie Sailor Girl USA
You can purchase it HERE ...Thanks Amy Marie

Template of choice:I am using Tracy F. Designz Template #71
You can download it HERE...Thanks Tracy

Mask of Choice: I am using Insatiable Dreams mask #59
You can download it HERE...Thanks Cat

Filters used:Eye Candy 4000 gradient glow - HERE
Frame AAA-Foto frame - HERE

Font for Name is Organic Elements
Copy write is always done in Pixelette  HERE

Drop shadow use through out H-2/V-2/O-50/B-5.00

Please leave a thank you when you downloading for supplies.

my tag is just a guide...please use your imagination 
and make the tag your own you do not have to 
use any of the supplies I used.


     LET'S BEGIN

Open up Template and ShiftD and close original...delete copy
right layer/close all layers/copy/paste paper of choice/resize
to fit canvas/layers/load/save mask/find your mask and set with 
these settings/click ok


on background layer/effects/AAAFrame
Foto Frame with these settings/click ok


On the following raster layers follow these directions...

glitter circle as is/activate circle1 layer/copy/paste paper of 
choice/resize paper/selections/invert on circle1 layer/delete on 
paper layer/merge down/add drop shadow/copy/paste elements of 
choice/resize to fit/add drop shadow

glitter rectangle1 as is/activate rectangle1 layer/copy/paste paper 
of choice/resize paper/selections/invert on rectangle1 layer/delete 
on paper layer/merge down/add drop shadow/delete rectangle2 glitter 
layer and rectangle2 layer

glitter oval layer as is/activate oval layer/copy/paste paper of 
choice/resize paper/selections/invert on oval layer/delete on paper 
layer/merge down/copy/paste tube of choice/resize/selections/invert 
on oval layer/delete on tube layer/add drop shadow

glitter circle layer as is/activate circle2 layer/copy/paste paper of 
choice/resize paper/selections/invert on circle2 layer/delete on paper 
layer/merge down/copy/paste element of choice/resize to fit/add drop
shadow

copy/paste your main tube of choice/resize if needed/place your tag
where it will look best/add drop shadow

add any other elements you wish to use/resize/add drop shadow to each
place where they will look best

add your watermark and copyright credits/give it a slight 
gradient glow ...now give your tag to a friend.

You're done...thank you for trying my tutorial
please send me a copy so that I can show case it on my blog


5/18/13

PTU Amy Marie and Ninaste

Heather


This tutorial was written on May 18,2013. 

Any similarities to another tutorial is purely coincidental.
All my tutorial are register with My Free Copyright. 
Please do not claim as your own.
This tutorial writer assumes you have a working 
knowledge of using Paint Shop Pro.
This tutorial was done in Paint Shop Pro9,
but can be adapted to use in other 
Paint Shop Pro versions.


SUPPLIES NEEDED


Tube of choice: I'm using the awesome artwork of Ninaste.

Please do not use unless you have a license to do so. 
You can get her tubes HERE


Scrapkit of Choice: I am using PTU Amy Marie Heather

You can purchase it HERE ...Thanks Amy


Template of choice:I am using Scraps of Enchantment Template #89

You can download it HERE...Thanks Rachel


Mask of Choice: I am using Weescotslass Creation Mask #362. 

you can download HERE.....thank you Chell


Filters used:Eye Candy 4000 gradient glow - HERE


Font for Name is Prime Script

Copy write is always done in Pixelette  HERE

Drop shadow use through out H-2/V-2/O-50/B-5.00


Please leave a thank you when you downloading for supplies.


my tag is just a guide...please use your imagination 

and make the tag your own you do not have to 
use any of the supplies I used.


     LET'S BEGIN


Open up Template and ShiftD and close original...delete 

copyright layer/close all layers/copy/paste paper of choice
resize to fit canvas/layers/load/save mask/find mask/on paper
layer/invert/on mask layer delete/with these settings


On the following raster layers follow these directions...


activate half circle layer/copy/paste paper of choice resize

paper/selections/invert on circle layer/delete on paper layer
merge down/keep activated/copy paste element of choice/resize
to fit/leave circle frame as is/add drop shadow to element and 
frame


leave black strip as is/activate blue strip layer/copy/paste paper 

of choice/resize paper/selections/invert on strip layer/delete on 
paper layer/merge down/add drop shadow/


leave grey strip as is/leave black Inner right square as is/activate

copy/paste tube of choice/resize tube to fit/invert on black square
delete on tube layer/leave frame as is/add drop shadow


leave black inner left square and frame as is/add drop shadow 


activate blue square layer/copy/paste paper of choice/resize paper

selections/invert on blue square layer/delete on paper layer/merge
down/leave square frame as is/add drop shadow 


copy/paste tube of choice/resize if needed/place on left side/add

drop shadow


add any other elements you wish to use/resize/add drop shadow to 

each place where they will look best


add your watermark and copyright credits/give it a slight 

gradient glow/now give your tag to a friend


You're done...thank you for trying my tutorial

please send me a copy so that I can show case it on my blog


4/1/13

PTU Amy Marie and Alexander McMillan

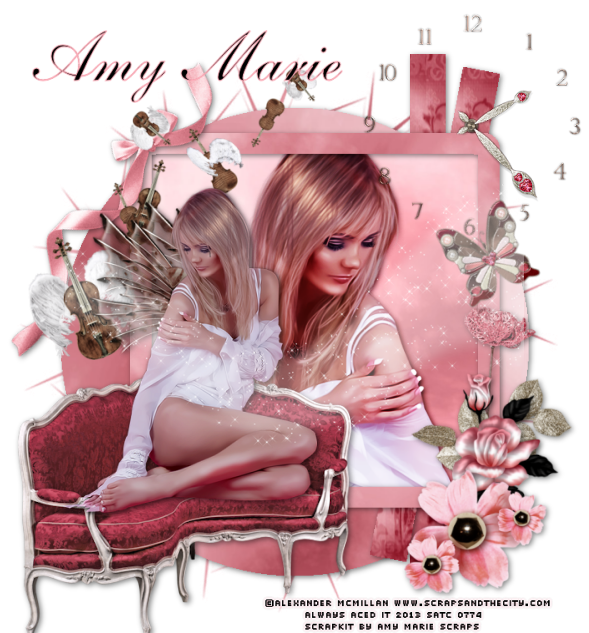
Wings of Love 

This tutorial was written on March 20,2013. 
Any similarities to another tutorial is purely coincidental.
All my tutorial are register with My Free Copyright. 
Please do not claim as your own.
This tutorial writer assumes you have a working 
knowledge of using Paint Shop Pro.
This tutorial was done in Paint Shop Pro9,
but can be adapted to use in other 
Paint Shop Pro versions.


SUPPLIES NEEDED

Tube of choice: I'm using the awesome work of Alexander McMillan.
Please do not use unless you have a license to do so. 
You can get her tubes HERE

Scrapkit of Choice: I am using PTU Amy Marie Wings of Love
You can purchase it HERE  or HERE...Thanks Amy

Template of choice:I am using Bel Vidotti #26
Bel Vidotti no longer has her site up..please
 use another template, thanks...Thanks Bel Vidotti

Mask of Choice: I am using Vix Mask #166
You can download it Here...Thanks Vix

Filters used:Eye Candy 4000 gradient glow - HERE

Font for Name is Freebooter Script 
Copy write is always done in Pixelette  HERE

Drop shadow use through out H-2/V-2/O-50/B-5.00

Please leave a thank you when you downloading for supplies.

my tag is just a guide...please use your imagination 
and make the tag your own you do not have to 
use any of the supplies I used.

     LET'S BEGIN

Open up Template and ShiftD and close original...delete 
copyright layer/close all layers/copy/paste paper of choice
resize to fit canvas/layers/load/save mask/find your mask
and set with these setting/click ok/delete background


On the following raster layers follow these directions...

activate large circle layer/copy/paste paper of choice/resize
paper/selection/invert on large circle layer/delete on paper
layer/merge down/add drop shadow

activate thin rectangle2 layer/copy/paste paper of choice/resize
paper/selection/invert on thin rectangle2 layer/delete on paper
layer/merge down/add drop shadow

activate thin rectangle1 layer/copy/paste paper of choice/resize
paper/selection/invert on thin rectangle1 layer/delete on paper
layer/merge down/add drop shadow

activate frame back layer/copy/paste paper of choice/resize paper
selection/invert on frame back layer/delete on paper layer/merge
down/keep activated/copy/paste close up tube/resize to fit/delete
on tube layer/duplicate/on original layer /blend/overlay/place
duplicate layer underneath/add drop shadow to both tubes

activate frame layer/copy/paste paper of choice/resize paper
selection/invert on frame layer/delete on paper layer/merge
down/add drop shadow

add any other elements you wish to use/resize/add drop shadow to
each/place where they will look best

copy/paste main tube/resize/position so that she is sitting on 
the chaise chair/add drop shadow

add your watermark and copyright credits/give it a slight 
gradient glow ...now give your tag to a friend.
You're done...thank you for trying my tutorial
please send me a copy so that I can show case it on my blog


Here's another tag I did with the kit


3/3/13

PTU Foxy's Designz and Very Many

Your Sweetness Is My Weakness


This tutorial was written on March 2,2013. 
Any similarities to another tutorial is purely coincidental.
All my tutorial are register with My Free Copyright. 
Please do not claim as your own.
This tutorial writer assumes you have a working 
knowledge of using Paint Shop Pro.
This tutorial was done in Paint Shop Pro9,
but can be adapted to use in other 
Paint Shop Pro versions.


SUPPLIES NEEDED

Tube of choice: I'm using the awesome work of Zlata M.
Please do not use unless you have a license to do so. 
You can get her tubes HERE

Scrapkit of Choice: I am using PTU Foxy's Designs Sweet Candy
You can purchase it HERE ...Thanks Foxy

Template of choice:I am using Leah Template #12
You can download it HERE ...Thanks Leah

Mask of Choice: I am using Designs by Vaybs #99
You can download it Here ...Thanks Vaybs

Filters used:Eye Candy 4000 gradient glow - HERE

Font for Name is Duvall Condensed
Copy write is always done in Pixelette  HERE


Drop shadow use through out H-2/V-2/O-50/B-5.00

Please leave a thank you when you downloading for supplies.


my tag is just a guide...please use your imagination 
and make the tag your own you do not have to 
use any of the supplies I used.

     LET'S BEGIN

Open up Template and ShiftD and close original...delete 
copyright layer/close all layers/copy/paste paper of choice
resize to fit canvas/layers/load/save mask/find your mask
and set with these setting/click ok/delete background


On the following raster layers follow these directions...


delete decoration and brush layers


activate back circle layer/copy/paste paper of choice/resize

paper/selection/invert on back circle layer/delete on paper
layer/merge down/add drop shadow


activate right square layer/copy/paste paper of choice/resize

paper/selection/invert on right square layer/delete on paper
layer/merge down//add drop shadow 

activate left square layer/copy/paste paper of choice/resize
paper/selection/invert on left square layer/delete on paper
layer/merge down//add drop shadow 


activate square top layer/copy/paste paper of choice/resize

paper/selection/invert on square top layer/delete on paper
layer/merge down//add drop shadow/leave thin square top 
layer as is 


activate square bottom layer/copy/paste paper of choice/resize

paper/selection/invert on square bottom layer/delete on paper
layer/merge down//add drop shadow/leave thin square bottom 
layer as is 


leave right circle back as is/copy/paste round frame/resize to

fit around edges of right circle frame/add drop shadow


activate right circle layer/copy/paste paper of choice/resize

paper/selection/invert on right circle layer/delete on paper
layer/merge down/keep activated/copy/paste close up tube/place
where you want it/resize/delete on tube layer/duplicate/ on
orignial layer/blend/soft light/place duplicate underneath the
original tube add drop shadow 


leave left circle back as is/copy/paste round frame/resize to

fit around edges of left circle frame/add drop shadow


activate left circle layer/copy/paste paper of choice/resize

paper/selection/invert on left circle layer/delete on paper
layer/merge down/keep activated/copy/paste close up tube/place
where you want it/resize/delete on tube layer/duplicate/ on
orignial layer/blend/overlay/place duplicate underneath the
original tube add drop shadow


activate rectangle layer/copy/paste paper of choice/resize

paper/selection/invert on rectangle layer/delete on paper
layer/merge down/add drop shadow/leave thin rectangle layer
as is/choose font of choice/type out your sweetness is my
weakness/place on top of rectangle layer/add drop shadow 


add any other element you want to create your tag/resize if 

needed/add drop shadow


copy/paste your tube of choice/resize if needed/place on your 

tag where it will look best/add drop shadow


add your watermark and copyright credits/give it a slight 

gradient glow ...now give your tag to a friend.


You're done...thank you for trying my tutorial

please send me a copy so that I can show case it on my blog

3/2/13

PTU Amy Marie and Jose Cano

Let's Get Jiggy

This tutorial was written on February 28,2013. 
Any similarities to another tutorial is purely coincidental.
All my tutorial are register with My Free Copyright. 
Please do not claim as your own.
This tutorial writer assumes you have a working 
knowledge of using Paint Shop Pro.
This tutorial was done in Paint Shop Pro9,
but can be adapted to use in other 
Paint Shop Pro versions.


SUPPLIES NEEDED

Tube of choice: I'm using the awesome work of Jose Cano.
Please do not use unless you have a license to do so. 
You can get her tubes HERE

Scrapkit of Choice: I am using PTU Amy Marie Irish Luck
You can purchase it HERE ...Thanks Amy

Template of choice:I am using Kandee's Collab St. Patty's 
Template #3...You can download it HERE or HERE...Thanks Kandi/Dee

Mask of Choice: I am using Creative misfit St. patty mask from
Annaica...You can download it Here...Thanks Annaica

Filters used:Eye Candy 4000 gradient glow - HERE

Font for Name is Calligula
Copy write is always done in Pixelette  HERE


Drop shadow use through out H-2/V-2/O-50/B-5.00

Please leave a thank you when you downloading for supplies.


my tag is just a guide...please use your imagination 
and make the tag your own you do not have to 
use any of the supplies I used.


     LET'S BEGIN

Open up Template and ShiftD and close original...delete 
copyright layer/close all layers/copy/paste paper of choice
resize to fit canvas/layers/load/save mask/find your mask
and set with these setting/click ok/delete background


On the following raster layers follow these directions...

delete decoration and brush layers

activate bottom dark rectangle layer/copy/paste paper of choice
resize paper/selection/invert on bottom dark rectangle layer
delete on paper layer/copy/paste element of choice/resize/place 
element so that it's hanging over the top part of the layer/add 
drop shadow

activate orange rectangle layer/copy/paste paper of choice
resize paper/selection/invert on orange rectangle layer/delete 
on paper layer/copy/paste element of choice/resize and place 
where it's peeping out at the side/add drop shadow to element
leave white rectangle and dotted rectangle as is/add drop
shadow to first rectangle

activate gold layer/copy/paste paper of choice/resize paper
selection/invert on gold layer/delete on paper layer/add drop
shadow

leave white rectangle as is/activate green rectangle
copy/paste paper of choice/resize/selections/invert on green
rectangle/delete on paper layer/add drop shadow to white rectangle
copy/paste element of choice/resize/place near top left corner
add drop shadow

activate bottom green rectangle layer/copy/paste paper of choice
resize paper/selection/invert on bottom green rectangle layer
delete on paper layer/add drop shadow/copy/paste elements of 
choice/resize to fit/add drop shadow

activate yellow circle layer/copy/paste paper of choice/resize
paper/selection/invert on yellow circle layer/delete on paper 
layer/add drop shadow/keep activated/copy/paste tube of choice
resize/delete on tube layer/erase all over hang so it won't show
duplicate/on original layer/blend/overlay/place duplicate under
neath original/add drop shadow to tubes/white circle and dotted 
circle as is

activate orange square layer/copy/paste paper of choice/resize 
paper/selection/invert on orange square layer/delete on paper 
layer/add drop shadow/copy/paste elements of choice/resize
add drop shadow

on black wordart change  color to match your tag/then merge 
down twice/add drop shadow/repeat with next word art

add any other element you want to create your tag/resize if 
needed/add drop shadow

copy/paste your tube of choice/resize if needed/place on your 
tag where it will look best/add drop shadow

add your watermark and copyright credits/give it a slight 
gradient glow ...now give your tag to a friend.

You're done...thank you for trying my tutorial
please send me a copy so that I can show case it on my blog
send to.... riggsbee53@gmail.com


2/12/13

PTU Amy Marie and Al Rio

Heavenly Angel
This tutorial was written on February 11,2013.
Any similarities to another tutorial is purely coincidental.
All my tutorial are register with My Free Copyright.
Please do not claim as your own.
This tutorial writer assumes you have a working
knowledge of using Paint Shop Pro.
This tutorial was done in Paint Shop Pro9,
but can be adapted to use in other
Paint Shop Pro versions.

SUPPLIES NEEDED
Tube of choice: I'm using the awesome work of Al Rio.
Please do not use unless you have a license to do so.
You can get his tubes HERE
Scrapkit of Choice: I am using PTU Amy Marie Wings Of Love
You can purchase it HERE ...Thanks Amy
Template of choice:I am using Additive Pleasure Template #79
You can download it HERE...Thanks Tamie
Mask of Choice: I am using Enchanted by Darkness Mask #53
You can download it Here...Thanks Rachel
Filters used:Eye Candy 4000 gradient glow - HERE
Font for Name is Redressed
Copy write is always done in Pixelette  HERE

Drop shadow use through out H-2/V-2/O-50/B-5.00
Please leave a thank you when you downloading for supplies.

my tag is just a guide...please use your imagination
and make the tag your own you do not have to
use any of the supplies I used.


     LET'S BEGIN
Open up Template and ShiftD and close original...delete
copyright layer/close all layers/copy/paste paper of choice
resize to fit canvas/layers/load/save mask/find your mask
and set with these setting/click ok/delete background
On the following raster layers follow these directions...
activate rectangle layer/copy/paste/paper of choice/resize paper
selection/invert on circle layer/delete on paper layer/merge down
copy/paste element of choice/resize/add drop shadow to all
activate circle layer/copy/paste paper of choice/resize paper
selections/invert on circle layer/delete on paper layer/merge
down/copy/keep activated/copy/paste tube of choice/resize if
needed/duplicate/on original layer/blend/overlay/on duplicated
layer lower opacity to 70%/add element of choice/resize if
needed/leave dotted circle as is/add drop shadow
activate square layer/copy/paste paper of choice/resize paper
selections/invert on square layer/delete on paper layer/merge
down/keep activated/copy/paste element of choice/resize if
needed/add drop shadow to all
activate square2 layer/copy/paste paper of choice/resize paper
selections/invert on square2 layer/delete on paper layer/merge
down/keep activated/copy/paste elements of choice/resize if
needed/add drop shadow to all
add any other elements you wish to use to make you tag your own
resize if needed and add drop shadow
activate word art/copy/paste paper of choice/selections/invert
on wordart layer/delete on paper layer/add drop shadow to word
art back/add drop shadow
add your watermark and copyright credits/give it a slight
gradient glow ...now give your tag to a friend.
You're done...thank you for trying my tutorial
please send me a copy so that I can show case it on my blog
send to....
riggsbee53@gmail.com


PTU Amy Marie and Barbara Jensen

I'm Your Angel
This tutorial was written on February 11,2013.
Any similarities to another tutorial is purely coincidental.
All my tutorial are register with My Free Copyright.
Please do not claim as your own.
This tutorial writer assumes you have a working
knowledge of using Paint Shop Pro.
This tutorial was done in Paint Shop Pro9,
but can be adapted to use in other
Paint Shop Pro versions.

SUPPLIES NEEDED
Tube of choice: I'm using the awesome work of Barbara Jensen.
Please do not use unless you have a license to do so.
You can get her tubes HERE
Scrapkit of Choice: I am using PTU Amy Marie Wings Of Love
You can purchase it HERE ...Thank you Amy
Template of choice:I am using Additive Pleasure Template #54
You can download it HERE...Thanks Tamie
Mask of Choice: I am using Dees'Sign Depot Mask #22
You can download it Here...Thanks Dee
Filters used:Eye Candy 4000 gradient glow - HERE
Font for Name is Ribbon of Hope
Copy write is always done in Pixelette  HERE

Dropshadow use through out H-2/V-2/O-50/B-5.00
Please leave a thank you when you downloading for supplies.

my tag is just a guide...please use your imagination
and make the tag your own you do not have to
use any of the supplies I used.


     LET'S BEGIN
Open up Template and ShiftD and close original...delete
copyright layer/close all layers/copy/paste paper of choice
resize to fit canvas/layers/load/save mask/find your mask
and set with these setting/click ok/delete background
On the following raster layers follow these directions...
recolor all element to match your tube
leave glittered circle as is/activate circle layer/copy/paste
paper of choice/resize paper/selection/invert on circle layer
delete on paper layer/merge down/keep activated/copy/paste/close
up tube/resize to fit circle/delete on tube layer/duplicate on
original layer/blend/overlay/place duplicate layer underneath
original tube/lower opacity to 60%/add drop shadow to all
leave glittered rectangle as is/activate rectangle layer/copy
paste paper of choice/resize paper/selections/invert on rectangle
layer/delete on paper layer/merge down/copy/paste elements of
choice/resize if needed/add drop shadow/copy/paste main tube
resize if needed/place on top of elements/add drop shadow
leave glittered circle2 as is/activate circle2 layer/copy/paste
paper of choice/resize paper/selections/invert on circle2 layer
delete on paper layer/merge down/keep activated/copy/paste close
up tube again/resize to fit circle/delete/add drop shadow
delete the following layers/heart/glittered heart2/heart2/heart3
hearts and hearts2
leave glittered strip layer as is/activate strip layer/copy/paste
paper of choice/resize paper/selection/invert on strip layer/delete
on paper layer/merge down/add drop shadow
leave glittered heart as is/copy/paste a heart from the kit/resize
if needed/recolor if needed/add drop shadow/recolor word art to
match tag
add any other elements you wish to use to make you tag your own
resize if needed and add drop shadow
add your watermark and copyright credits/give it a slight
gradient glow ...now give your tag to a friend.
You're done...thank you for trying my tutorial
please send me a copy so that I can show case it on my blog
send to....
riggsbee53@gmail.com


2/8/13

PTU Hungry Hills and Zindy Nielsen

Dark Mistress
This tutorial was written on February 8,2013.
Any similarities to another tutorial is purely coincidental.
All my tutorial are register with My Free Copyright.
Please do not claim as your own.
This tutorial writer assumes you have a working
knowledge of using Paint Shop Pro.
This tutorial was done in Paint Shop Pro9,
but can be adapted to use in other
Paint Shop Pro versions.

SUPPLIES NEEDED
Tube of choice: I'm using the awesome work of Zindy Nelsen.
Please do not use unless you have a license to do so.
You can get her tubes HERE
Scrapkit of Choice: I am using PTU Dark Romance
You can purchase it HERE ...Thank you Ali
Mask of Choice: I am using Weescotlass #105
You can download it Here...Thanks Chell
Filters used:Eye Candy 4000 gradient glow - HERE
Font for Name is Kingthings Petrock
Copy write is always done in Pixelette  HERE

Drop shadow use through out H-2/V-2/O-50/B-5.00
Please leave a thank you when you downloading for supplies.

my tag is just a guide...please use your imagination and make
the tag your own you do not have to use any of the supplies I
used.With this tutorial you will be making a cluster frame first.


     LET'S BEGIN
Open up Template and ShiftD and close original...delete
copyright layer/close all layers/copy/paste paper of choice
resize to fit canvas/layers/load/save mask/find your mask
and set with these setting/click ok/delete background
On the following raster layers follow these directions...
To begin you need to make a cluster frame,because I can not
supply the one I made/copy/paste frame of choice/now choose
any elements you want to make the frame/be creative/every
tag should be different,but yet similar to mine/add drop
shadow to each element
once your cluster is made/copy/paste either a paper or add
new layer/add color from the tube/if you use a paper/copy/paste
paper/resize paper/selections/modify/expand by 8/invert
on frame layer/delete on paper layer/place underneath frame
add drop shadow to frame
keep this layer activated/copy/paste tube of choice/resize
if needed/place where it will look best/add drop shadow
add your watermark and copyright credits/give it a slight
gradient glow ...now give your tag to a friend.
You're done...thank you for trying my tutorial
please send me a copy so that I can show case it on my blog
send to....
riggsbee53@gmail.com

1/30/13

PTU Amy Marie and Celinart

Sweet As Candy
This tutorial was written on January 21,2013.
Any similarities to another tutorial is purely coincidental.
All my tutorial are register with My Free Copyright.

Please do not claim as your own.
This tutorial writer assumes you have a working
knowledge of using Paint Shop Pro.
This tutorial was done in Paint Shop Pro9,
but can be adapted to use in other
Paint Shop Pro versions.

SUPPLIES NEEDED
Tube of choice: I'm using the awesome work of Celinart.
Please do not use unless you have a license to do so.
You can get her tubes HERE
Scrapkit of Choice: I am using PTU Amy Marie SexNCandy2
You can purchase it HERE ...thank you Amy
Template of choice:I am using Toxic Desirez Template #172
You can download it HERE...Thanks Kristin
Mask of Choice: I am using Enchanted by Darkness Mask #55
You can download it HERE...Thanks
Wordart of Choice: I am using Blissfully Beth word art Sweet
As Candy....you can download HERE...Thank you Beth
Filters used:Eye Candy 4000 gradient glow - HERE
Font for Name is A&S Snappy Script
Copy write is always done in Pixelette  HERE

Drop shadow use through out H-2/V-2/O-50/B-5.00
Please leave a thank you when you downloading for supplies.

my tag is just a guide...please use your imagination
and make the tag your own you do not have to
use any of the supplies I used.


     LET'S BEGIN
Open up Template and ShiftD and close original...delete
copyright layer/close all layers/copy/paste paper of choice
resize to fit canvas/layers/load/save mask/find your mask
and set with these setting/click ok/delete background
On the following raster layers follow these directions...
activate rectangle top layer/copy/paste paper of choice
resize paper/selection/invert on rectangle layer/delete on
paper layer/merge down/copy/paste element of choice/resize

if needed/add drop shadow to all
activate rectangle bottom layer/copy/paste paper of choice
resize paper/selection/invert on rectangle layer/delete on
paper layer/merge down/copy/paste element of choice/resize
if needed/add drop shadow to all
activate top square layer/copy/paste paper of choice/resize
paper/selection/invert on square layer/delete on paper
layer/merge down/add drop shadow/copy/paste element of choice
resize to fit/add drop shadow to all
activate bottom square layer/copy/paste paper of choice/resize
paper/selection/invert on bottom square layer/delete on paper
layer/merge down add drop shadow/copy/paste element of choice
resize to fit/add drop shadow to all
activate round rectangle top layer/copy/paste paper of choice
resize paper/selection/invert on rectangle layer/delete on paper
layer/merge down/add drop shadow/copy/paste element of choice
resize to fit/add drop shadow to all
activate round rectangle bottom layer/copy/paste paper of choice
resize paper/selection/invert on rectangle layer/delete on paper
layer/merge down/add drop shadow/copy/paste element of choice
resize to fit/add drop shadow to all
activate large round rectangle layer/copy/paste paper of choice
resize paper/selection/invert on rectangle layer/delete on paper
layer/merge down/add drop shadow/copy/paste element of choice
resize to fit/add drop shadow to all

activate circle layer/copy/paste paper of choice/resize paper
selection/invert on circle layer/delete on paper layer/merge
down/keep activated/copy/paste tube of choice/resize to fit
circle/delete on tube layer/blend/screen/add drop shadow to all
add any more elements you wish to use/resize if needed/add drop
shadow to all elements
copy/paste your tube of choice/resize if needed/place your
tag where it will look best/add drop shadow
you can either choose to use word art or not/copy/paste/resize if
needed/add drop shadow
add your watermark and copyright credits/give it a slight
gradient glow ...now give your tag to a friend.
You're done...thank you for trying my tutorial
please send me a copy so that I can show case it on my blog
send to....
riggsbee53@gmail.com

PTU Hungry Hills and Zlata M

Enchanted
This tutorial was written on January 30,2013.
Any similarities to another tutorial is purely coincidental.
All my tutorial are register with My Free Copyright.
Please do not claim as your own.
This tutorial writer assumes you have a working
knowledge of using Paint Shop Pro.
This tutorial was done in Paint Shop Pro9,
but can be adapted to use in other
Paint Shop Pro versions.


SUPPLIES NEEDED

Tube of choice: I'm using the awesome work of Zlata M.
Please do not use unless you have a license to do so.
You can get her tubes HERE

Scrapkit of Choice: I am using Hungry Hill Enchanted
You can purchase it HERE ... Thanks Alison

Template of choice:I am using Additive Pleasure Template #98
You can download it HERE...Thanks Tamie

Mask of Choice: none
Filters used:Eye Candy 4000 gradient glow - HERE
Font for Name is Elegance
Copy write is always done in Pixelette  HERE

Drop shadow use through out H-2/V-2/O-50/B-5.00
Please leave a thank you when you downloading for supplies.

my tag is just a guide...please use your imagination
and make the tag your own you do not have to

use any of the supplies I used.


     LET'S BEGIN

Open up blank canvas 900x900/will resize later
copy/paste frame2 to canvas/copy/paste frame4 to canvas
resize frame4 by75%/click inside frame4/selections/modify
expand by 10/copy/paste paper of choice/selections invert
on frame/delete on paper layer/move paper layer underneath
frame4/keep activated/copy/paste closeup tube of choice
resize to fit frame/delete on tube layer/add drop shadow to
both frames


on tube layer/effect/xero/radiance with these
setting/click ok/add drop shadow to tube


now here is where we get creative/copy/paste any elements
you wish to use to make your tag your own/resize if needed
make sure you add drop shadow to all elements

copy/paste your tube of choice/resize if needed/place your
tag where it will look best/add drop shadow/resize your tag

add your watermark and copyright credits/give it a slight
gradient glow ...now give your tag to a friend.
You're done...thank you for trying my tutorial
please send me a copy so that I can show case it on my blog
send to....
riggsbee53@gmail.com

1/26/13

PTU Amy Marie and Lady Mishka

Emo Star
This tutorial was written on January 25,2013.
Any similarities to another tutorial is purely coincidental.
All my tutorial are register with My Free Copyright.
Please do not claim as your own.
This tutorial writer assumes you have a working
knowledge of using Paint Shop Pro.
This tutorial was done in Paint Shop Pro9,
but can be adapted to use in other
Paint Shop Pro versions.

SUPPLIES NEEDED
Tube of choice: I'm using the awesome work of Lady Mishka .
Please do not use unless you have a license to do so.
You can get her tubes HERE
Scrapkit of Choice: I am using PTU Amy Marie Emo Star
You can purchase it HERE ... Thank You Amy
Template of choice: I am using Additive Pleasures Emo Star
Template #77...You can download HERE...Thank You Tamie
Mask of Choice: I am using Designs by Vaybs Mask #128
You can download it Here...Thanks Vaybs
Filters used:Eye Candy 4000 gradient glow - HERE
Xero - Porcelain...HERE
Font for Name is Neuropol
Copy write is always done in Pixelette  HERE

Drop shadow use through out H-2/V-2/O-50/B-5.00
Please leave a thank you when you downloading for supplies.

my tag is just a guide...please use your imagination
and make the tag your own you do not have to
use any of the supplies I used.


     LET'S BEGIN
Open up Template and ShiftD and close original...delete
copyright layer/close all layers/copy/paste paper of choice
layers/load/save mask/locate mask/set with these settings
below/click ok


On the following raster layers follow these directions...

label all layers/it might be easier if layers are label
 
activate octagon layer/copy/paste paper of choice/resize paper
selections/invert on octagon layer/delete on paper layer/merge
down/copy/paste two element of choice/resize if needed/add a drop
shadow to all

activate square layer/copy/paste paper of choice/resize paper
selections/invert on square layer/delete on paper layer/merge
down/keep activated/paste tube of choice/resize if needed/delete
on tube layer/add a drop shadow to all

activate circle1 layer/copy/paste paper of choice/resize paper
selections/invert on circle1 layer/delete on paper layer/merge
down/ copy/paste element of choice/resize if needed/add a drop
shadow on all

activate copy of circle1 layer/copy/paste paper of choice/resize
paper/selections/invert on copy of circle1 layer/delete on paper
layer/merge down/ copy/paste element of choice/resize if needed
add a drop shadow on all

activate rectangle layer/copy/paste paper of choice/resize paper
selections/invert on rectangle layer/delete on paper layer/merge
down/copy/paste element of choice/resize if needed/duplicate
mirror/add a drop shadow to all

activate thin rectangle layer/copy/paste paper of choice/resize
paper/selections/invert on rectangle layer/delete on paper layer
add drop shadow

activate copy of thin rectangle layer/copy/paste paper of choice
resize paper/selections/invert on copy of rectangle layer/delete
on paper layer/add drop shadow

activate oval layer/copy/paste paper of choice/resize paper
selections/invert on copy of rectangle layer/delete on paper  layer
merge down/copy/paste element of choice/resize if needed/add drop
shadow to all/change all star layers to black


activate circle3 layer/copy/paste paper of choice/resize
paper/selections/invert on circle3 layer/delete on paper

layer/keep activated/copy/paste tube of choice/delete on
tube layer/effects/xero/porcelain/with these setting/add drop shadow

On word art/change color to pink and add gradient glow 2x/add
drop shadow


copy/paste your main tube/place where you think it
will look best/add drop shadow
add your watermark and copyright credits/give it a slight
gradient glow ...now give your tag to a friend.

You're done...thank you for trying my tutorial
please send me a copy so that I can show case it on my blog
send to....
riggsbee53@gmail.com